Data protection, Kubernetes, cybersecurity and AI. Hands-on guides from the trenches: Veeam, Kasten, VMware, Oracle, cloud, and whatever I’m breaking in the homelab this week.
Table of ContentsTable of Contents
Containers orchestrated by Kubernetes are among the most widely used cloud-native services, and the public cloud is one of the most popular places to run this kind of workload. In fact, one of the 2020 cncf.io surveys showed that around 60% of users and companies use cloud-native storage for their containers directly from Google (81%), AWS (80%) and Azure (74%). Those numbers have surely shifted over the years. That is why, in this post, we will look at how to protect all of your containers on AWS EKS.
The recommended approach is to use the integration with an IAM role associated with a service account, in this case k10-k10. We will therefore start by creating the IAM policies to assign permissions according to the official Kasten configuration:
The first link lists the permissions required to take snapshots, restore, and migrate between clusters. The second link lists all the permissions for each service you need access to, depending on what you want to protect. In this case, we will create 3 IAM policies to keep permissions granular for the service account.
We will create 3 policies based on the JSON shown in the Kasten documentation. For example, to build the AWS EBS policy, click “Create Policy”, click “JSON”, and paste the content:
Then click Next to apply tags, and as a final step enter the policy name:
**Important: You need to create all the required policies, so repeat this step for each of the services you need, using the policies from the second link above**
We will use CloudShell or a local aws cli configuration, authenticated as an administrator user, to run the following commands.
To authenticate correctly, we can configure OIDC on our EKS cluster with the following command (enter the name of your cluster):
 eksctl utils associate-iam-oidc-provider --cluster NombreCluster --approve

```bash


As stated in the documentation:

https://docs.kasten.io/latest/install/aws/using\_aws\_iam\_roles.html#creating-an-iam-role-for-k10-install

Keep in mind that the service account we create must be named "k10-k10", the namespace must be "kasten-io", and you also need to add the ARN of the policies we generated. To get the policy ARNs, open IAM and click the policy name to see its ARN. Copy each of the ARNs from the policies created earlier:


Now we will create the "kasten-io" namespace:

```bash
kubectl create ns kasten-io

```bash


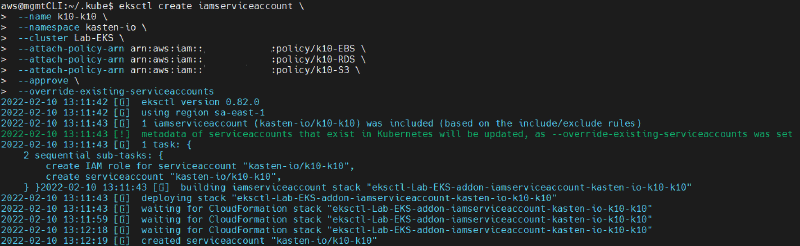
Then we create the service account with the following command:

```bash
eksctl create iamserviceaccount \
 --name k10-k10 \
 --namespace kasten-io \
 --cluster Lab-EKS \
 --attach-policy-arn arn:aws:iam::123456789000:policy/k10-EBS \
 --attach-policy-arn arn:aws:iam::123456789000:policy/k10-RDS \
 --attach-policy-arn arn:aws:iam::123456789000:policy/k10-S3 \
 --approve \
 --override-existing-serviceaccounts

```bash

**\*\*remember to enter the name of your EKS cluster and the ARN of each policy\*\***


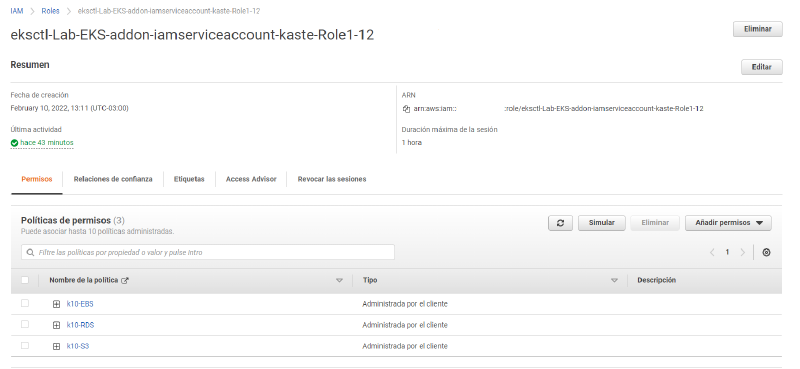
After this, we will see a new Role in IAM:


As shown in the image above, the policies are attached to this new role, which is generated and associated with the service account. We will copy the ARN of the new role and move on to installing Kasten K10.

## Installing Kasten K10 on AWS EKS

As we have seen several times on this blog, we need to have "helm" configured with its chart. You can review it here:

> [Veeam + Kasten](/en/veeam-kasten/)

/veeam-kasten/embed/#?secret=KfxpkOJaRX#?secret=hRCMNgXjyM

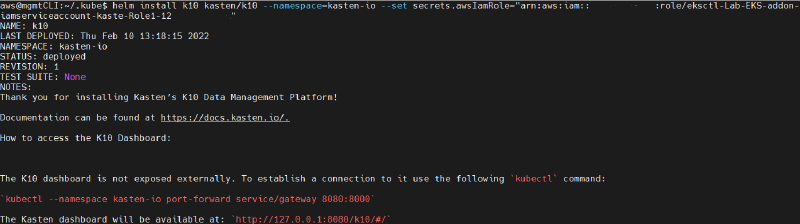
Now we will install Kasten K10 with the following command:

```bash
helm install k10 kasten/k10 --namespace=kasten-io --set secrets.awsIamRole="arn:aws:iam::123456789000:role/eksctl-Lab-EKS-addon-iamserviceaccount-kaste-Role1-12FASDASDCKA"

```bash

**\*Remember to enter the ARN of the role you created earlier\***


\\*\\* If you get an error about the existence of a service account, simply delete and recreate the kasten-io namespace\*\*

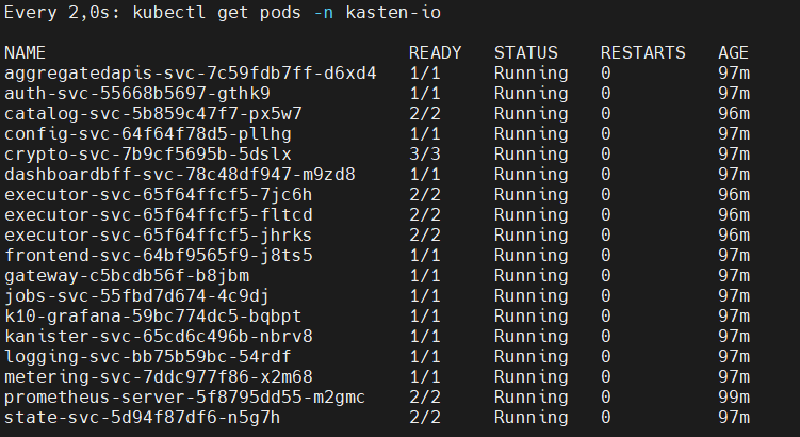
We expect the "kasten-io" pods to reach the "running" state. Check them with the following command:

```bash
watch kubectl get pods -n kasten-io

```bash


If you want to see the volumes that were created automatically during the Kasten K10 installation:

```bash
kubectl get pvc -n kasten-io

```bash


Finally, we need access to the Kasten K10 console. We just have to run the following command:

```bash
 helm upgrade k10 kasten/k10 --namespace=kasten-io \
     --reuse-values \
     --set externalGateway.create=true \
     --set auth.tokenAuth.enabled=true

```bash

This will create a "Load Balancer" service and assign an AWS DNS address:

```bash
kubectl get svc gateway-ext -n kasten-io

```bash


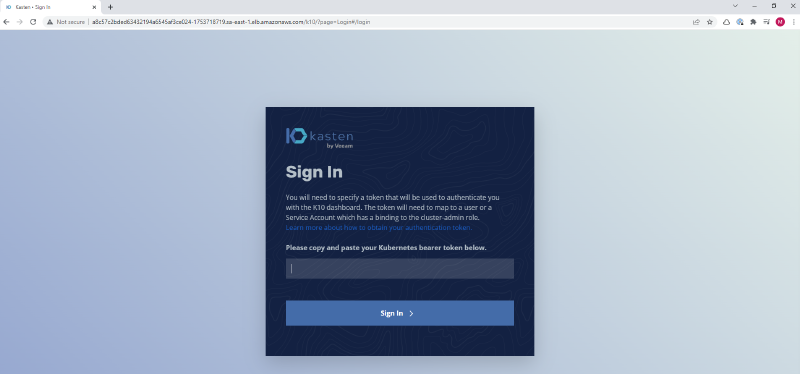
We just need to open the URL, in this case:

http://a8c57c2bded63432194a6545af3ce024-1753718719.sa-east-1.elb.amazonaws.com/k10/#/


We then authenticate as shown in the official documentation:

https://docs.kasten.io/latest/access/authentication.html#obtaining-tokens

At this point, you can use Kasten K10 to back up your workloads on AWS EKS :)

## Integrating with the K10 Multi-Cluster Manager on AWS EKS

We have already covered how to install the K10 Multi-Cluster Manager. If you haven't reviewed it yet:

> [Kasten RBAC Multi-Tenant Multi-Cluster Keycloak - 1](/en/kasten-rbac-multi-tenant-multi-cluster-keycloak/)

/kasten-rbac-multi-tenant-multi-cluster-keycloak/embed/#?secret=MIlKOe6eZN#?secret=LGzFX95dGH

Or install the K10 Multi-Cluster Manager without Keycloak:

> [Install Kasten Multi Cluster Manager](/en/install-kasten-multi-cluster-manager/)

/instalar-kasten-multi-cluster-manager/embed/#?secret=JEgxvfjbM1#?secret=oF7QN5V4wF

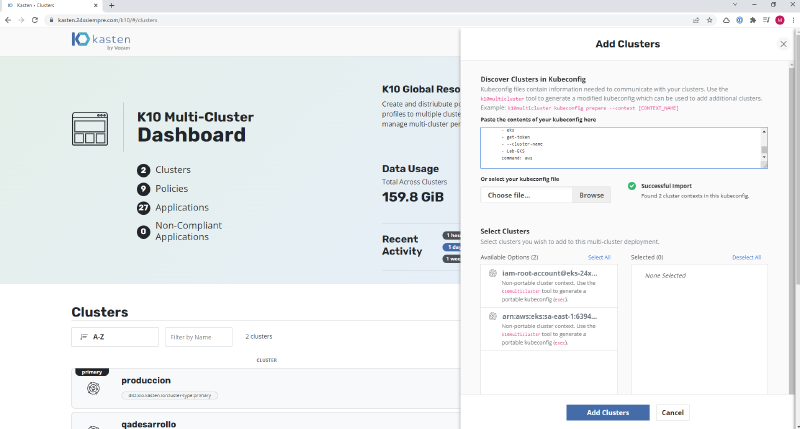
Now we need to configure the kubeconfig file in our Multi-Cluster Manager interface. We will try to add the cluster through the web interface by clicking "Add Clusters" and pasting the contents of the kubeconfig file from our AWS EKS cluster, which will show us the following:


As you can see, the cluster cannot be selected, because K10MultiCluster requires a prior step to prepare the kubeconfig file correctly. To do this, we run the following command to identify the Kubernetes context in use:

```bash
kubectl config get-contexts

```json


We copy the name of the context and then run this command:

```text
k10multicluster kubeconfig prepare --context arn:aws:eks:sa-east-1:12345678900:cluster/Lab-EKS
We copy the content after the “—” and paste it back into “Add Clusters” in the K10 Multi-Cluster Manager. You will see that the options to add the AWS EKS cluster are now enabled:
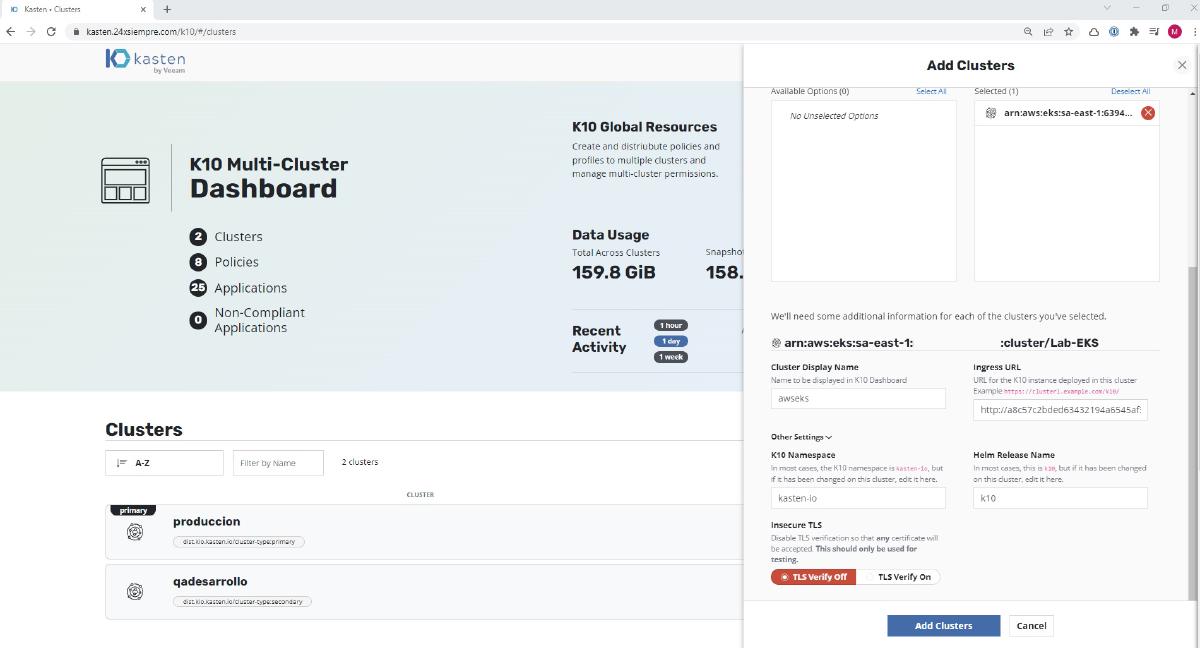
We select the cluster and move it to the right, then enter the “Cluster Display Name” and the “Ingress URL” (the URL that was assigned to us in the kasten-io services). As the interface indicates, always use the “kasten-io” namespace and the helm release name “k10”, and disable TLS since we are adding it without TLS. If you configure access with a certificate, enable TLS instead. Then click “Add Clusters”:
And we will have our AWS EKS cluster configured in the K10 Multi-Cluster Manager, ready to apply the policies we need.
Since we previously configured all the permissions associated with a Kasten K10 service account, along with the policies attached to the role we created, we can reuse the same IAM Role for authentication when configuring a “Location Profile” by selecting:
We enter the Region and Bucket Name and save the profile. Of course, if the bucket has immutability enabled, you can use that as well.
My recommendations are always about security. Only allow authorized IP addresses to access the Kasten services, using firewall rules to preserve privacy. On the other hand, if you need to grant the role more permissions, create only the policy you need, for example to back up with the required RDS permissions, and attach it to the role you generated.
Why is it recommended to install Kasten K10 with an IAM Role instead of using access keys?
Using an IAM Role attached to the “k10-k10” service account through IRSA avoids storing static access keys inside the cluster. Permissions are granted at the IAM role level and rotated automatically, which reduces the risk of credential exposure and follows the best practices described in the official Kasten documentation.
Which IAM policies do I need to create to install Kasten K10 on AWS EKS?
In this post we create 3 policies to keep permissions granular: one for EBS, one for RDS, and one for S3, using the JSON provided in the Kasten documentation. The first documentation link covers the permissions for snapshots, restore, and migration between clusters, while the second details the permissions for each service you want to protect. If you later need another service, you simply add the matching policy and attach it to the same role.
Why must the service account be named "k10-k10" and the namespace "kasten-io"?
Kasten K10 expects those exact names to correctly associate the IAM Role through IRSA. That is why you first create the “kasten-io” namespace with kubectl create ns kasten-io and then the “k10-k10” service account with eksctl create iamserviceaccount, attaching the ARNs of the policies you created. If you change these names, the IAM Role integration will not work as expected.
Is enabling OIDC on the EKS cluster mandatory?
Yes, enabling the OIDC provider is a required prior step so that EKS can associate IAM roles with Kubernetes service accounts. You enable it with eksctl utils associate-iam-oidc-provider --cluster ClusterName --approve, run from CloudShell or a local aws cli authenticated as an administrator. Without OIDC, eksctl create iamserviceaccount cannot bind the role to the service account.
How do I access the Kasten K10 web console after installing it?
You run a helm upgrade with externalGateway.create=true and auth.tokenAuth.enabled=true, which creates a Load Balancer service that AWS assigns a DNS address to. With kubectl get svc gateway-ext -n kasten-io you get that URL to open the console at the /k10/#/ path. You then authenticate with a token, following the official Kasten documentation.
Can I reuse the same IAM Role to configure the S3 bucket as a Location Profile?
Yes, since the policies are already attached to the role and the service account, when you create a “Location Profile” you can reuse the same IAM Role for authentication instead of entering keys. You just provide the Region and the bucket name and save the profile. If the bucket has immutability enabled, you can take advantage of that as well to protect your backups.