Data protection, Kubernetes, cybersecurity and AI. Hands-on guides from the trenches: Veeam, Kasten, VMware, Oracle, cloud, and whatever I’m breaking in the homelab this week.
Table of ContentsTable of Contents
According to the latest surveys by cncf.io and other companies, one of the most used services is Google Kubernetes Engine, GKE, therefore, as expected, it is always necessary to protect the applications that run on these types of services, as well as the use of Google’s infrastructure to store backups. In this guide we will see how to install Kasten K10 to protect applications running on GKE and also integrate it with K10 Multi-Cluster Manager.
After reading the documentation we will confirm how easy it is to install Kasten K10 at Google Kubernetes Engine, since the recommendation is to install it with a service account (Service Account), since Kasten You need two types of service accounts, one to access Google’s infrastructure, such as storage, and one to access Google resources. kubernetes. We will review the option of a separate service account as it is the recommendation and good practice to perform application protection in GKE
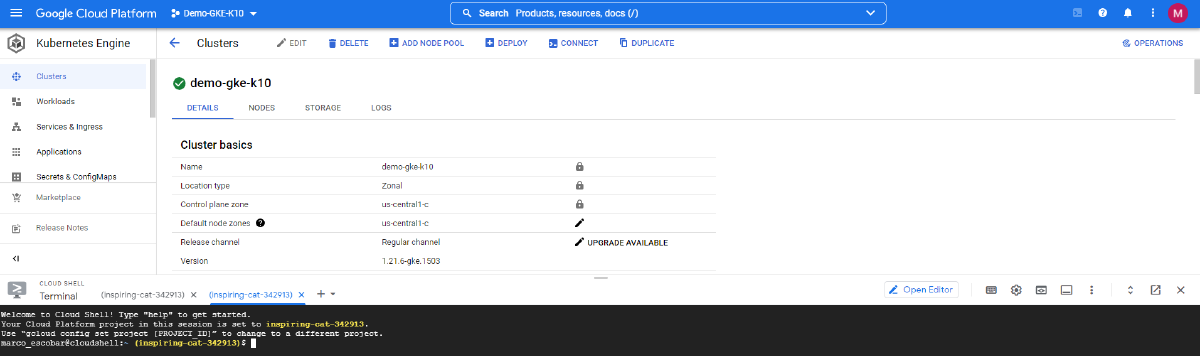
First we will make sure that we are in the Google Cloud console and we have access to the Cluster GKE:
Then we will access the Google “Cloud Shell” by clicking on the “Prompt” icon to the left of the question mark in the upper right side of the Google console:
Then we will execute the following command to access the cluster GKE:
gcloud container clusters get-credentials NombreMiClusterGKE --zone ZonaGoogle
```bash
Where you should enter the name of your cluster GKE and the area where you configured it, for example in this case, the cluster name is “demo-gke-k10” and the zone is “us-central1-c”:
With this, we ensure the configurationof the kubeconfig file in .kube/config for management via kubectl, if we execute the following command we will see the nodes running in GKE:
```bash
kubectl get nodes -o wide
```bash
We are now ready to generate the service account. Important, the permissions that we will need to add to the service account will be:
- roles/compute.storageAdmin for access to Google infrastructure
- roles/storage.admin for access to buckets for backup in Google Cloud Storage
\\*\\*\\* According to the security of each company you can segment storage.admin permissions \*\*\*
Therefore, as indicated in the documentation of Kasten We will proceed to execute the following commands in the Google Cloud Shell:
```bash
myproject=$(gcloud config get-value core/project)
gcloud iam service-accounts create k10-sa --display-name "K10 Service Account"k10saemail=$(gcloud iam service-accounts list --filter "k10-sa" --format="value(email)")
gcloud iam service-accounts keys create --iam-account=${k10saemail} k10-sa-key.json
gcloud projects add-iam-policy-binding ${myproject} --member serviceAccount:${k10saemail} --role roles/compute.storageAdmin
```bash
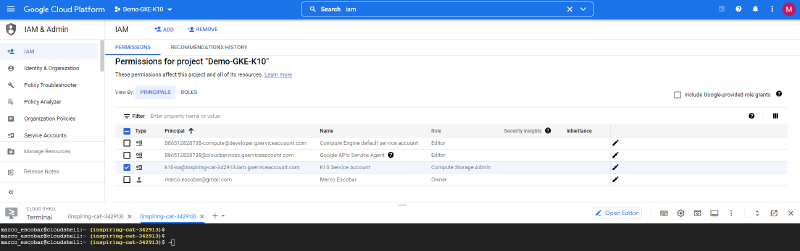
We will then add the permissions for bucket access, because this could be the same service account or another that is used exclusively to access Google Cloud Storage buckets. To validate we can go to "IAM" within the Google Cloud console and confirm the creation of the service account:
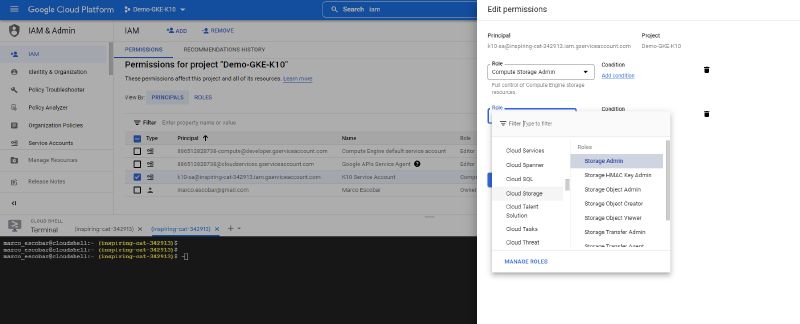
As seen in the previous image we observe that there is “k10-sa@inspiring-cat-342913.iam.gserviceaccount.com” which is the service account that has been created earlier with the executed commands and then we will edit the account, in this case, to use it to also access Google Cloud Storage, we will add the Storage.Admin role to the service account:
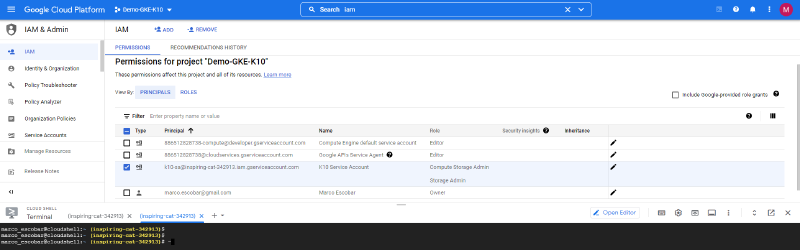
And we can validate that the necessary role has been assigned:
## Installation of Kasten K10If we follow the documentation of Kasten K10, for the installation, we must always review the prerequisites that I mentioned at the beginning of this post, we will add the helm repository and create the namespace for kasten, by name "kasten-io” with the following commands:
```bash
helm repo add kasten https://charts.kasten.io/
kubectl create namespace kasten-io
```bash
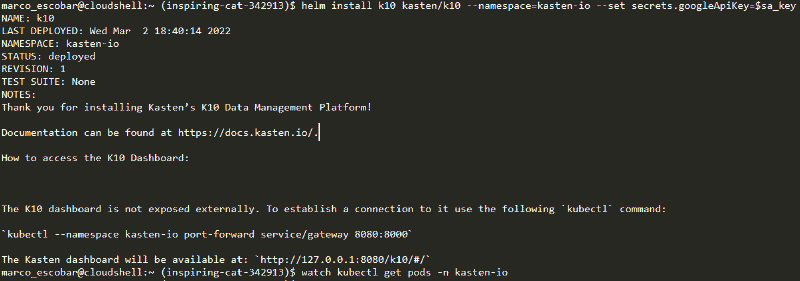
With the above created, we proceed to install Kasten K10 with the service account that we created previously and its respective key with the following commands:
```bash
sa_key=$(base64 -w0 k10-sa-key.json)helm install k10 kasten/k10 --namespace=kasten-io --set secrets.googleApiKey=$sa_key```bash
Finally we check that all the pods of the namespace are in "RUNNING":
```bash
kubectl get pods -n kasten-io
```bash
Now we need to access the web console of Kasten and since we have configured it several times in this blog, we only have to execute the command:
```bash
helm upgrade k10 kasten/k10 --namespace=kasten-io \
--reuse-values \
--set externalGateway.create=true \
--set auth.tokenAuth.enabled=true
```bash
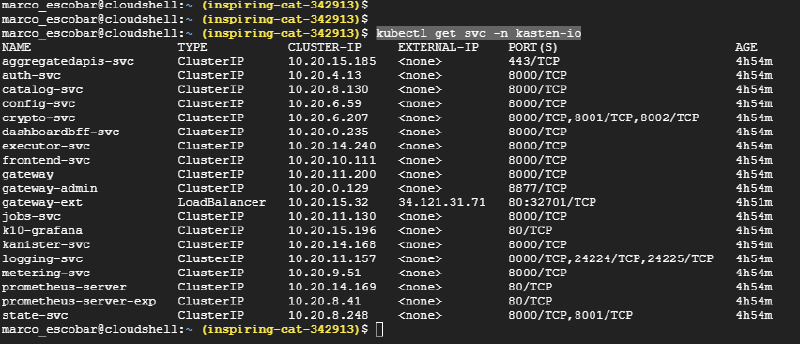
Again we validate that the pods of the namespace of kasten is in “RUNNING” and then we review the service that has been created to access the console with the following command:
```bash
kubectl get svc -n kasten-io
```bash
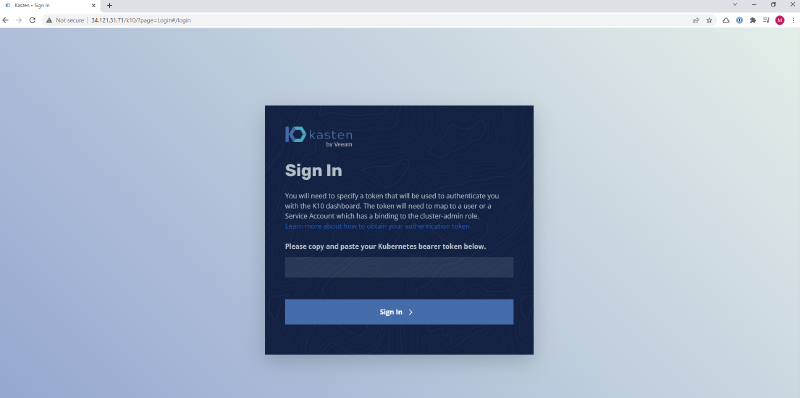
And we see that in this case I have assigned the IP: 34.121.31.71 as "LoadBalancer", we will enter the web with http://34.121.31.71/k10/ # /
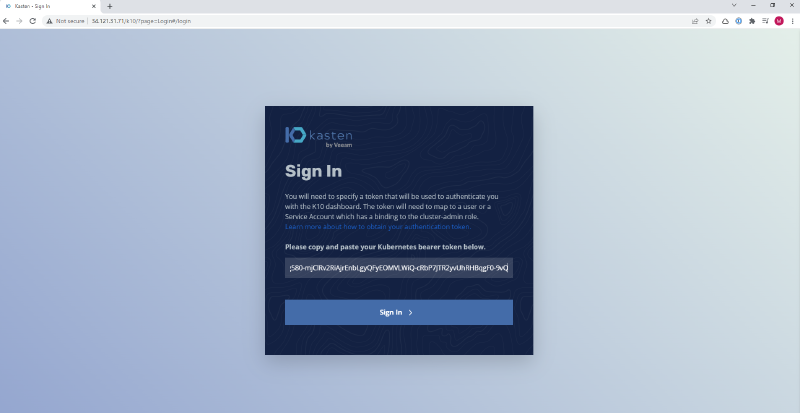
And the credential is obtained from the token, as we saw in a previous post in this blog, we just have to execute:
```bash
sa_secret=$(kubectl get serviceaccount k10-k10 -o jsonpath="{.secrets[0].name}" --namespace kasten-io)kubectl get secret $sa_secret --namespace kasten-io -ojsonpath="{.data.token}{'\n'}" | base64 --decode
```bash
And it will show us the token to enter:
## Configuration Infrastructure Google
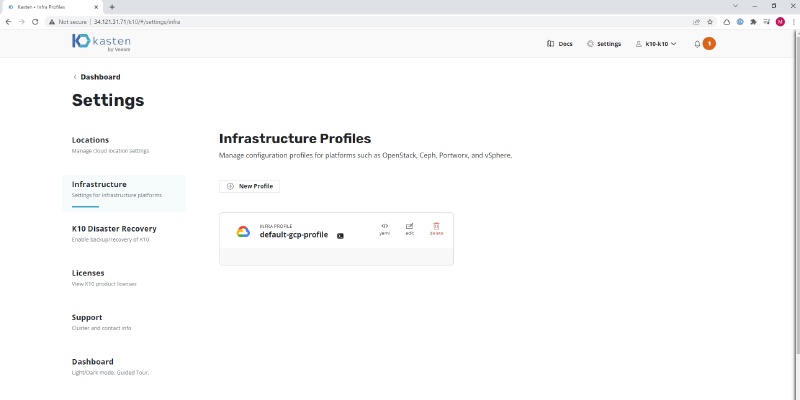
We already mentioned that Kasten you need access to Google infrastructure as well as Google Cloud Storage to host the backups, since we configure with the service account, the infrastructure profile is generated in Kasten automatically, to validate, we can see it in the configuration of the cluster of Kasten “Settings” and then in “Infrastructure”:
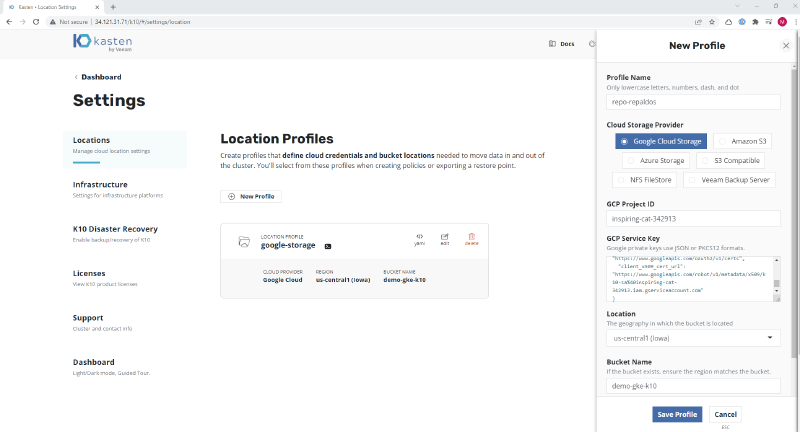
We only need to add the backup repository with a Google Cloud Storage bucket, we will create the Google bucket in the standard way and then from kasten enter the following data:
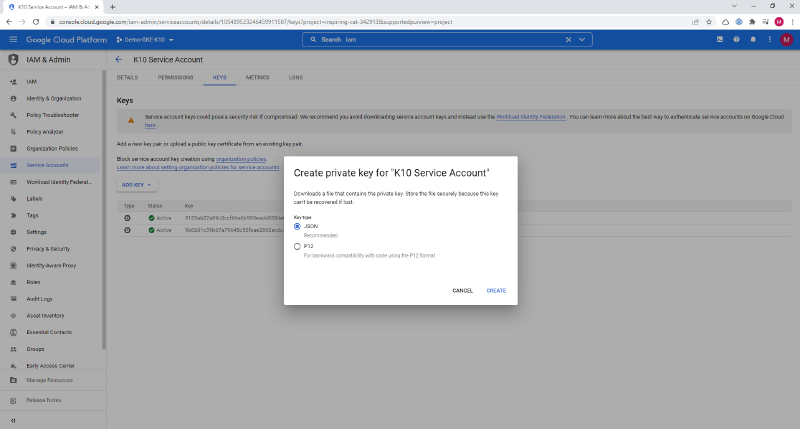
To generate the service key, we enter "IAM", then "Service Accounts", we select the service account of Kasten what we create”k10-sa”, click on “Keys” and we generate one in json format:
Where:
- Profile Name: Profile name
- Cloud Storage Provider: We select Google Cloud Storage
- GCP Project ID: We take the name of the Google Project ID in this case “inspiring-cat-342913”
- GCP Service key: We copy the content of the json that we generated previously
- Location: Location of the bucket when it was generated or you can see it in the bucket properties
- Bucket Name: Name of the previously created bucket
And now we are ready to make backups.
## Integration with K10 Multi Cluster Manager
In the next post we will see how to integrate our cluster GKE with K10 Multi-Cluster manager, if you need to install K10 Multi-Cluster:
> [Install Kasten Multi Cluster Manager](/en/install-kasten-multi-cluster-manager/)
/instalar-kasten-multi-cluster-manager/embed/#?secret=cygiegwj0g#?secret=YFsOO0bgjS
And in this case for Google, we must execute k10multicluster to modify the kubeconfig of the cluster. To copy the cluster's kubeconfig GKE, we must execute in the “Cloud Shell”:
```text
cat .kube/config
```bash
We entered our primary cluster of kubernetes for Kasten, and enter the route:
```text
cd
cd .kube/
```text
And we will generate a file with nano named google to paste the content of the kubeconfig:
```text
nano google
```bash
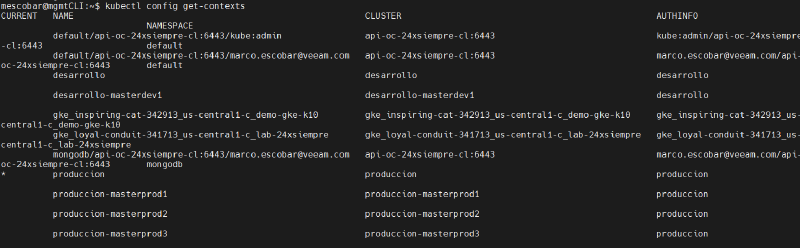
We set it as environment variable in your profile and you can list the contexts of kubernetes:
```bash
kubectl config get-contexts
```json
And we focus on the context of Google, in this case gke\_inspiring-cat-342913\_us-central1-c\_demo-gke-k10 and we will execute the following command (remember to set the context of your cluster):
```text
k10multicluster kubeconfig prepare --context gke_inspiring-cat-342913_us-central1-c_demo-gke-k10
We copy the created file content to our K10 multi-cluster,
Cluster Display Name: name that we want to display the cluster
Ingress URL: Address of the console Kasten en GKE
K10 Namespace: Name of the namespace where it was installed Kasten
Helm release name: k10
Insecure TLS: If you use http, disable it, otherwise use SSL with a valid certificate.
And we already have our Google cluster GKE centrally managed.
As always, security comes first, applying access only through trusted addresses as well as applying RBAC to access via Multi-Cluster Manager and of course if necessary applying permissions to service accounts with the minimum access for operation.