Data protection, Kubernetes, cybersecurity and AI. Hands-on guides from the trenches: Veeam, Kasten, VMware, Oracle, cloud, and whatever I’m breaking in the homelab this week.
Table of ContentsTable of Contents
One of the recurring queries we have lately is how to configure the vSphere CSI Driver in environments OpenShift 4.x without the need to use the operator that VMWare already developed, but that is only supported for production from version 4.10 of OpenShiftTherefore, in this guide we will review how to install and configure the driver in versions prior to 4.10 without the need to use the VMware operator.
As is generally known, it is possible to install the vSphere CSI Driver to provision volumes directly as First Class Disk using the configured DataStores of the vSphere environment. In addition, as of version 4.8 there is an operator of OpenShift in Preview to install the CSI Driver, which is supported, for production environments completely in the latest version of OpenShift 4.10.
Generally users of OpenShift do not automatically update to the latest versions of OpenShift until your applications and/or new features or versions of kOpenShift have some higher update or are compatible / supported, therefore, this guide is to install the vSphere CSI driver from the command line.
This guide assumes that the reader knows the environment of OpenShift as well as connecting via command line. In this case the version of OpenShift 4.8.39
We will create 2 files, csi-vsphere.conf and vsphere.conf, which contain the vSphere access credentials:
csi-vsphere.conf
[Global]# Para conseguir el ID del cluster se debe ejecutar el siguiente comando# oc get clusterversion -o jsonpath='{.items[].spec.clusterID}{"\n"}'cluster-id ="5341dc3e-4ea8-4de6-a4fd-f2715c75a0b8"[VirtualCenter "vcenter.24xsiempre.cl"]insecure-flag ="true"user="SuperUserdevSphere"password="SuperDuperPassword"port="443"datacenters="24xSiempre"```bash
In the previous points, the information of our vSphere environment must be entered:
- cluster-id: openshift cluster id, the command indicated in the file must be executed
- VirtualCenter: vcenter fqdn address
- User: vCenter user used with OpenShift
- Password: Password of the vCenter user
- Datacenters: Name of the vCenter Datacenter
Then we will create the following file:
vsphere.conf
```bash
[Global]# Para conseguir el ID del cluster se debe ejecutar el siguiente comando# oc get clusterversion -o jsonpath='{.items[].spec.clusterID}{"\n"}'cluster-id ="5341dc3e-4ea8-4de6-a4fd-f2715c75a0b8"[VirtualCenter "vcenter.24xsiempre.cl"]insecure-flag ="true"user="SuperUserdevSphere"password="SuperDuperPassword"port="443"datacenters="24xSiempre"```bash
In the previous points, the information of our vSphere environment must be entered:
- cluster-id: openshift cluster id, the command indicated in the file must be executed
- VirtualCenter: vcenter fqdn address
- User: vCenter user used with OpenShift
- Password: Password of the vCenter user
- Datacenters: Name of the vCenter Datacenter
After generating the files we will proceed to configure the "secrets" from these files, executing the following commands:
```bash
oc create secret generic vsphere-config-secret --from-file=csi-vsphere.conf --namespace=kube-system
oc create configmap cloud-config --from-file=vsphere.conf --namespace=kube-system
```json
And to validate if they were created correctly we will execute:
```bash
oc get secret vsphere-config-secret --namespace=kube-system
oc get configmap cloud-config --namespace=kube-system
```bash
Now we will proceed to leave all the nodes in "Taint" with the following command:
```bash
kubectl taint nodes --all 'node.cloudprovider.kubernetes.io/uninitialized=true:NoSchedule'```json
And we will proceed to apply the following yaml files:
```bash
oc apply -f https://raw.githubusercontent.com/kubernetes/cloud-provider-vsphere/master/manifests/controller-manager/cloud-controller-manager-roles.yaml
oc apply -f https://raw.githubusercontent.com/kubernetes/cloud-provider-vsphere/master/manifests/controller-manager/cloud-controller-manager-role-bindings.yaml
oc apply -f https://github.com/kubernetes/cloud-provider-vsphere/raw/master/manifests/controller-manager/vsphere-cloud-controller-manager-ds.yaml
```json
And to validate the correct application of the previous files, we will execute:
```bash
oc describe nodes | grep "ProviderID"```json
## vSphere-CSI InstallationNow we will apply the installation of the driver with the application of the following files:
```bash
oc apply -f https://raw.githubusercontent.com/kubernetes-sigs/vsphere-csi-driver/v2.1.1/manifests/v2.1.1/vsphere-7.0u1/vanilla/rbac/vsphere-csi-controller-rbac.yaml
oc apply -f https://raw.githubusercontent.com/kubernetes-sigs/vsphere-csi-driver/v2.1.1/manifests/v2.1.1/vsphere-7.0u1/vanilla/deploy/vsphere-csi-node-ds.yaml
oc apply -f https://raw.githubusercontent.com/kubernetes-sigs/vsphere-csi-driver/v2.1.1/manifests/v2.1.1/vsphere-7.0u1/vanilla/deploy/vsphere-csi-controller-deployment.yaml
```json
We will execute the following command:
```bash
oc get deployments --namespace=kube-system
```text
And we will waituntil"READY" is in state 1/1:
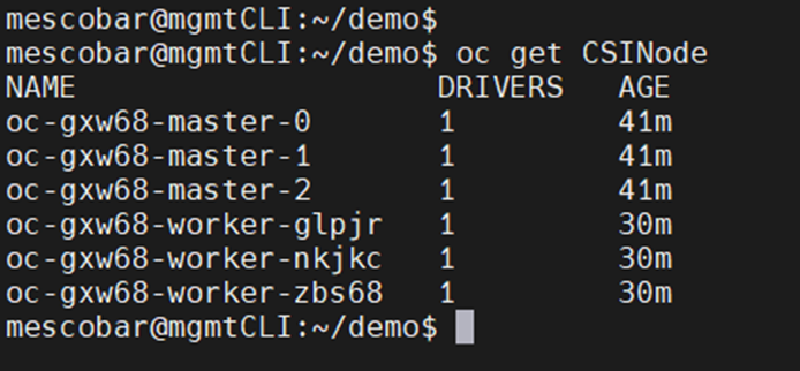
And we will validate the installation of the driver in the nodes with the following command:
```bash
oc get CSINode
```bash
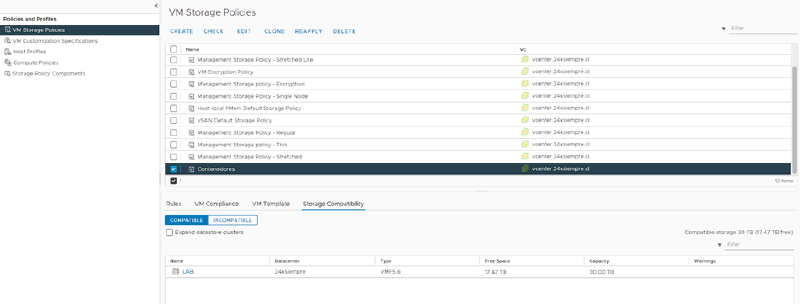
## Create StorageClassWe will now move on to configuring the StorageClass to use the vSphere CSI driver. First of all, in vCenter we will generate a "Storage Policy", this case named "Containers" which must be associated with the DataStore that we will use to host our persistent disks:
Then we edit the following file:
```bash
cat << EOF | kubectl apply -f -
kind: StorageClass
apiVersion: storage.k8s.io/v1
metadata:
name: sc-csi-vsphere
annotations:
storageclass.kubernetes.io/is-default-class: "false"
provisioner: csi.vsphere.vmware.com
parameters:
StoragePolicyName: "Contenedores"
datastoreURL: "ds:///vmfs/volumes/60634600-6fcc5d36-bd83-dcfe07e145f9/"
EOF
Where we must modify the following parameters:
name: It is the name we want for the StorageClass.
StoragePolicyName: The name of the “Storeage Policy” that we created earlier.
datastoreURL: The URL of the vCenter Datastore. In the following image is the info.
After the changes that we apply in the file, we will execute it in the console and it will show us:
And we can also validate it in the console OpenShift:
We will create a persistent disk from the console OpenShift to validate the creation and deletion of disks with the new StorageClass. We will enter the console OpenShift, Storage, PersistenVolumeClaims and we will click on “Create PersistentVolumeClaim”:
We select the StorageClass that we created with vSphere CSI
We enter the Name of the Volume
We enter the size
Click on “Create”
And we will see the creation of the disc in OpenShift:
In the configured Datastore:
Now we will eliminate the disk to validate the correct operation:
We will enter the console OpenShift, then Storage and we will click on “StorageClasses”, where we will see:
As can be seen in the previous image, the default StorageClass is “thin”, which is created automatically when installing OpenShift, we will select the “thin”, then “Edit Annotations” and we will change the parameter “storageclass.kubernetes.io/is-default-class” to “false” and save:
And finally, we select our StorageClass that uses the vSphere CSI driver, in this case, “sc-csi-vsphere”, click on “Edit Annotations” and change the parameter “storageclass.kubernetes.io/is-default-class” to “true” and save:
Now we will see that our StorageClass is default and every new persistent disk creation will use it:
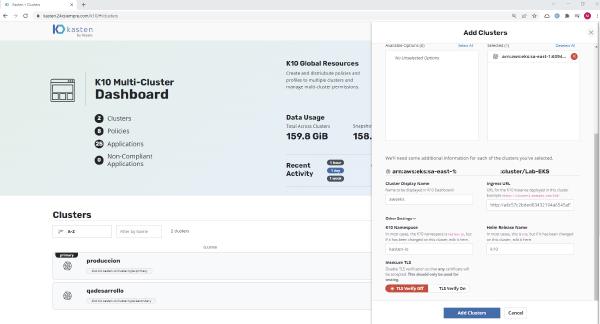
So now all you have to do is install Kasten K10 to protect all your applications in OpenShift, where in this blog there are multiple guides to install and configure Kasten K10.