Data protection, Kubernetes, cybersecurity and AI. Hands-on guides from the trenches: Veeam, Kasten, VMware, Oracle, cloud, and whatever I’m breaking in the homelab this week.
Table of ContentsTable of Contents
In this guide we will review how to install Kasten Multi-Cluster Manager for the management and protection of containers from multiple clusters of kubernetes in different environments with centralized resource management. Usually in most companies that maintain application development teams there are different types of environments such as Development, QA and Production, in other companies they also manage Pre-Production, Staging, UAT, etc. environments. In the same way everything depends a lot on the development life cycle as well as the architectures of each company, this is why with Kasten Multi-Cluster Manager we will be able to achieve the protection of multiple environments and/or clusters of kubernetes.
As I mentioned before, it is necessary to have protection of your data regardless of where it is housed or the type of workload, since in the event of a disaster, malware attack or other reasons it is possible to lose data and even more than today we handle data in many environments, spread out geographically and needing centralized resource management and protection.
It is therefore, Kasten by Veeam developed the solution Kasten Multi-Cluster Manager that allows us to centrally manage backup resources as well as data protection based on backup policies for clusters. As always we will review the official documentation that we will find
For this guide I have two clusters of kubernetes integrated with vSphere through vSphere-CSI, each with 3 Worker nodes and 1 Master, I also have a ubuntu Linux that I use for administration of kubernetesThey also have MongoDB, MySQL and WordPress containers installed to validate the backup of the environments with applications, apart from all the services associated with the cluster.
Must have installed on each cluster kubernetes or your distribution kubernetes, Kasten K10, if you still do not have it installed, you can follow the guide that applies to any version of kasten k10:
/veeam-kasten/#Instalacion_de_Kasten
And an important consideration is define which will be your Primary and Secondary Cluster(s), in this case I will define my cluster named “production” as primary and the secondary as “development”, this is key for the configuration of the Multi-Cluster of Kasten.
This configuration of kubernetes contexts will allow us in a few words to manage multiple clusters of kubernetes centrally and natively from a machine that contains the configuration and/or connection files, commonly known as KUBECONFIG, therefore we will proceed to copy them to the administration machine
scp /home/mescobar/.kube/config mescobar@mgmtCLI:/home/mescobar/.kube/produccion
scp /home/mescobar/.kube/config mescobar@mgmtCLI:/home/mescobar/.kube/desarrollo
```text
In the above commands I am copying the config file from my servers **MASTER** where you will usually find it in $HOME/.kube/config or inside the home of the user you are using in the hidden .kube folder towards my administration server (mgmtCLI). In the event that for some reason you cannot find the configuration file, you can copy the following file from the following path to your administration server
```bash
sudo scp /etc/kubernetes/admin.conf mescobar@mgmtCLI:/home/mescobar/.kube/produccion
```bash
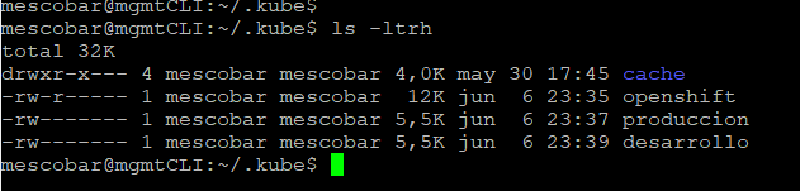
Now if we list the directory we can see the different files of the clusters
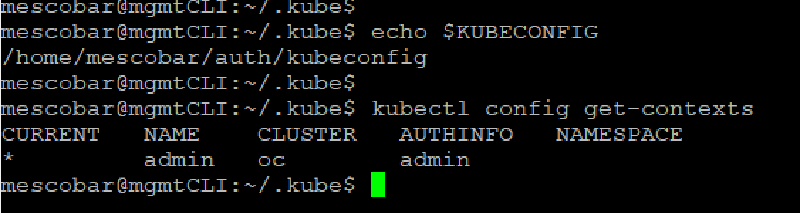
And with the following command we will check which configuration file is loaded
```bash
echo$KUBECONFIGkubectl config get-contexts
```json
As seen in the previous image, I have another configuration file and it is loaded in the context, therefore we are going to configure the KUBECONFIG environment variable so that it loads the clusters every time we enter the administration server with our user, therefore we will do the following: Next
```text
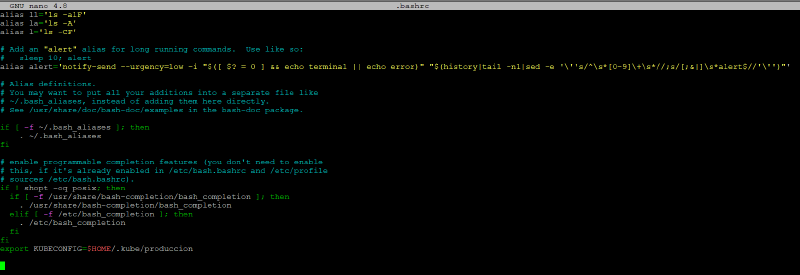
cd$HOMEnano .bashrc
```text
And we go to the last line and add
```bash
exportKUBECONFIG=$HOME/.kube/produccion
```json
We save the file and execute the following command to load the environment variable
```text
. .bashrc
```bash
So with this we can validate again if the file we need is loaded
```bash
echo$KUBECONFIGkubectl config get-contexts
```bash
### Context configurationAs we can see in the previous image, the name of our cluster is by default “kubernetes-admin@kubernetes” which could cause confusion to know which cluster we are managing, that is why we are going to change the name to make it much easier with the following command:
```bash
kubectl config rename-context kubernetes-admin@kubernetes produccion
```json
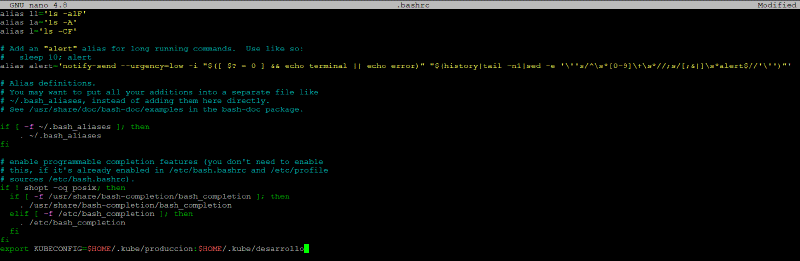
Now we have identified the cluster and we will proceed to add the development cluster. As we saw in a previous point we will add in the .bashrc file the path of the development configuration file and we will execute the command to load that new variable (use the name of the file that belongs to your clusters)```bash
exportKUBECONFIG=$HOME/.kube/produccion:$HOME/.kube/desarrollo
```bash
We execute the commands to load the variable and see the contexts
and again we change the default name to identify the development environment
```bash
kubectl config rename-context kubernetes-admin@kubernetes desarrollo
```bash
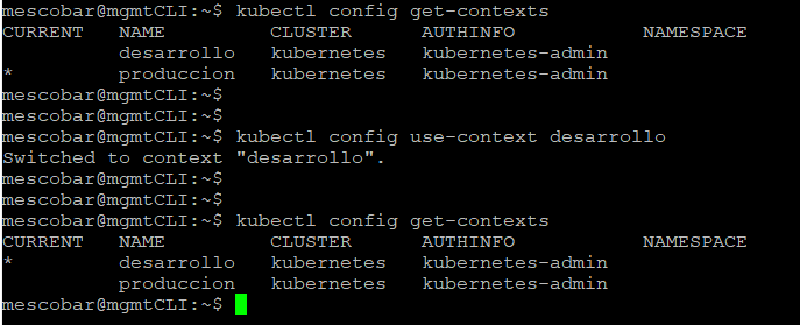
Why do we do the above? clearly because when clusters of kubernetes With default settings, the cluster name will always be kubernetes-admin@kubernetes, also the name of the cluster will be kubernetes, the name change in the context is important to know which cluster we will be connecting to. And finally, to change between clusters or contexts we will use the following command```bash
kubectl config use-context desarrollo
```bash
As you can see in the previous image or in your session, to see the change of context it is confirmed in the column “ **Current**” where you see a **\*** is the cluster you are currently managing. Also as **recommendation** across **configuration files you can change the name of the cluster to make sure** even more about what cluster you are using, as there is a lot of information on the internet that covers this configuration.
## Configuration KastenAs you will remember, previously we defined our primary and/or secondary cluster's since it is a requirement of Kasten Multi-Cluster that must have installed Kasten k10 and another requirement that we must meet is that the Authentikation of the Kasten **k10 installed in each** of the cluster's that will be **SECONDARY** must be via token. Therefore we can use the Authentikation that we want in the primary cluster, but token Authentikation will always be mandatory in the secondary clusters. For more information:
https://docs.kasten.io/latest/access/Authentikation.html#token-Authentikation
Now in our secondary cluster we will configure the Authentikation by token for which they must execute the following command in the context of their secondary cluster or directly in the master server of the **SECONDARY CLUSTER**
```bash
helm upgrade k10 kasten/k10 --namespace=kasten-io \
> --reuse-values \
> --set externalGateway.create=true\
> --set auth.tokenAuth.enabled=true```bash
With the above command **executed on the SECONDARY cluster(s)** we do not ensure that they are Authentikated via token. and the cluster **PRIMARY** you can use whatever Authentikation method is necessary. In this case in the cluster **PRIMARY** We will use basic Authentikation, to configure this it is necessary to execute (user and password “kasten"):
```bash
helm upgrade k10 kasten/k10 --namespace=kasten-io \
--set auth.basicAuth.enabled=true \
--set auth.basicAuth.htpasswd='kasten:$apr1$twc26zga$AA47exHs1a3uNq/4lDKxD.' \
--set externalGateway.create=true
```bash
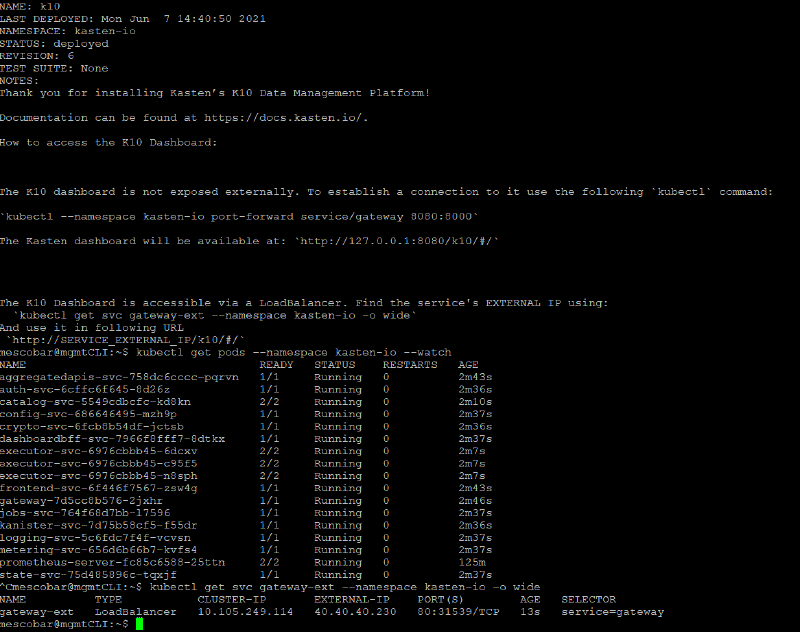
And then to know the ip address that will be using this access with the command
```bash
kubectl get svc gateway-ext --namespace kasten-io -o wide
```bash
And in the column “ **EXTERNAL-IP**” you will be able to see the IP address assigned by MetalLB and of course you can associate it with a DNS, in my case I will use kasten.24xsiempre.cl and kastendev.24xsiempre.cl to access the clusters.
## Configuration Kasten Multi Cluster Manager
Now that we have our clusters configured with the requirements for Multi-Cluster of Kasten, we will download the solution in our administration server or in the server that you are using as MASTER for the management of the clusters. To download Kasten Multi-Cluster Manager, you must do it from the following address (To date we will download version 4.0.3):
https://github.com/kastenhq/external-tools/releases/download/4.0.3/k10multicluster\_4.0.3\_linux\_amd64
To download directly from the command line, grant execute permissions and move to executable directory:
```bash
wget https://github.com/kastenhq/external-tools/releases/download/4.0.3/k10multicluster_4.0.3_linux_amd64
chmod +x k10multicluster_4.0.3_linux_amd64
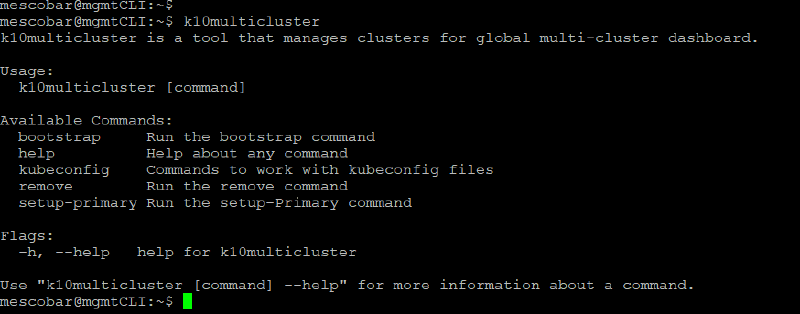
sudo mv k10multicluster_4.0.3_linux_amd64 /usr/local/bin/k10multicluster
k10multicluster
```bash
Now we will make sure that we are in the context of the primary server that we defined earlier with the command
```bash
kubectl config get-contexts
```json
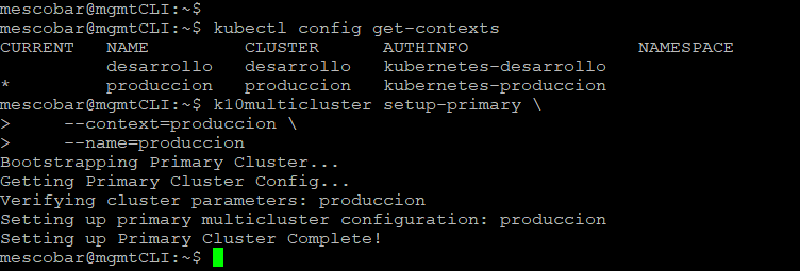
We check the context of my primary cluster, in this case production and proceed to configure K10 Multi-Cluster Manager. With the following command we will configure the cluster **PRIMARY**
```text
k10multicluster setup-primary \
--context=produccion \
--name=produccion
```bash
Where **context** is the name of the context that we have in the configuration of kubernetes y **name** is the name that will appear in the interface.
Now we will add the cluster **SECONDARY** with the following command
```bash
k10multicluster bootstrap \
--primary-context=produccion \
--primary-name=produccion \
--secondary-context=desarrollo \
--secondary-name=desarrollo \
--secondary-cluster-ingress=http://kastendev.24xsiempre.cl/k10/
After the steps above, you may get a 503 or 400 error on the interface. Kasten Multi-Cluster, this is because it may not have management permissions, for this we must enter RBAC Entry and add the user or users that we will use to manage data protection, in my case add the user k10-admin and with this I was able to enter all the management.
If there are any doubts in this part, you should only visit
And finally we need to configure all the global resources as well as global policies that are needed, for details on how to do it you must visit a post that I made previously
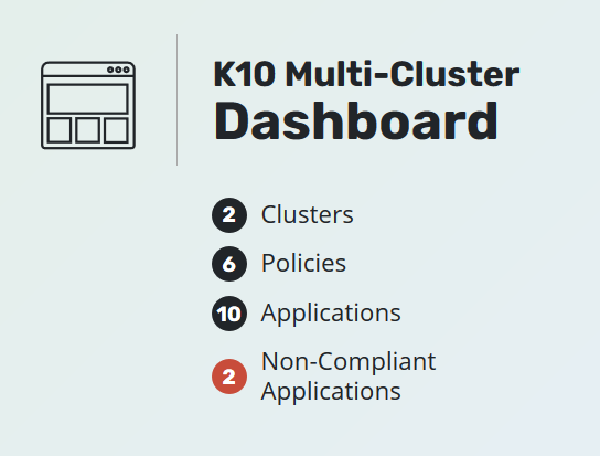
One of the great advantages that this solution does not provide is the centralized management of resources to assign, either by applications, clusters or according to the needs of the solutions that will be protected. It is important to note that Kasten Multi-Cluster Manager allows you to add clusters from different distributions kubernetes, for example Red Hat OpenShift,Rancher, EKS, AKS o kubernetes, as long as the necessary requirements are met, such as installing Kasten K10 in each of the clusters, it will allow us to have a unique and centralized access for container protection.