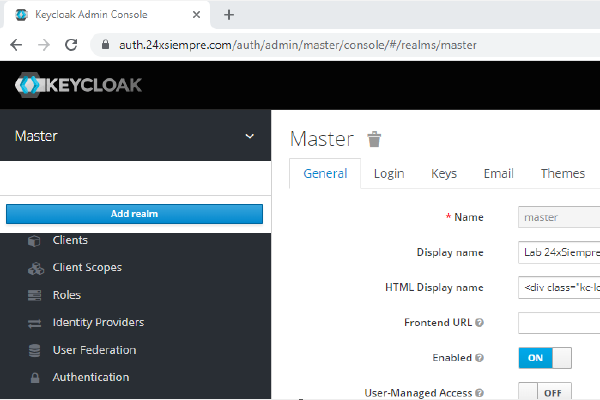

This is a great topic to dig into. In the previous post we covered everything about configuring Keycloak for centralized user management through OpenID, leaving it ready for integration with Kasten K10 and Kasten K10 Multi-Cluster Manager. In this post we walk step by step through configuring the ClusterRoles, Roles and groups needed to manage Kasten K10 via RBAC.
Kasten Keycloak Configuration#
\\\* The idea behind this series is to explain how to generate the groups, roles, clusterroles and other resources tied to RBAC without having to keep modifying user permissions directly in the Kubernetes cluster over time. That way, all user creation, group creation and group assignment happens in Keycloak. ***
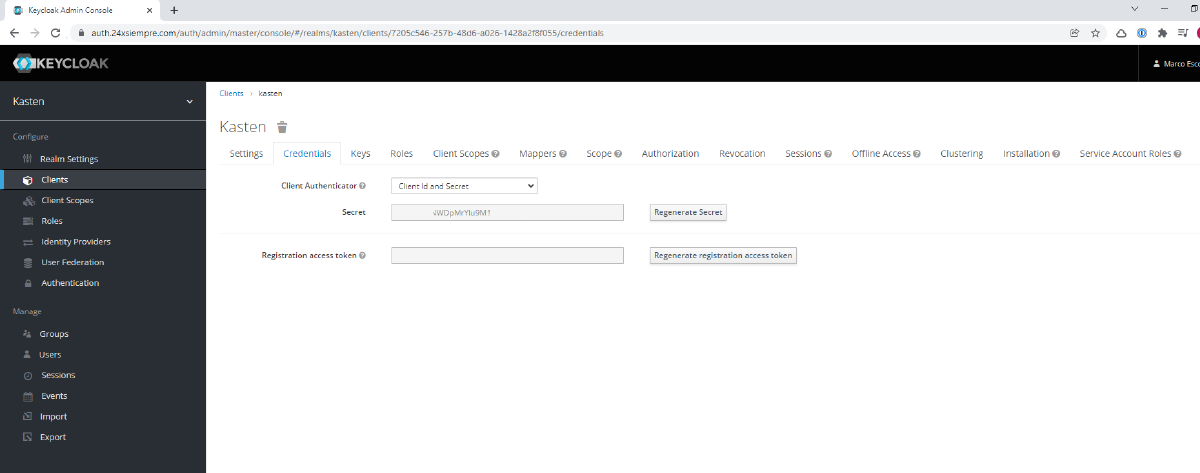
We need to connect to the primary Kubernetes cluster where Kasten K10 is installed and then configure authentication against Keycloak. But first, we need to extract the “Secret” from our “kasten” Client under the “Credentials” menu and place it in the “auth.oidcAuth.clientSecret” variable (replacing SuperDuperClientSecret), and of course substitute your own DNS or IP values. Then run the following command (for security I trimmed part of the secret):

helm upgrade k10 kasten/k10 --namespace=kasten-io --set auth.oidcAuth.enabled=true --set auth.oidcAuth.providerURL="https://auth.24xsiempre.com/auth/realms/kasten" --set auth.oidcAuth.redirectURL="https://kasten.24xsiempre.com/" --set auth.oidcAuth.scopes="groups profile email" --set auth.oidcAuth.groupClaim="groups" --set auth.oidcAuth.prompt="login" --set auth.oidcAuth.clientID="kasten" --set auth.oidcAuth.clientSecret="SuperDuperClientSecret" --set auth.oidcAuth.usernameClaim="email" --reuse-values --set externalGateway.create=true
Now let’s look at what each of these variables means:
- –set auth.oidcAuth.enabled=true / Enables OpenID authentication
- –set auth.oidcAuth.providerURL=“https://auth.24xsiempre.com/auth/realms/kasten" / Authentication URL
- –set auth.oidcAuth.redirectURL=“https://kasten.24xsiempre.com/" / K10 application URL
- –set auth.oidcAuth.scopes=“groups profile email” / Client Scopes to validate
- –set auth.oidcAuth.groupClaim=“groups” / Name of the Client Scope group
- –set auth.oidcAuth.prompt=“login” / Login prompt message
- –set auth.oidcAuth.clientID=“kasten” / Name of the Client in the realm you created
- –set auth.oidcAuth.clientSecret=“SuperDuperClientSecret” / Client secret
- –set auth.oidcAuth.usernameClaim=“email” / For email-based authentication
- –reuse-values / Reuses the values already configured
- –set externalGateway.create=true / Reconfigures the K10 gateway service for remote access
One important note: if you already have an authentication method configured for Kasten, it’s better to disable it first and then run the command above, in case you hit an error.
User Access#
Since everything is already configured, including the user we created in the previous post, all that’s left is to log in to the Kasten web interface. Let’s recall the user details:
- User: kastenadmin
- Password: SuperDuperPassword, or whatever you applied
- Group: k10:admins
Now we just browse to the Kasten URL (in my case https://kasten.24xsiempre.com/k10/#/) and it redirects us to the Keycloak login form in the kasten realm, where we enter the credentials:

And we can see that we log in successfully with full permissions, since we belong to the “k10:admins” group, and we didn’t have to edit a single ClusterRole or Role.

To confirm the permissions, you can validate them graphically, either by viewing “permissions” set to “unrestricted”, or by entering the primary cluster, then “Cluster Settings”, then “Support”, and finally clicking “View Current User Details”. You’ll be able to see all of that user’s permissions and the group they belong to:

So far so good, but what happens if we move the “kastenadmin” user to a different group? We go back into Keycloak and change the group from “k10:admins” to “k10:basic”:

And when we log in to Kasten again, this is what we see:

The “kastenadmin” user no longer belongs to “k10:admins” and now belongs to “k10:basic”, which is not configured with any ClusterRoleBinding or RoleBinding tied to a ClusterRole or Role.
Creating Access Roles in Kasten K10#
As we saw earlier, we have both the Kasten K10 primary cluster and Kasten Multi-Cluster Manager configured. We’ll start by reviewing access to the primary cluster only, without needing to touch the Multi-Cluster roles.
Administrator User#
So, if you don’t need Multi-Cluster Manager, you can manage users entirely through Keycloak. We’ll create a group in Keycloak to access the cluster named “k10:solo” and associate it with the user “kastenadmin”:

And now, via SSH, we’ll list the ClusterRoles:
kubectl get clusterrole | grep k10
We’ll create a YAML file with the following content:
nano k10solo.yamlapiVersion: rbac.authorization.k8s.io/v1
kind: ClusterRoleBinding
metadata:
name: k10-k10-solo
roleRef:
apiGroup: rbac.authorization.k8s.io
kind: ClusterRole
name: k10-admin
subjects:
- apiGroup: rbac.authorization.k8s.io
kind: Group
name: k10:soloAnd then apply it with the command:
kubectl apply -f k10solo.yaml
We’ll confirm that the ClusterRoleBinding was created by listing it with the command:
kubectl get clusterrolebindings | grep k10
And if we log in to Kasten K10 again, we can verify that we only have access to the production cluster as administrator. Now, why do I have administrator access? On line 5 of the YAML file we generated there is a reference to the ClusterRole “k10-admin”, which grants us the role. On logging in we see that we have access to everything, except for the following error:

What Kasten K10 is telling us is that it doesn’t have permissions on the “kasten-io” namespace to query or list the deployments and report the status of the services. To fix that we need to add the “k10:solo” group to the “k10-ns-admin” Role that lives in that namespace. To list the role:
kubectl get roles -n kasten-io
There’s always more than one way to edit these roles. You can edit it directly with kubectl edit roles k10-ns-admin -n kasten-io, or use the following yaml:
nano ns-admin-k10solo.yamlapiVersion: rbac.authorization.k8s.io/v1
kind: RoleBinding
metadata:
name: k10-k10-ns-solo
namespace: kasten-io
roleRef:
apiGroup: rbac.authorization.k8s.io
kind: Role
name: k10-ns-admin
subjects:
- apiGroup: rbac.authorization.k8s.io
kind: Group
name: k10:solokubectl apply -f ns-admin-k10solo.yamlWe’ll confirm that the RoleBinding was created by listing it with the command:
kubectl get rolebindings -n kasten-io
And now we validate the permissions again, checking that the Kasten K10 service status error no longer appears:

And now everything is a nice healthy color :). So what if I want a user who can operate but can’t modify the configuration?
Operator User#
As we’ve done before, we’re going to create a group in Keycloak named “k10:operador” and assign it, once again as the only group, to the user “kastenadmin”.
What does an operator need? For example, to be able to see all the applications, view all the backup policies as well as the automatically generated reports, and also have access to create and edit backup policies but NOT to delete any resource or edit any configuration.
So we’re going to create a ClusterRole that gives us exactly the permissions the “Operator” role needs. We’ll create the file with its content:
nano k10operadorclusterrole.yamlapiVersion: rbac.authorization.k8s.io/v1
kind: ClusterRole
metadata:
name: k10-operador
rules:
- apiGroups:
- actions.kio.kasten.io
- apps.kio.kasten.io
- config.kio.kasten.io
- reporting.kio.kasten.io
- vault.kio.kasten.io
resources:
- '*'
verbs:
- get
- list
- patch
- update
- watch
- create
- apiGroups:
- cr.kanister.io
resources:
- '*'
verbs:
- '*'
- apiGroups:
- ""
resources:
- namespaces
verbs:
- create
- get
- listAnd we apply the file:
kubectl apply -f k10operadorclusterrole.yaml
As you can see in the file, the operator clusterrole has no delete permissions. We validate that the clusterrole was created:
kubectl get clusterrole | grep k10
Now we generate the clusterrolebinding to associate it with our user group “k10:operador”:
nano k10operadorbind.yamlapiVersion: rbac.authorization.k8s.io/v1
kind: ClusterRoleBinding
metadata:
name: k10-k10-operador
roleRef:
apiGroup: rbac.authorization.k8s.io
kind: ClusterRole
name: k10-operador
subjects:
- apiGroup: rbac.authorization.k8s.io
kind: Group
name: k10:operadorAnd we apply the file:
kubectl apply -f k10operadorbind.yamlWe validate:
kubectl get clusterrolebindings | grep k10
And finally, since the user will be able to access but not delete, we’ll also add them to “ns-admin”:
nano k10operadornsadmin.yamlapiVersion: rbac.authorization.k8s.io/v1
kind: RoleBinding
metadata:
name: k10-k10-ns-operador
namespace: kasten-io
roleRef:
apiGroup: rbac.authorization.k8s.io
kind: Role
name: k10-ns-admin
subjects:
- apiGroup: rbac.authorization.k8s.io
kind: Group
name: k10:operadorWe validate the creation:
kubectl get rolebinding -n kasten-io
We validate access to Kasten K10:

For example, if the user tries to delete a Backup Policy, they’ll get the following message:

But if they want to create a backup policy, they’ll be able to:

And if they try to delete a “Location Profile” they won’t be able to, since they don’t have permission for it and the delete button is disabled:

This shows that you can generate RBAC resources tied to groups and manage users directly from Keycloak, without having to create local users or edit the clusterroles and clusterrolebindings every time a user needs access to the Kasten platform. But we’re not done yet: we still need to review RBAC for Kasten Multi-Cluster Manager, which we’ll cover in the next post, click here!