Data protection, Kubernetes, cybersecurity and AI. Hands-on guides from the trenches: Veeam, Kasten, VMware, Oracle, cloud, and whatever I’m breaking in the homelab this week.
Table of ContentsTable of Contents
In this post, we will look at Role Based Access Control (RBAC) configuration in conjunction with Kasten K10 for access to one or multiple clusters protected by Kasten, is aimed both at clients who manage 1 or more clusters of any distribution of kubernetes supported by K10, as well as to service providers (SP or MSP) that offer the support of containers of kubernetes with Kasten K10, with the aim of providing controlled access to users / clients according to the granular roles required by each cluster or operation. We will also use a Single Sign-On (SSO) solution using OpenID in this case, Keycloak, for the centralized management of access credentials for either users or groups.
The idea of this series is to explain how to generate the groups, roles, clusterroles and other resources associated with RBAC, without the need to modify directly in the cluster of kubernetes over time, so all the management of user creation, groups, group assignment is done in Keycloak.
As usual in this blog, we should always refer to the official documentation of what we are going to install / configure or apply, since we must stay as close as possible to the good practices or guidelines of the creators of the solutions we will use.
We will not go into depth in the installation of the products in this post, since in the following links you have step by step the installation of Kasten K10 y Kasten Multi Cluster Manager:
And regarding the installation of keycloak, it’s very easy from helm or you can use one of the many guides on the internet to install it as a container or as an application on a server. (Leave a comment if you need a step by step guide)
We will now go on to review a summary of the existing roles and clusterroles for granular permission creation.
When we review the documentation, we see that there is RBAC for the individual installation of kasten k10, maintaining the standards of kubernetes as well as RBAC for multi-cluster installations using Multi-Cluster Manager.
In this case we will review the application of Roles, RoleBinding, ClusterRole, ClusterRoleBindings on kasten k10 to get granular access to our implementation of k10 according to the need of the operation. Therefore, when reviewing the documentation we will find the default ClusterRoles that are created when installing K10, which are 3:
k10-admin / Full access to the implementation of Kasten K10
k10-basic / Operational access to users on specific resources
k10-config-view / Access to configuration without permissions to create or modify
You can list them with the following command:
kubectl get clusterrole | grep k10
```bash
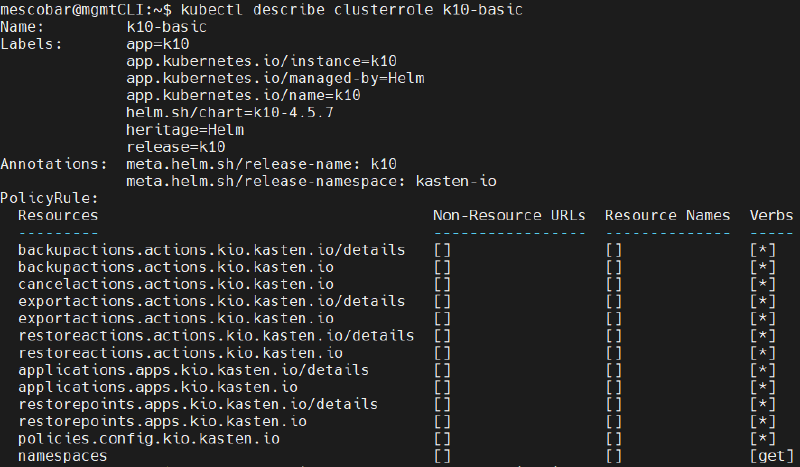
In fact, if the permissions are reviewed in detail by consulting each clusterrole, for example:
```bash
kubectl describe clusterrole k10-admin
```bash
All the permissions, resources and verbs (what it can do) of each of the clusterroles are observed, which are the basis for the creation of granular access permissions to K10. It is possible to use them as a basis to later create clusterrolebinding associated with users or user groups that will access via OpenID.
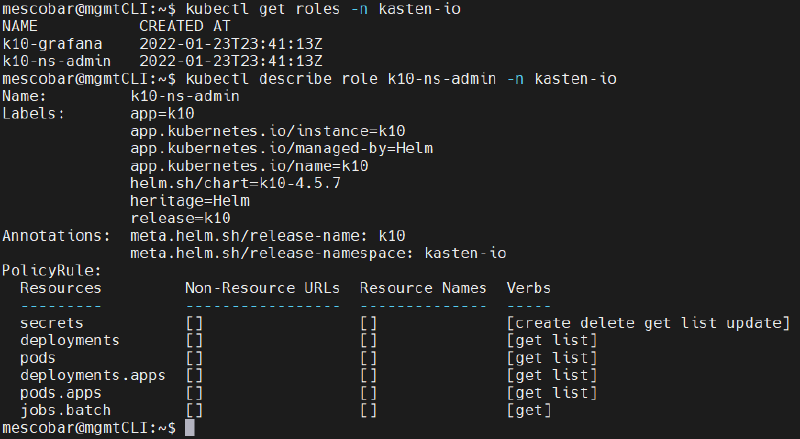
One of the important roles that also exist within the installation of K10 is the role **k10-ns-admin** which provides access to the secrets and also to see the status of the services directly from the console K10, to list the role, the namespace must be included **kasten-I**
```bash
kubectl get roles -n kasten-io
```bash
## K10 Multi-Cluster Manager RBACLike above when setting K10 Multi-Cluster Manager from the primary cluster, 2 clusterroles are generated by default and also clusterroles specific to k10:
- k10-mc-admin / Allows full access to manage multiple clusters and resources
- k10-mc-user / Allows access to the cluster but not to management resources
```bash
kubectl get clusterrole | grep k10-mc
```bash
Specific clusterroles of K10 for the management of RBAC within K10 multi-cluster
- k10-multi-cluster-admin / Allows full access to manage multiple clusters and resources
- k10-multi-cluster-basic / Allows access to the cluster but not to management resources
- k10-multi-cluster-config-view / Allows access to the cluster and configuration view
```bash
kubectl get k10clusterrole -n kasten-io-mc
Why do they have two types of clusterroles? the first roles are associated with resources and clusters of kubernetes and k10clusterroles are associated with the internal management of the Multi-Cluster Manager in order to provide access via RBAC within K10.
In this guide we will configure clusterroles and specific roles according to the need for access and operation using the resources provided. Kasten K10, but first we will go to the Keycloak configuration
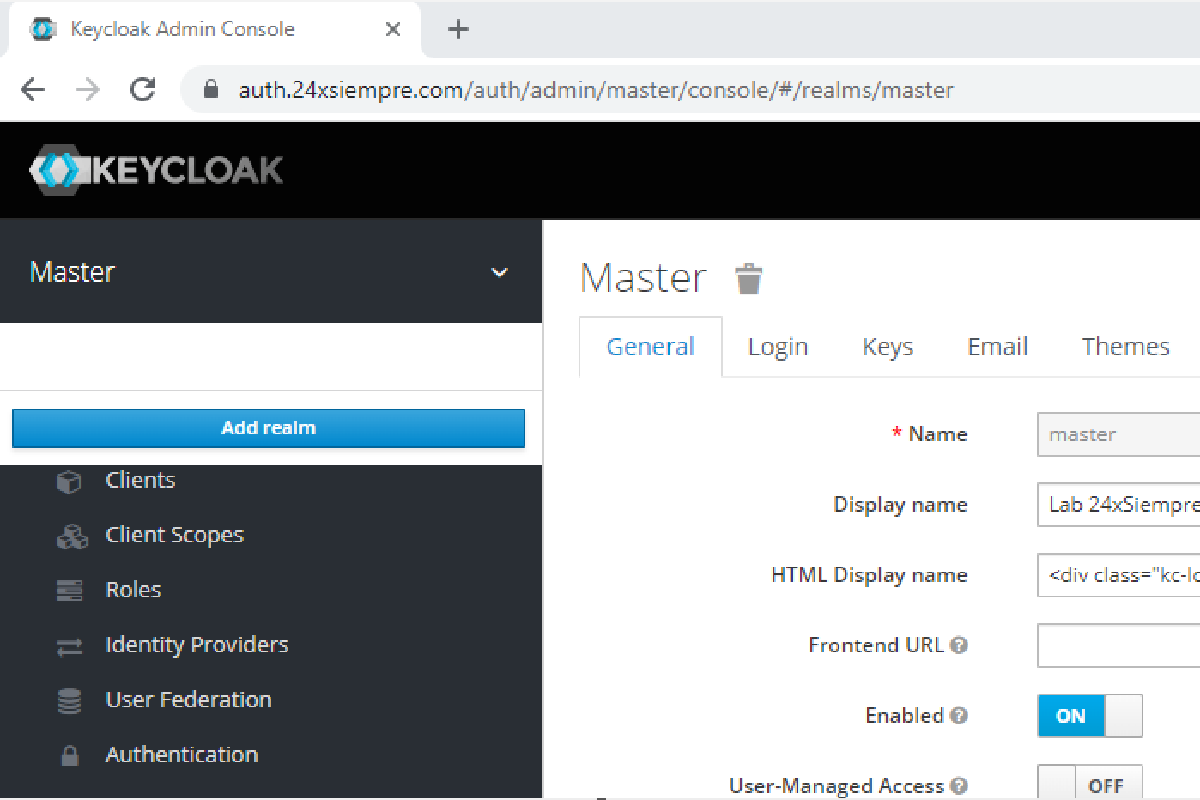
After installing Keycloak, it is possible to access the “master” domain or realm via the web with the user you have configured, for example, in my case I use auth.24xsiempre.com and enter the administration console:
You can keep the default settings or enable at least brute force detection in the “Security Defenses” menu.
Now, we will create a new exclusive Realm for Kasten K10, therefore we will select the “master” realm in the main menu and click on “Add Realm”, then we enter the name of the new realm and finally click on “create”:
Within “Realm Settings” there are several configurations as seen in the Keycloak menu, for this case we will enable in “Security Defenses” the brute force detection (optional, but recommended) and most importantly in the “Login” menu the following options:
It is preferable to use these options, in the case of “forgot password” and “Verify Email” it is necessary to have SMTP configured in Keycloak where it is very easy to enter the address, username and password of the SMTP server in the “Email” menu.
We already have the basics of Keycloak, now we will fully enter the configuration of a client in Keycloak for the use of OpenID in conjunction with K10. Click on “Clients” and then on “Create” to enter the name of the “Client ID” (in this case kasten) making sure that the “Client Protocol” is “openid-connect”:
To then enter the new client from the “Clients” menu.
Now we will configure the client in detail to use OpenID and allow access to users or groups, therefore the configurations that must be applied are the following:
Next I will explain each of the configured fields:
Enabled = Enables the Keycloak client
Always Display in Console = To view sessions in the Keycloak console
Login Theme = Type of graphical interface
Client Protocol = Enables the openid-connect protocol that we will use with K10
Access Type = Requires a credential to be used to use the Keycloak client
Standard Flow Enabled = Enables OpenID redirects for Authentikation and authorization.
Direct Access Grants Enabled = Access to user and password and exchange with Keycloak
Service Accounts Enabled = In case of using service accounts
OAuth 2.0 Device Authorization Grant Enabled = OAuth 2.0 Support
Browser Flow = Will use Authentikation with the browser
Direct Grant Flow = Will deliver the session directly
Now we will add a role, so that it is associated with k10, we will enter “Roles” within the same “Client” that we already configured and add a new role named “k10"
Now you enter the newly created role then in “Composite Roles” we click on “Client Roles” we select “kasten” and assign the new role “k10” in “Associated Roles”
And finally we will add the new role by default, click on “Roles” and then in the “Default Roles” menu, select “kasten” in “Client Roles” and add the new role “k10” to default roles:
Keycloak by default does not have the groups configured in “Client Scopes”, that is, if we configure the Authentikation associated with groups, it will not work, since kasten or the application will not be able to read the groups created in Keycloak. Therefore we will click on “Client Scopes” and then click on “Create” and enter the name “groups”, making sure to use the “openid-connect” protocol and save:
We will enter the recently created “Client Scope” “groups” and then we will click on “Mappers” to create a new association click on “Create”, we will enter the name “groups”, then we select the “Mapper Type” which should be “Group Membership”, then in “Token Claim Name” we enter “groups” and deactivate “Full group path” to leave the other options activated and save:
Then we click on “Scope”, we select the “Client Roles” which is “kasten” to add the assigned role “k10"
And finally we need to add the new “Client Scope” by default so that it can be read by Kasten. In “Clients Scopes” select the “Default Client Scopes” menu and move “groups” to the scopes assigned by default:
An excellent way of managing users is to associate them with groups that already have the associated permissions or roles to make their administration much more expeditious. Therefore, a good practice is to use the same nomenclature of Kasten for creating groups. We will click on “Groups” and then on “New” to add the name of the group, for example, “k10:admins” and save.
Then we select and edit the group, to select the “Role Mappings” menu and in “Client Roles” we will select “kasten” to then assign the role “k10” as we can see in the following image:
You can generate the groups that are necessary and assign the previous role to each of them as we did before.
Now we will create an administration user for the management of Kasten K10 either a single cluster or using Multi-Cluster Manager, therefore, we will enter the “Users” menu and enter the requested information and the associated group, in this case “k10:admins”, remember that in the case of email verification you must have the SMTP server configured. Otherwise you just enable it:
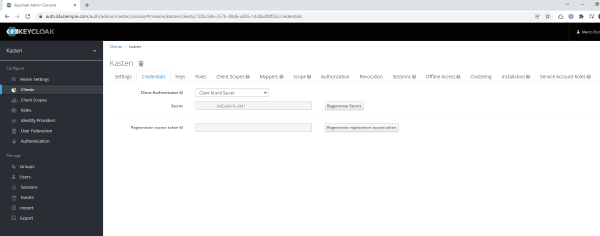
Something important, optionally, you can ask the client to configure MFA for better security, you just have to add it in “Required User Action”. Now we will assign a password to the user, click on “Credentials”, enter the necessary “password”, deactivate the “Temporary” option and click on “Set Password”:
We are now ready to start setting up Authentikation. Kasten K10 with keycloak. In the next post (Click Here) We will review step by step.