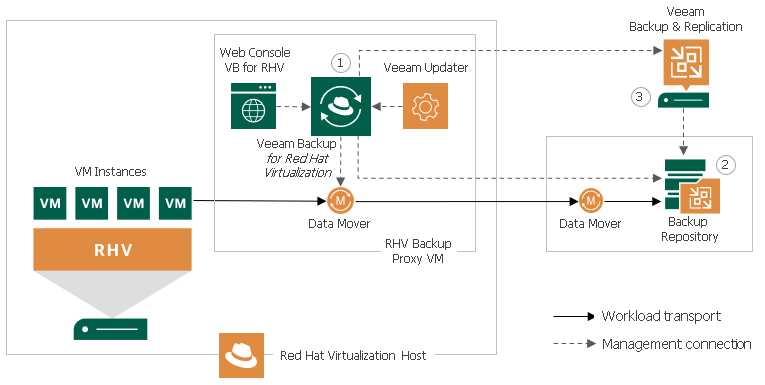
tremendous news from Veeam! Now it supports a new virtualization platform, Red Hat Virtualization, with the aim of protecting virtual machines in an easy way and taking advantage of the integration of the new CBT APIs that have been implemented in RHV. In this post we will see how to deploy Veeam for Red Hat Virtualization integrated with Veeam Backup & Replication reviewing the features and dependencies necessary for complete RHV protection.
Initial Steps
As usual, we should always go to the official documentation of the solution, in this case Veeam Backup for RHV 1.0
- Manual: https://helpcenter.veeam.com/docs/vbrhv/userguide/overview.html?ver=10
- Release Notes: https://www.veeam.com/veeam_backup_for_rhv_1_0_release_notes_rn.pdf
- Download from Veeam RHV: https://www.veeam.com/backup-red-hat-virtualization-download.html
Something very important to point out in this version of Veeam Backup for RHV, is in format public BETA, that is, you can download it, deploy it with official support from Veeam. You need valid licensing in your VBR since it has integration with Veeam Universal License. Of course you can use trial licenses.
Requirements
To host our backups we need a repository with Veeam Backup & Replication:
- Veeam Backup & Replication 11a (11.0.1.1261) or higher
- Red Hat Virtualization 4.4.8 or higher
virtual hardware for Veeam RHV
- 4 CPU cores + 1 for each concurrent task (more can be added if necessary)
- 4 GB RAM minimum (more can be added if needed)
- 64GB Space
It is recommended that if the amount of CPU is increased in parallel, the amount of RAM is increased, that is, if the appliance has 8 CPU cores, it must also have 8 GB of RAM and so on.
Red
- DHCP (then we can change the IP address from the Interface)
Ports
Virtual Machine Disks
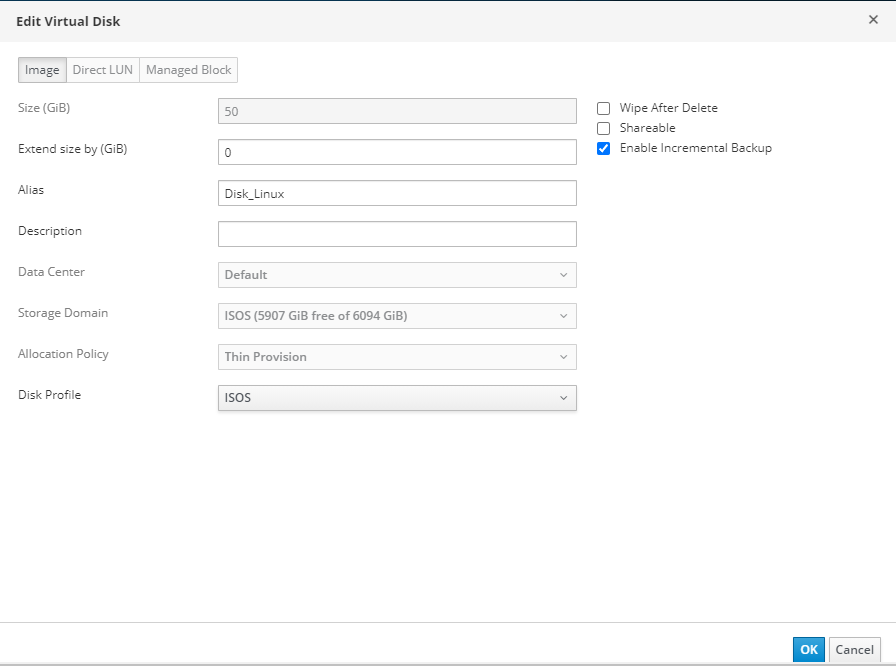
This option is important to take advantage of the use of API CBT in the machines that run in Red Hat Virtualization, the machines that will be protected on their disks must have the option enabled "Enable Incremental Backup"
Since it is a limitation of the virtualization platform, it is important to review:
Installation Veeam Backup for RHV
As we have already downloaded the appliance, we must copy it to a host in the cluster through ssh, in my case I use WinSCP and I will leave it in the path /tmp/veeam/
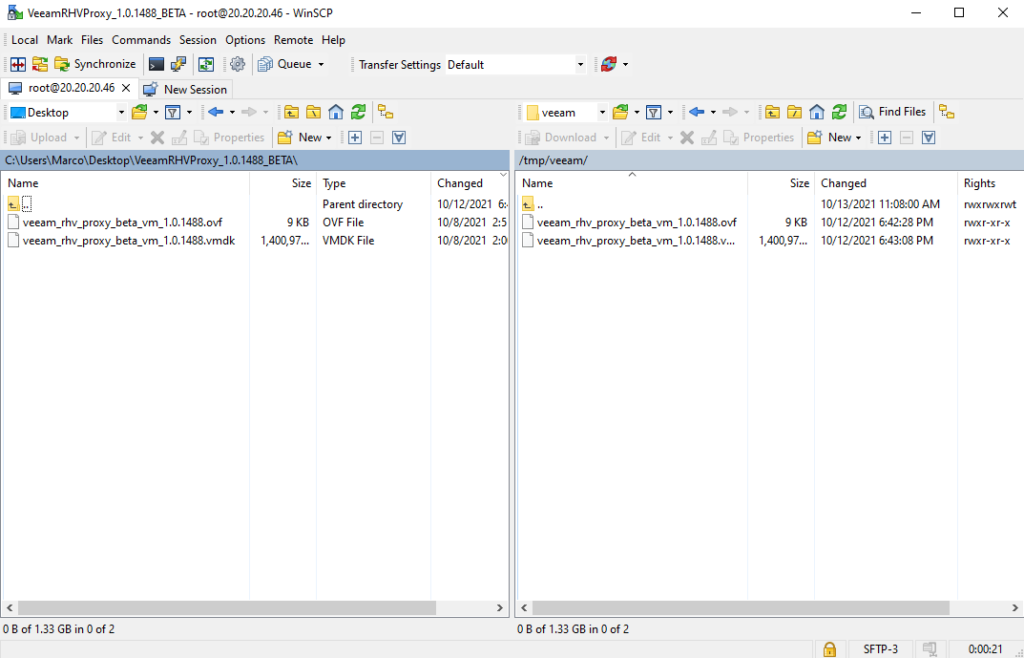
Then we will assign permissions so that the RHV host can read the files (remember I have them in the /tmp/ pathveeam) from the appliance with the commands:
chmod -R 755 veeam/
chown 36:36 -R  veeam/
ls -ltrh veeam/

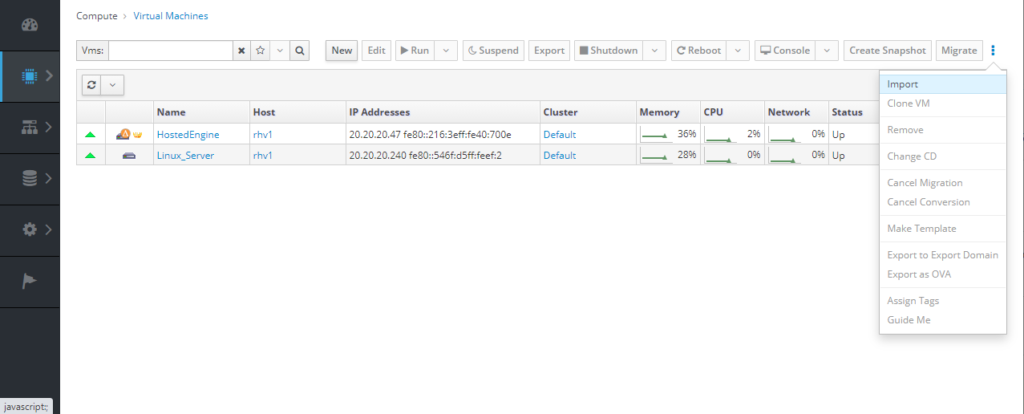
As seen in the image above, the vdsm user and kvm group now have access to the files, so it's time to import the appliance into the Red Hat Virtualization console. We will enter Compute -> Virtual Machines and in the drop-down menu we will select the option “Import"
Then we select the Datacenter, Source, which must be “VirtualAppliance“, the RHV host where we upload the appliance files and finally enter the path of the files, in this case, / tmp /veeam/ and click on "Load” will show us the name of the appliance to select it and pass it to “Virtual Machines to Import"
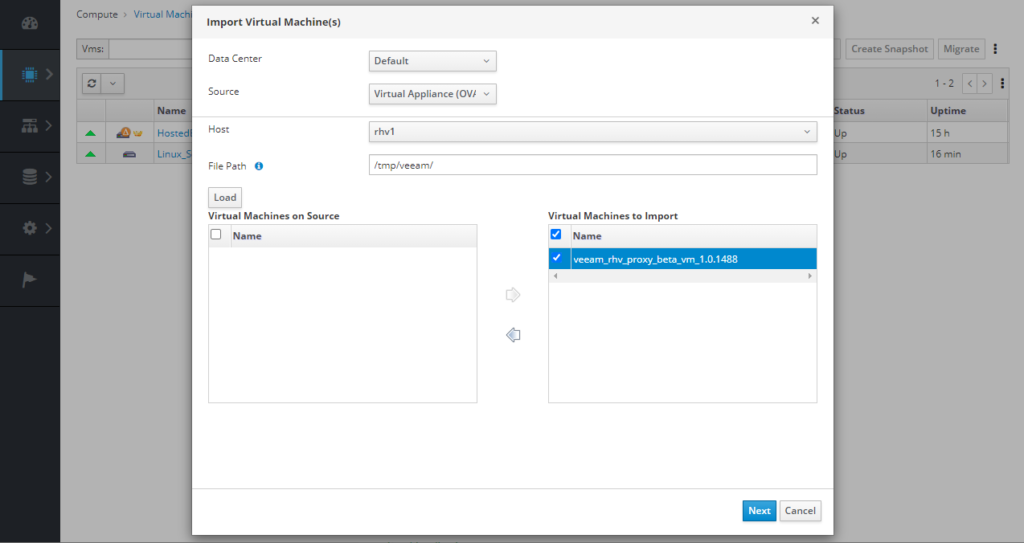
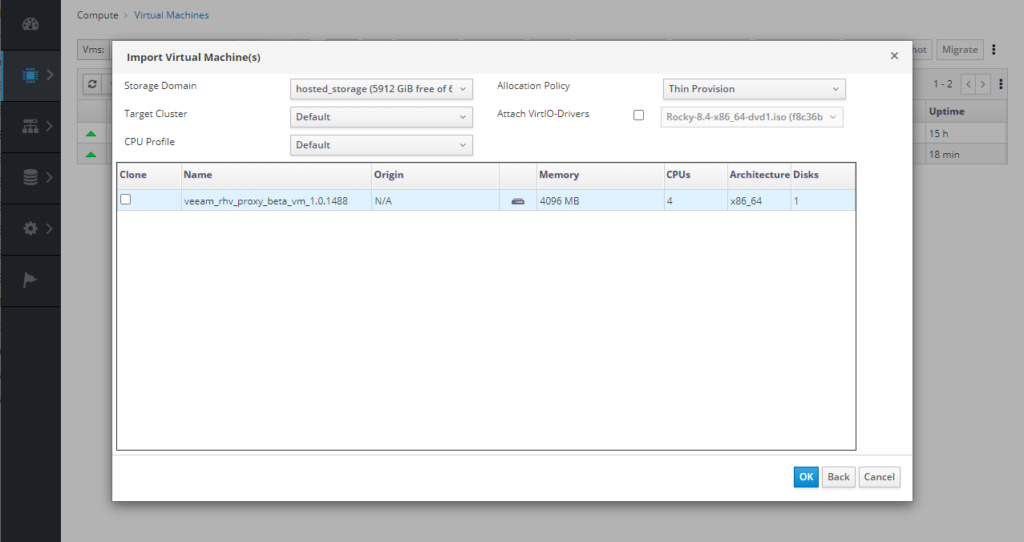
Then click “Next” to select settings.ones of CPU, Allocation, etc, you can leave them by default and click on “OK”
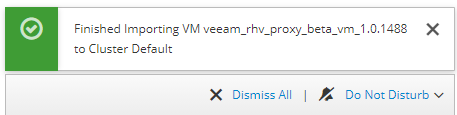
With the above we just have to wait for the appliance import task to finish, you can follow it in "Tasks" or directly in the virtual machine:

Now we only have to turn on the machine, we select our machine "veeam_rhv_proxy_beta_vm_1.0.1488” or whatever name you entered and click “Run"

If you want to see the boot, select the virtual machine and click on “Console” to download a utility to see the virtual machine:

A file is automatically downloadedconsole.vv” you execute it and you will be able to have access to the virtual machine:
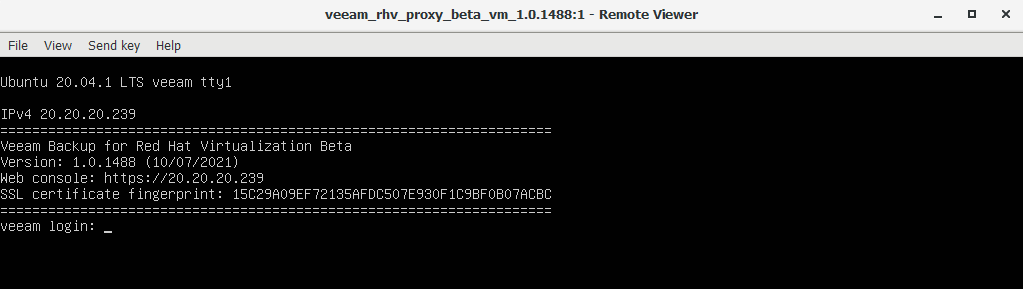
** In case the IP is not assigned by DHCP, check with the RHV administrator or Restart the appliance**
Configuration Veeam Backup for RHV
As we could see in the last image, it indicates the IP address that was assigned by DHCP, therefore, we must enter via HTTPS to that address:
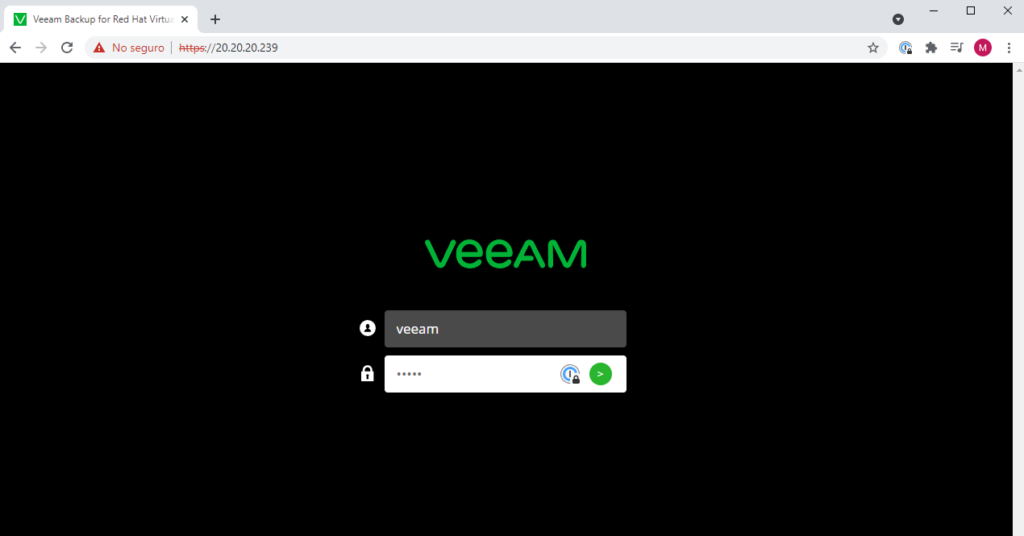
The username and password for the first access is “veeam” and we enter Veeam for Red Hat Virtualization
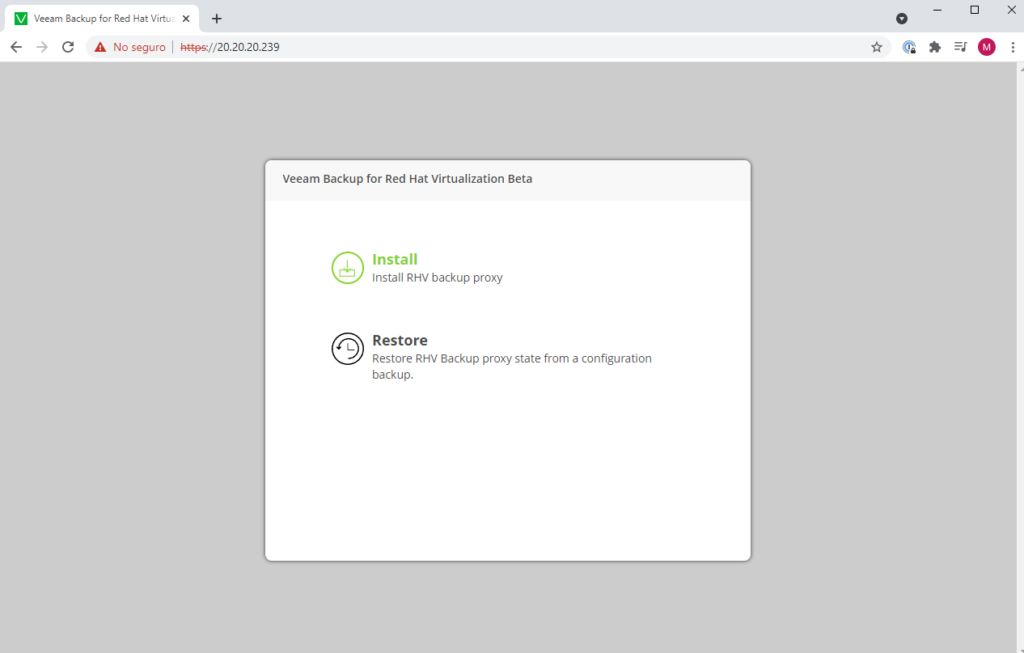
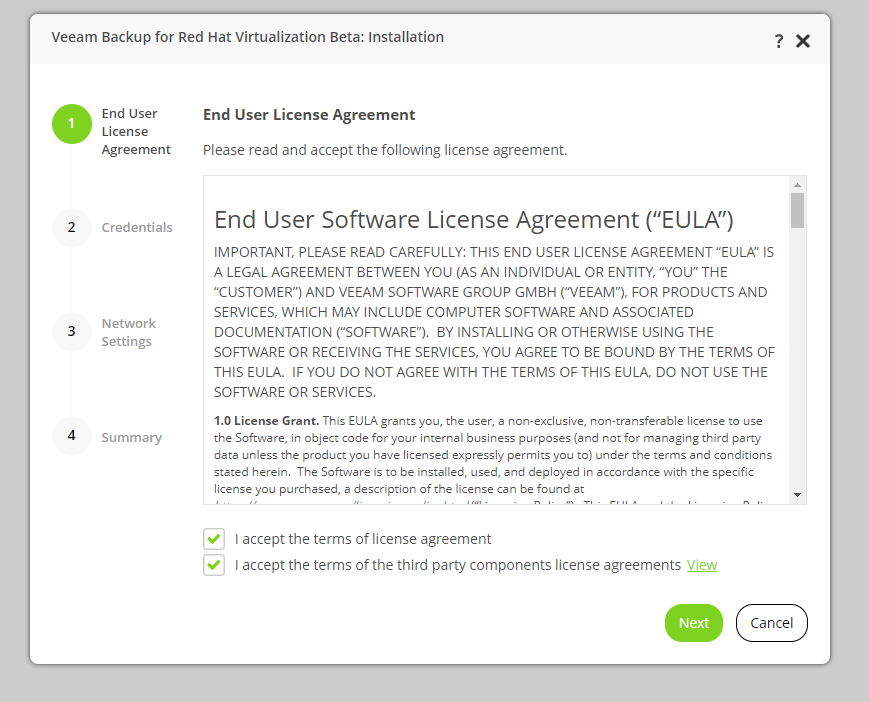
Of course we select the “Install” option to accept the EULA and enter the configurationsones requested:
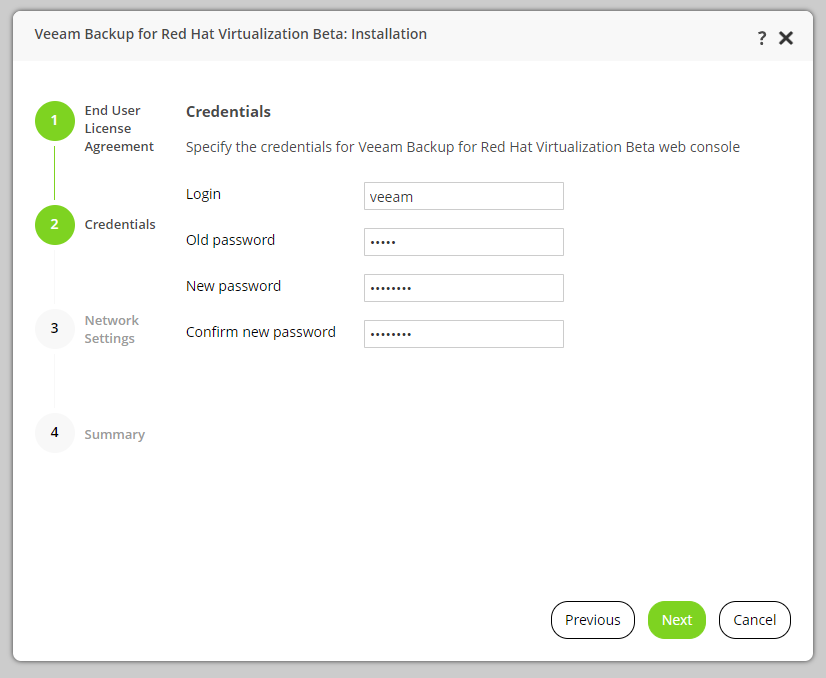
After clicking “Next” you enter the new password
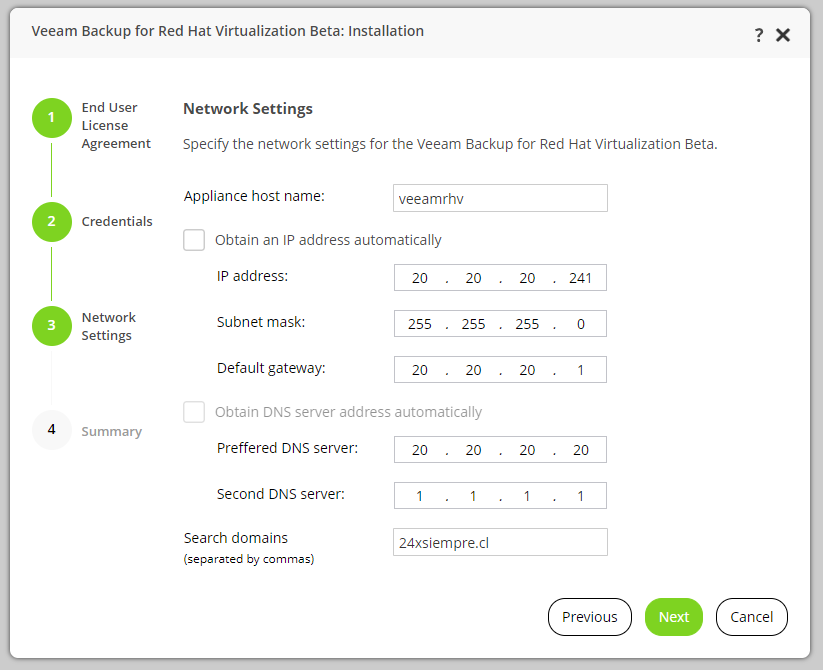
In this option you can assign server name, fixed IP address and dns, for example:
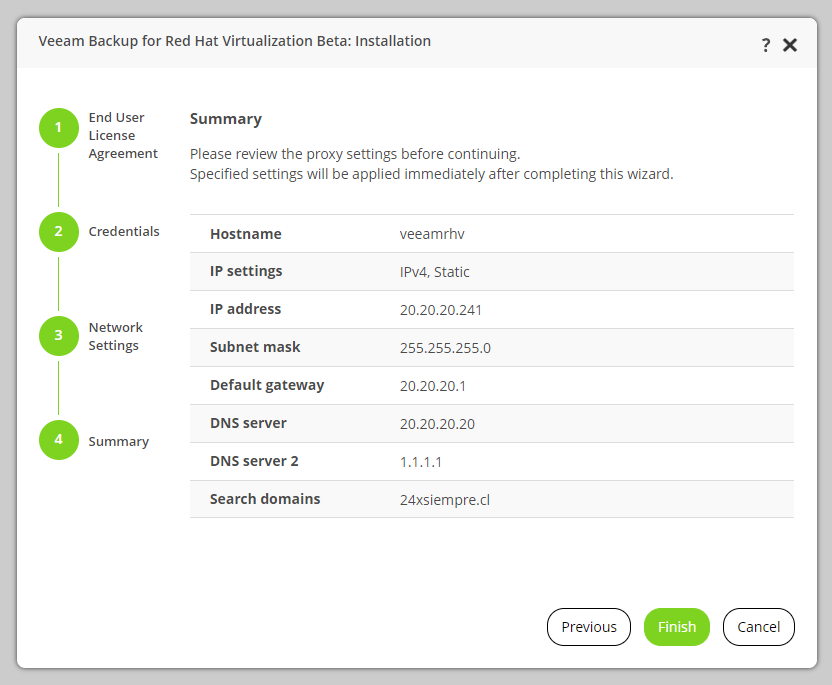
Next and we will see the summary of the configuration to finish by clicking on “Finish”
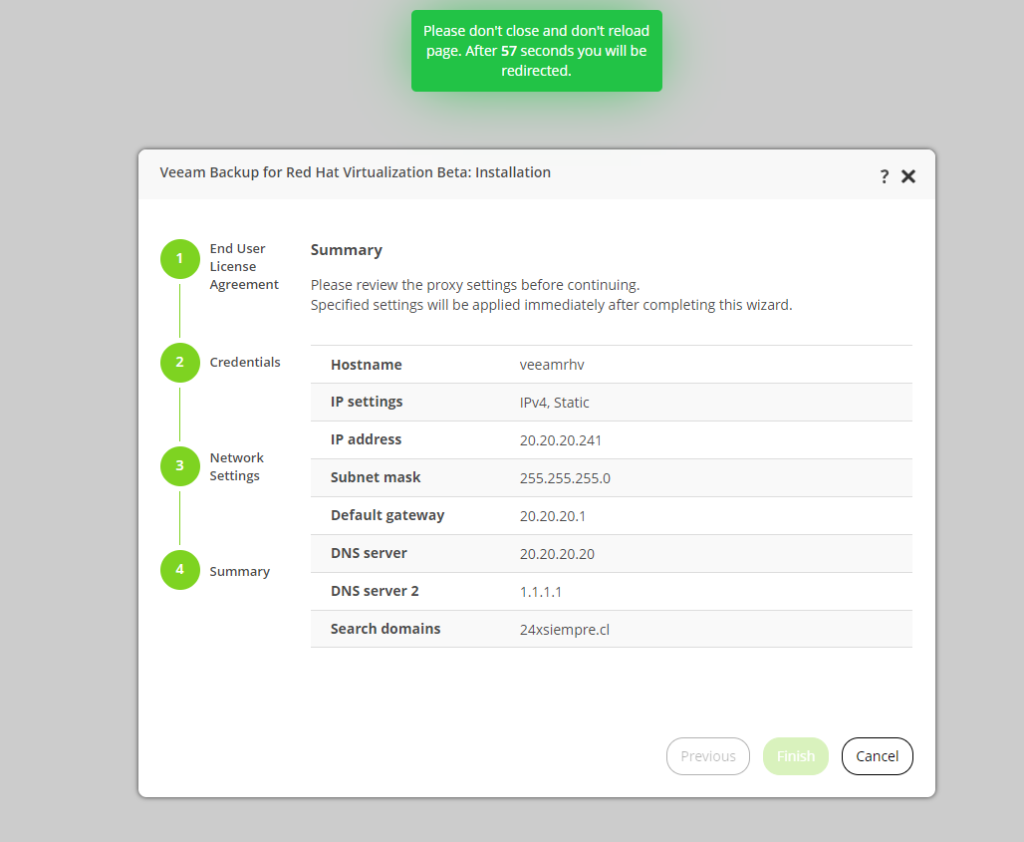
Now wait 60 seconds for the configuration to be applied and services are internally restarted
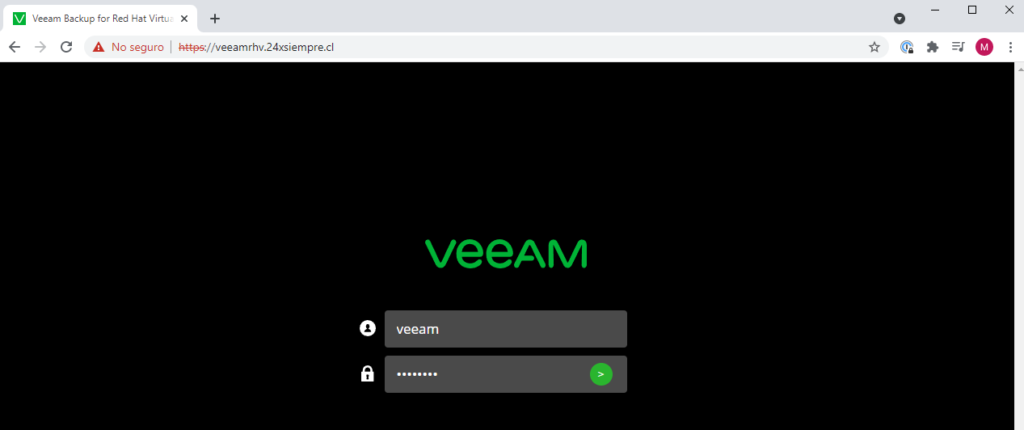
Then we enter via fqdn or IP to enter our new credentials:
Actualización Veeam Backup for RHV
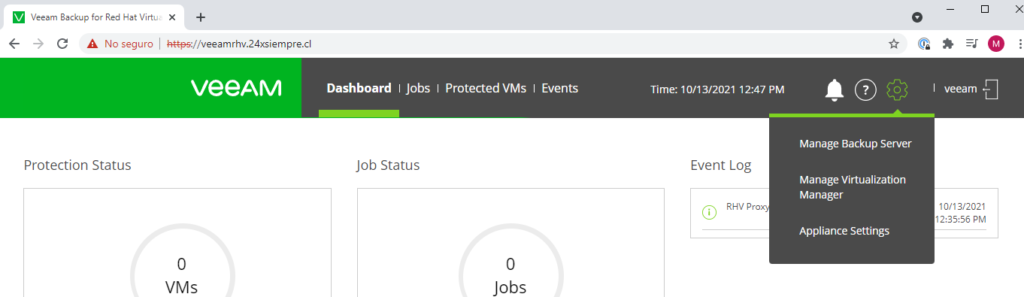
Already in the Dashboard, we must click on the configuration icon (gear) in the upper right
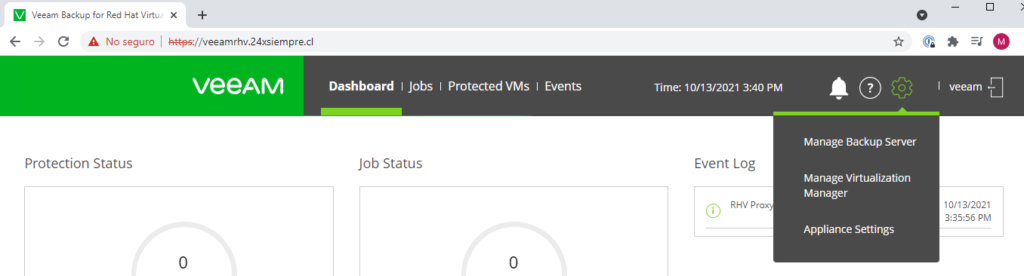
And we will select “Appliance Settings”, Here we can configure what is necessary for the appliance, in this case we will configure the “Time Zone” and then we will apply updateones

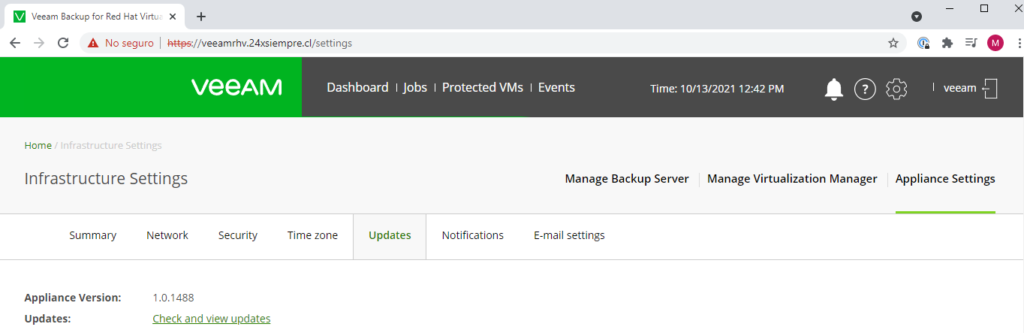
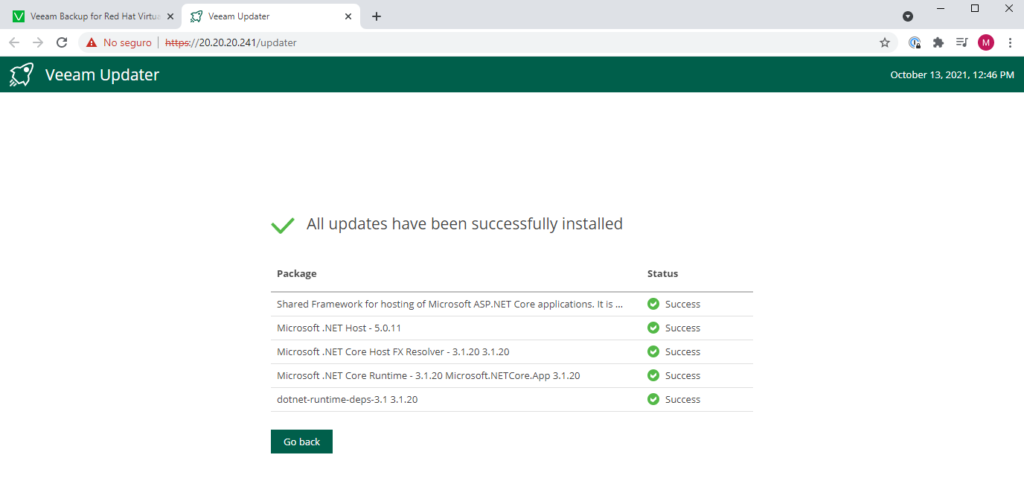
Then click on “Updates” and then click on “Check and view updates”
It will open another tab and you can check for updates.ones available or not, either from the operating system as well as from Veeam Backup for RHV
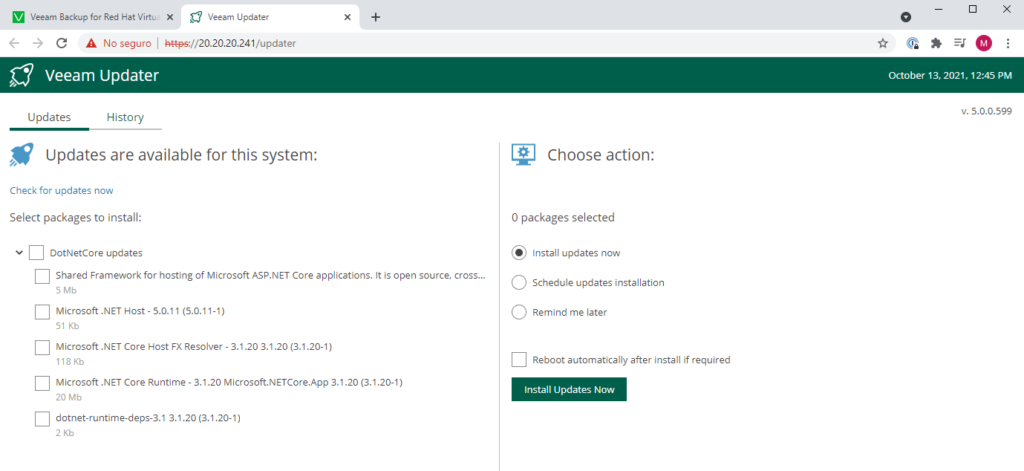
Select all updatesonethe updates are installedones
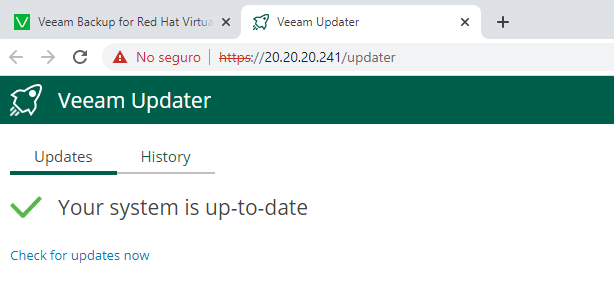
Close the update tabones and we will go on to configure Veeam Backup for RHV with the hypervisor and Veeam Backup & Replication.
Configuration Veeam Backup & Replication
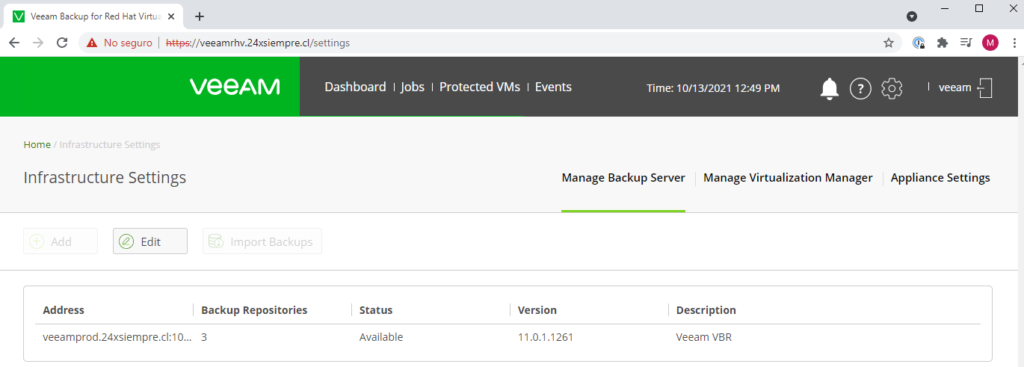
Again we go to the configuration icon (gear) and select "Manage Backup Server"
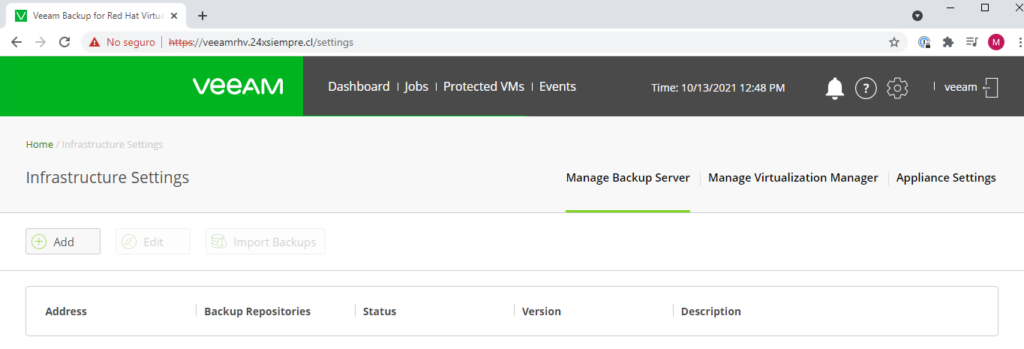
Click on “Add” and enter the information of Veeam Backup & Replication, and then click on “OK"

And it will show us the applied configuration
Configuring Red Hat Virtualization Manager
Now we will click on “Manage Virtualization Manager” and then in “Add” and enter the data, something very important is that everything must be configured to use DNS
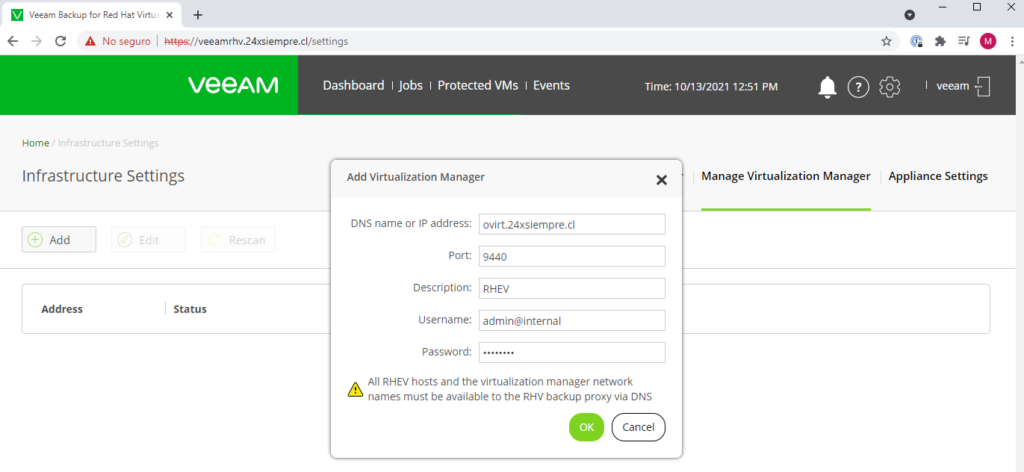
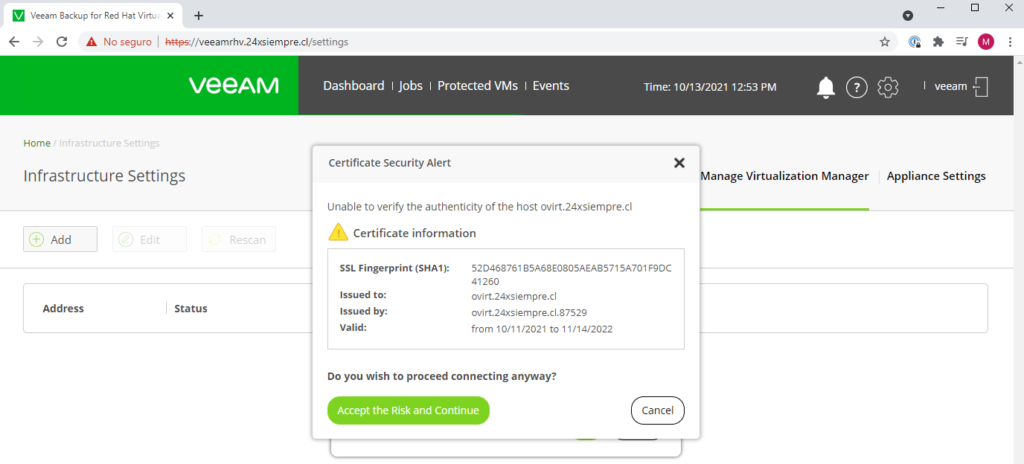
The user must always be an administrative user of the form “admin@internal” and if the first time it does not recognize the certificate, you just have to retry.
Clicking "OK” will tell us if we want to accept the certificate and proceed
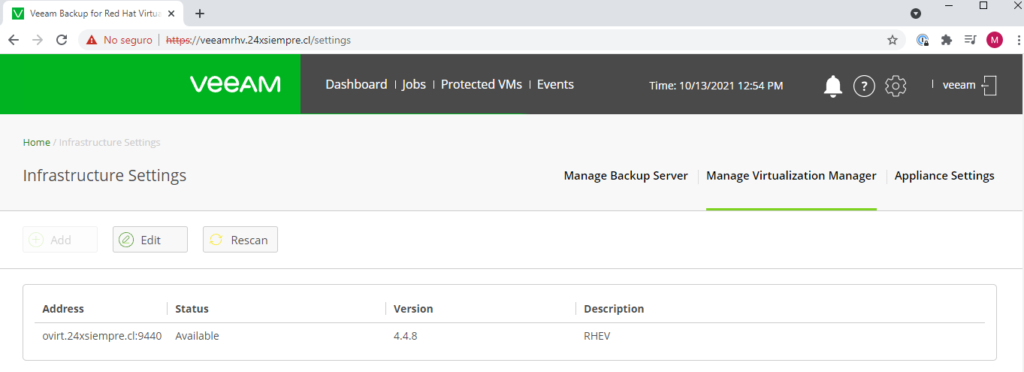
And it will show us the version of RHV and the configuration applied
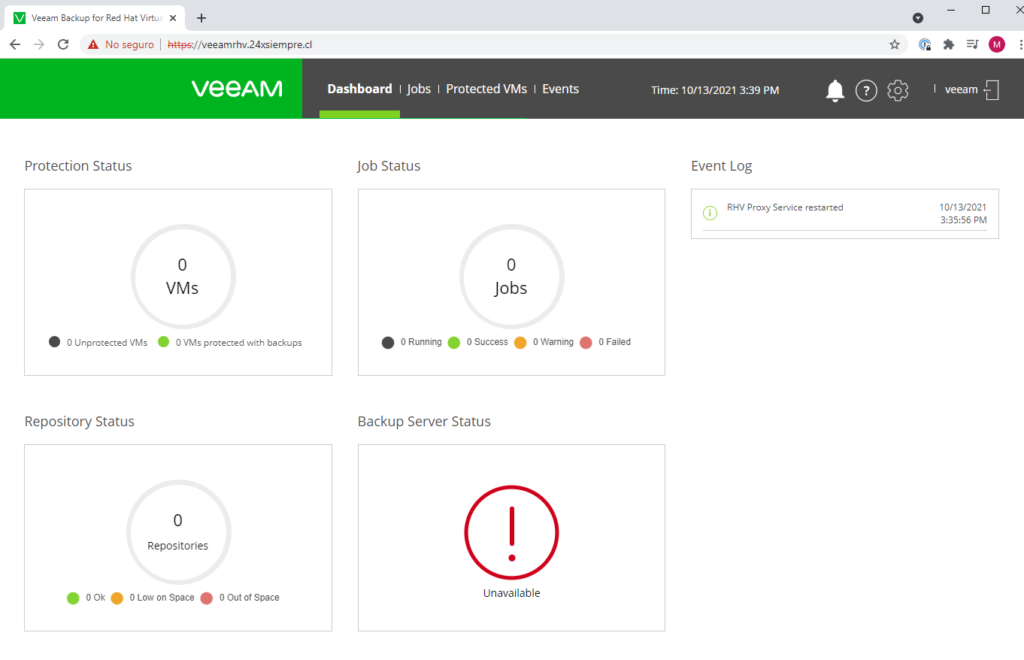
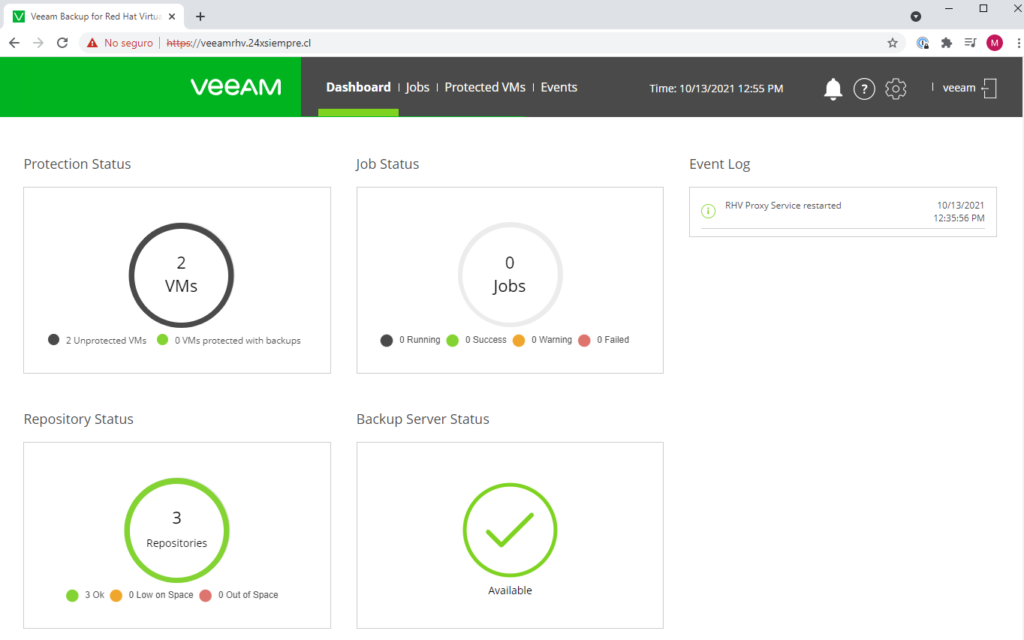
Now. We return to the "Dashboard" we will see that it recognizes the existing virtual machines and the configuration of the repository of Veeam Backup & Replication:
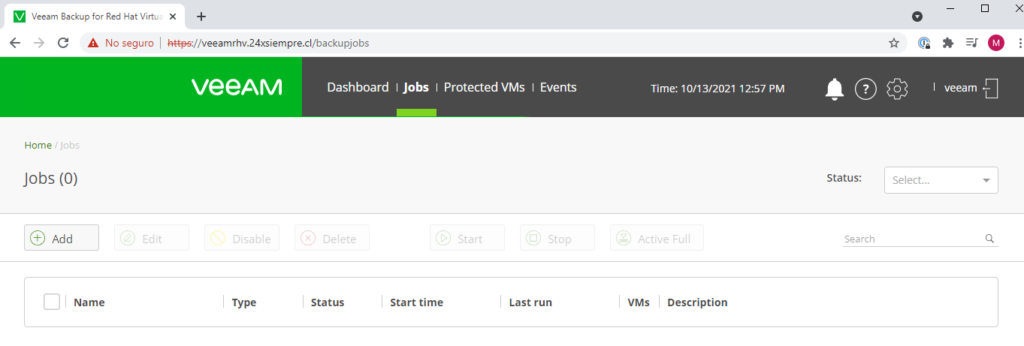
Backup Job Creation
We must select the “Jobs” menu within the “Dashboard” to enter the Jobs panel, of course we do not have any configured
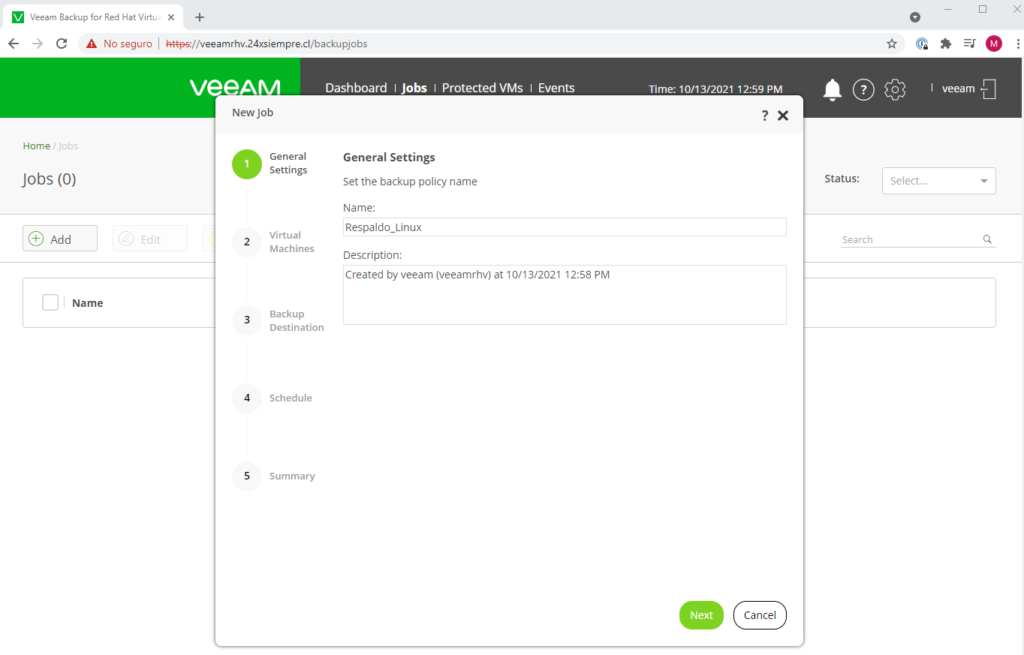
Click on “Add” and enter the name of the backup Job:
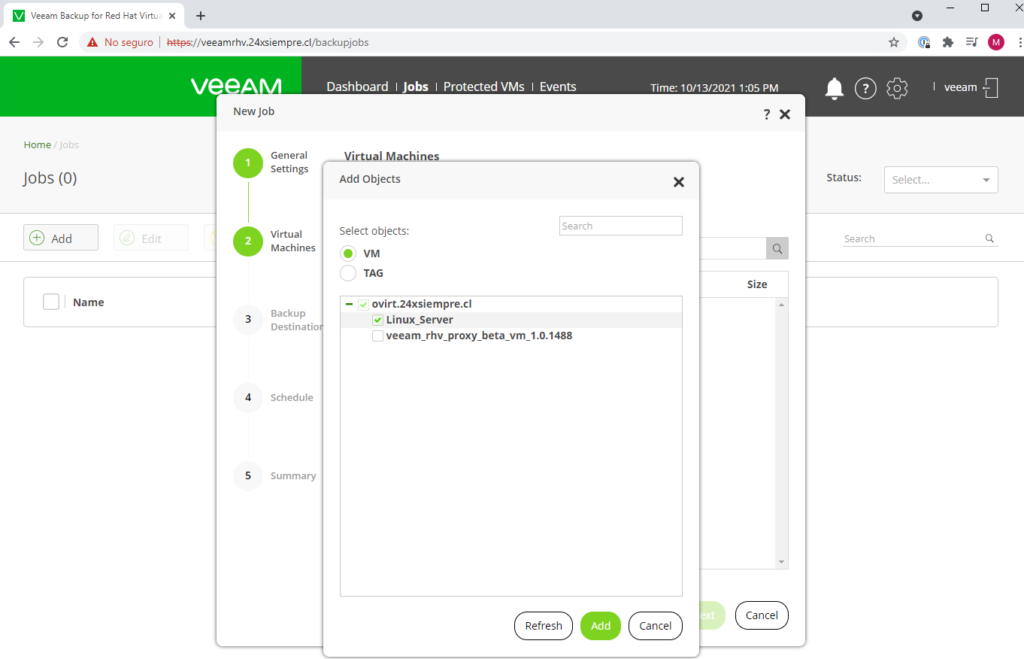
After clicking on “Next” we will go on to add virtual machines to protect
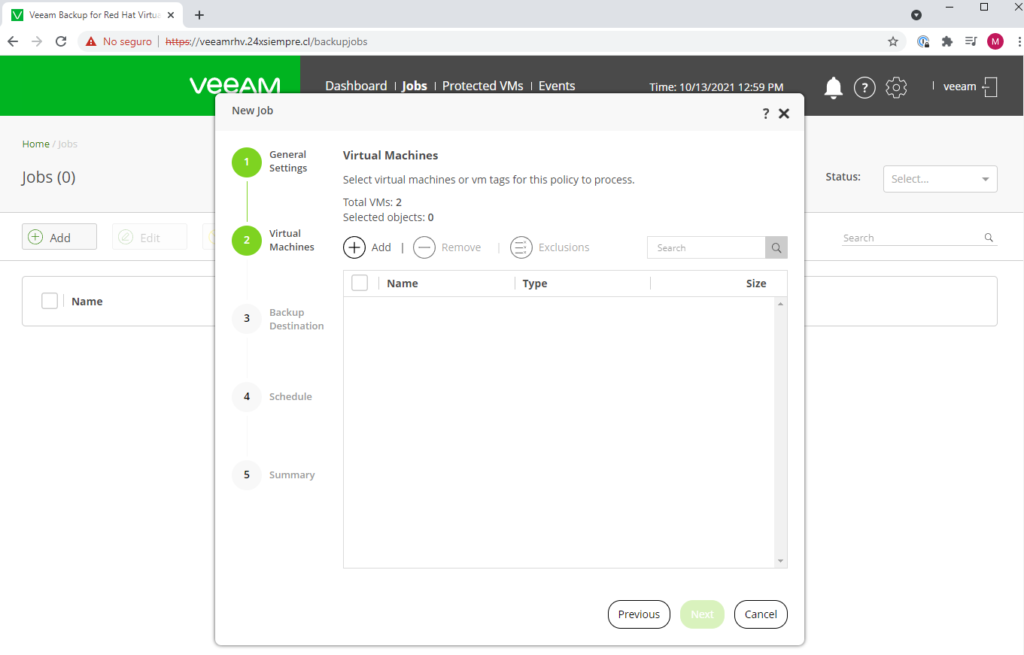
We will click on “Add” and select the machines to be backed up
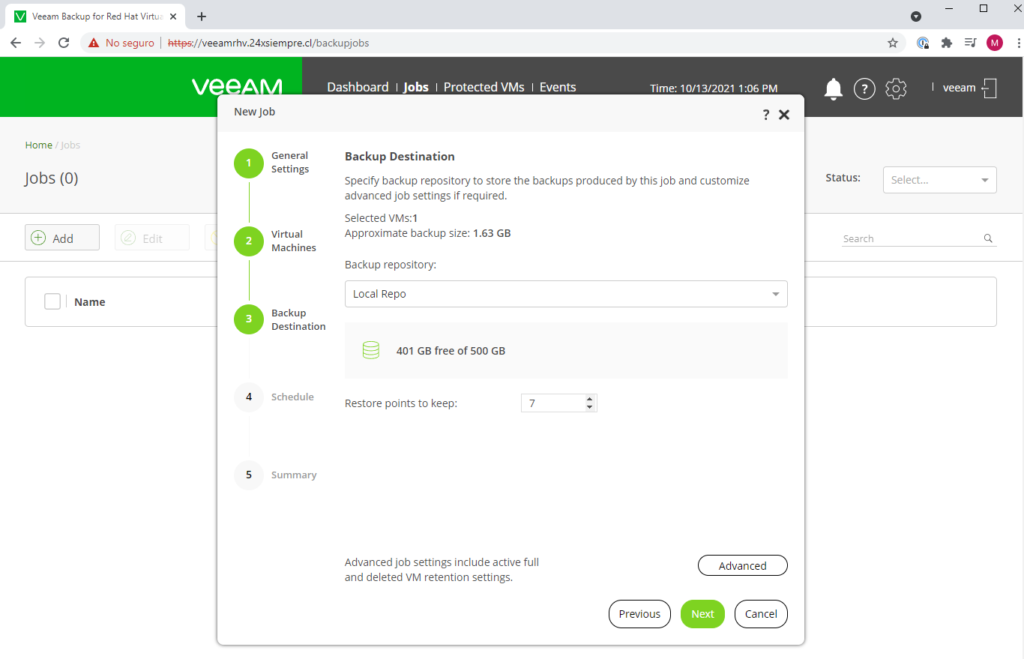
And after clicking on “Add” we will go to the configuration of the repository where the backups will be hosted, in this step, you only have to choose the repository of Veeam Backup & Replication and restore points
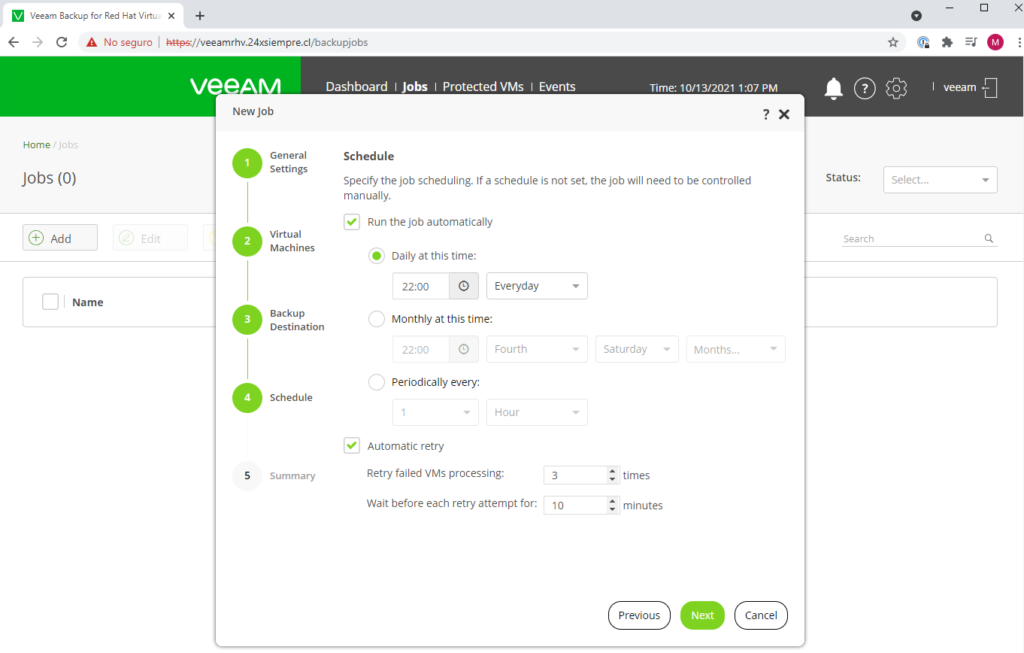
Then we go to the scheduling by clicking on "Next" and enter what is necessary
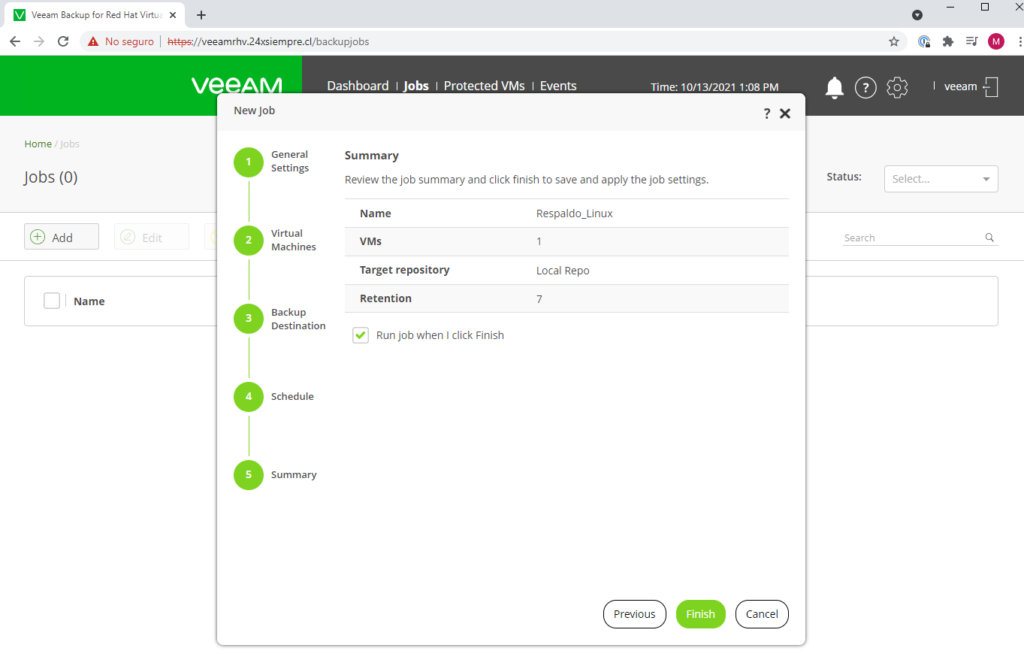
And finally, we will see the summary of the job configuration and we will start the backup job after creation by selecting “Run job when I click Finish”
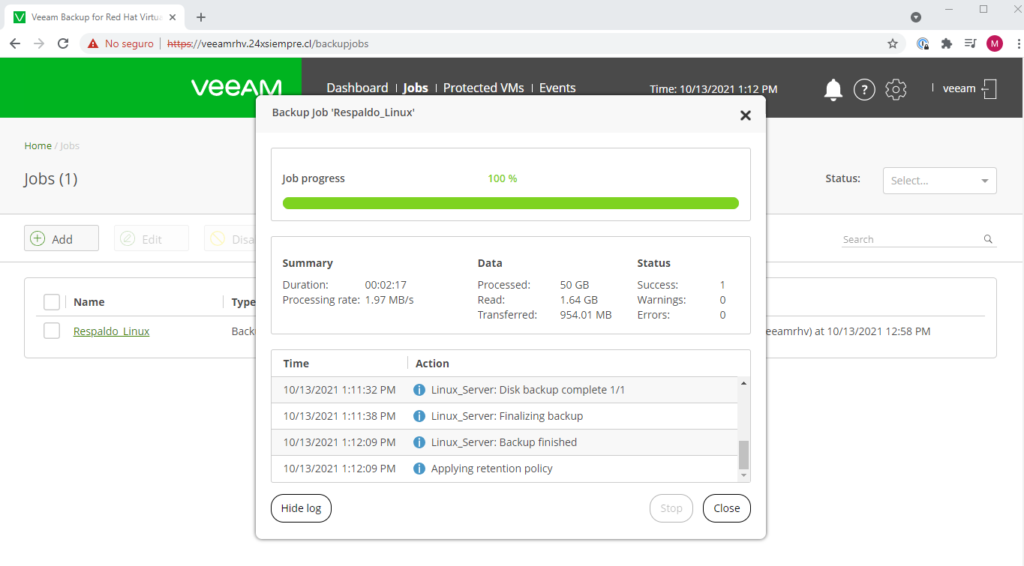
And we will see the backup statistics:

And in our console Veeam Backup & Replication We will see the backup job and if it is running or not:
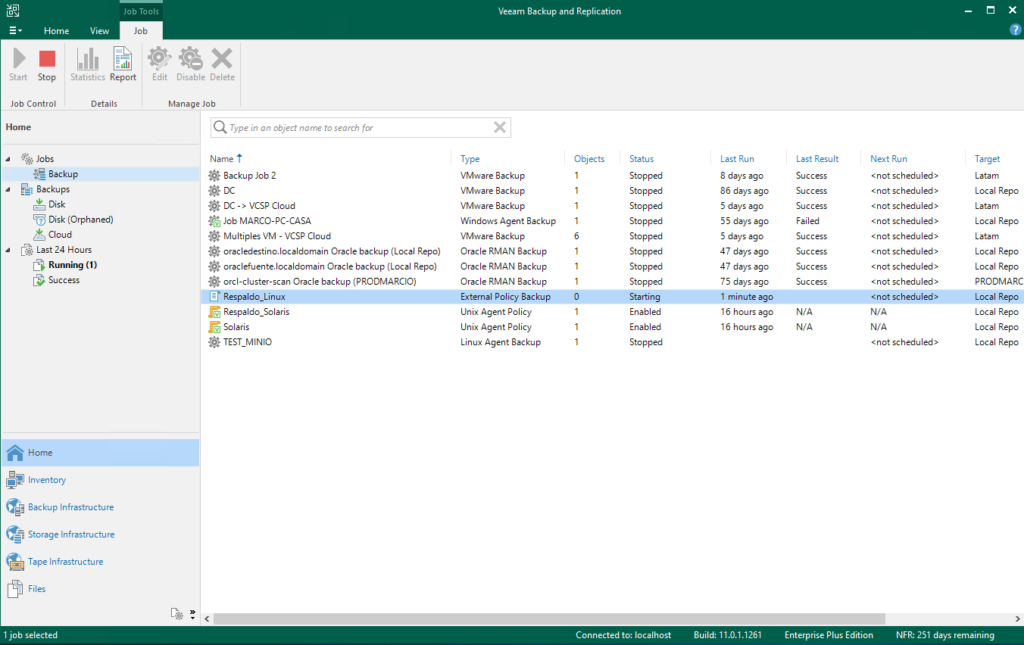
And of course the completion of the backup:
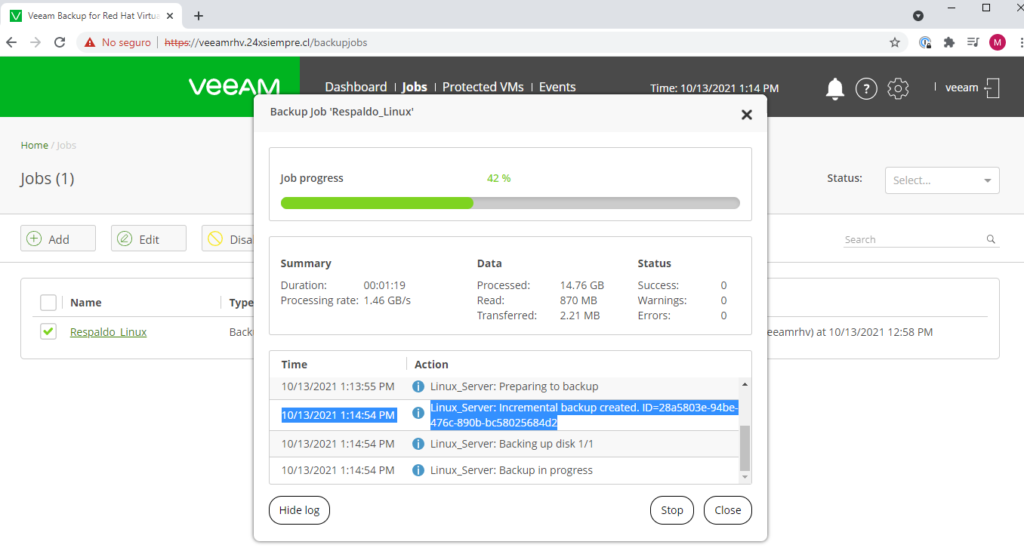
And if you want to check an incremental backup run the Job and in the statistics you will get
File Recovery or Virtual Machine
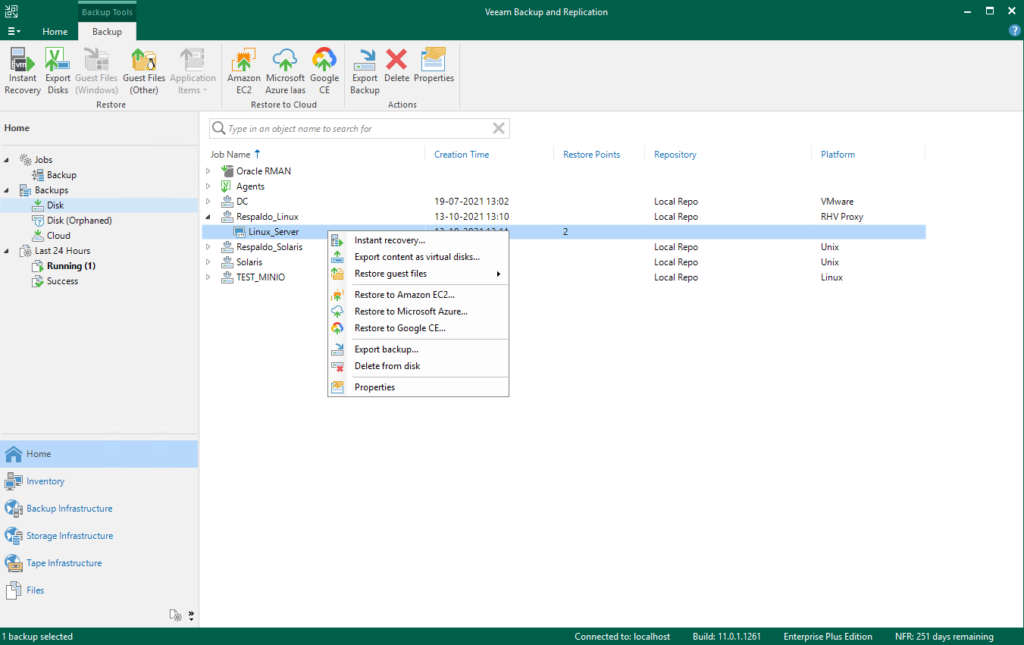
The recoveriesones can be done both from Veeam Backup & Replication as well as from the web interface of Veeam Backup for RHV, for example you can perform all recoveriesones from VBR as shown in the following image:
And from veeam Backup for RHV, clicking on “Protected VMs”, selecting the virtual machine you will see the restore points as well as the two optionsones initials to recover the complete machine or only disks:

Clicking "Restore” allows you to recover the virtual machine to the same location or another with different settings.ones and in the case of using “Disk Restore” it is possible to map the disk that you want to recover to the virtual machine that you need to use at that moment. To recover the complete machine it will show us the following
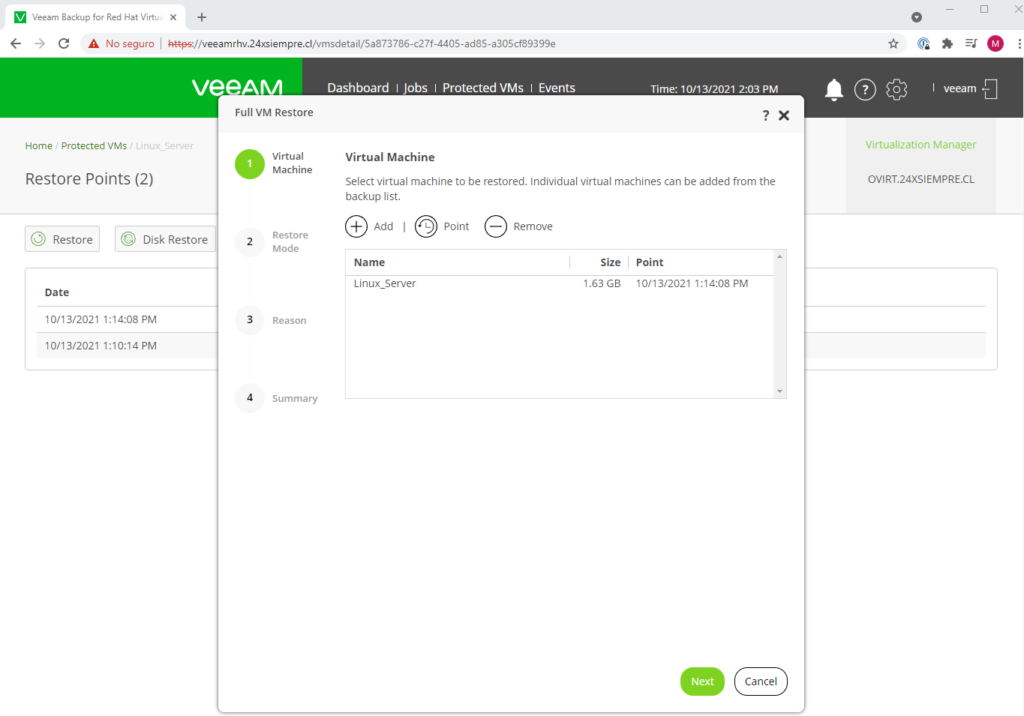
Where we can select the restore point using the “Point” icon
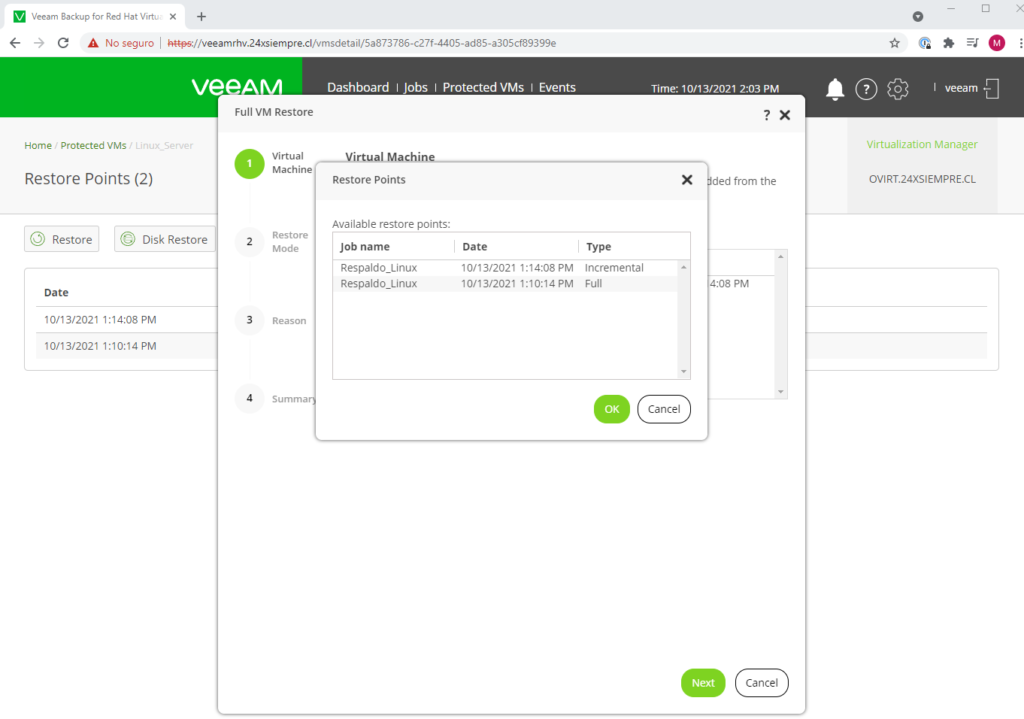
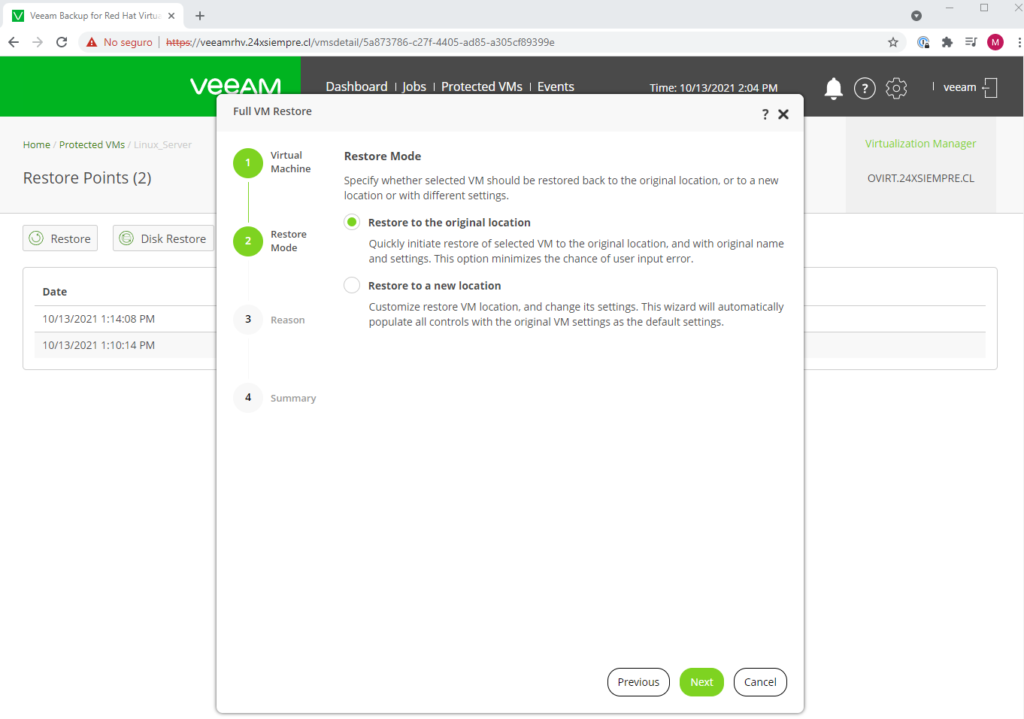
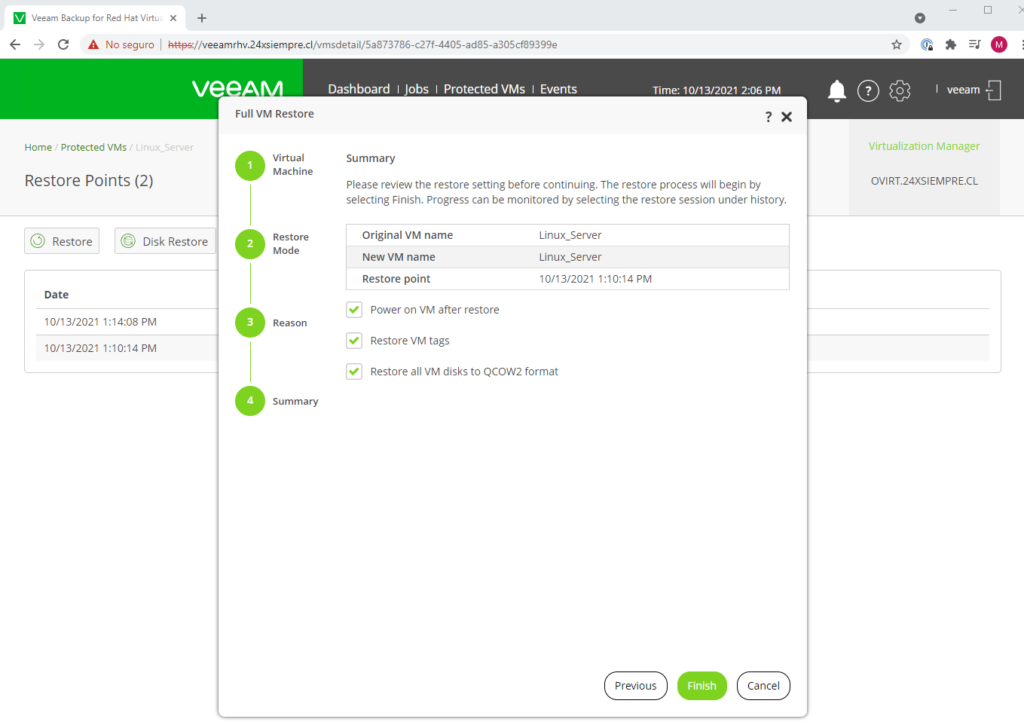
We select the point that we want to use and we go to select the restoration mode, in this case I will use “Restore to Original Location”
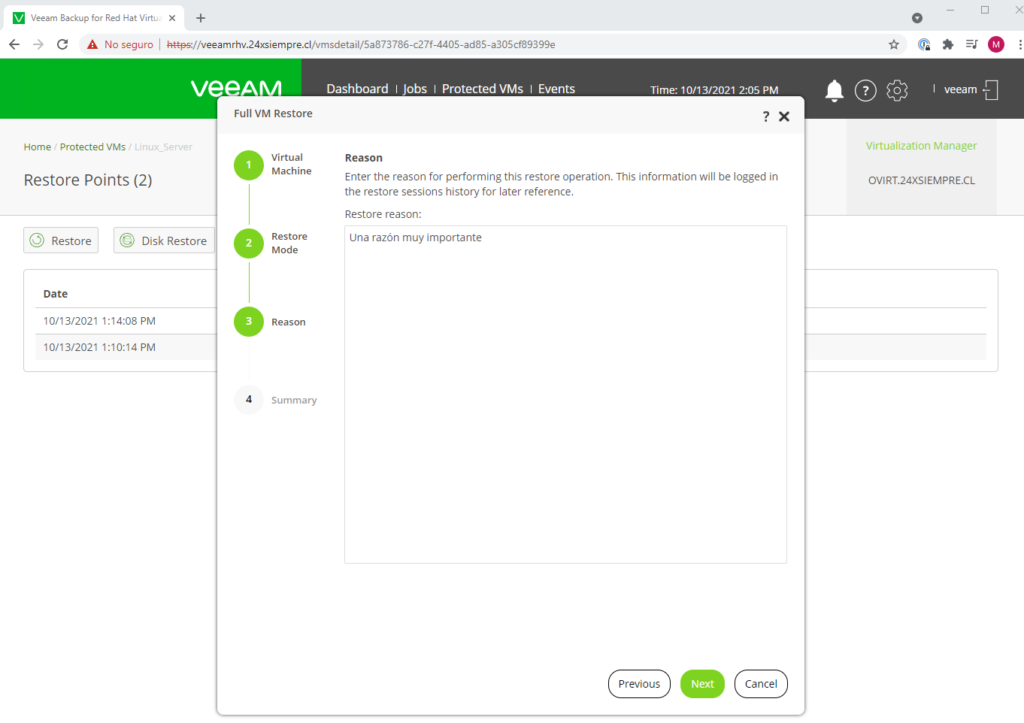
Click on “Next” and enter the reason for the restoration
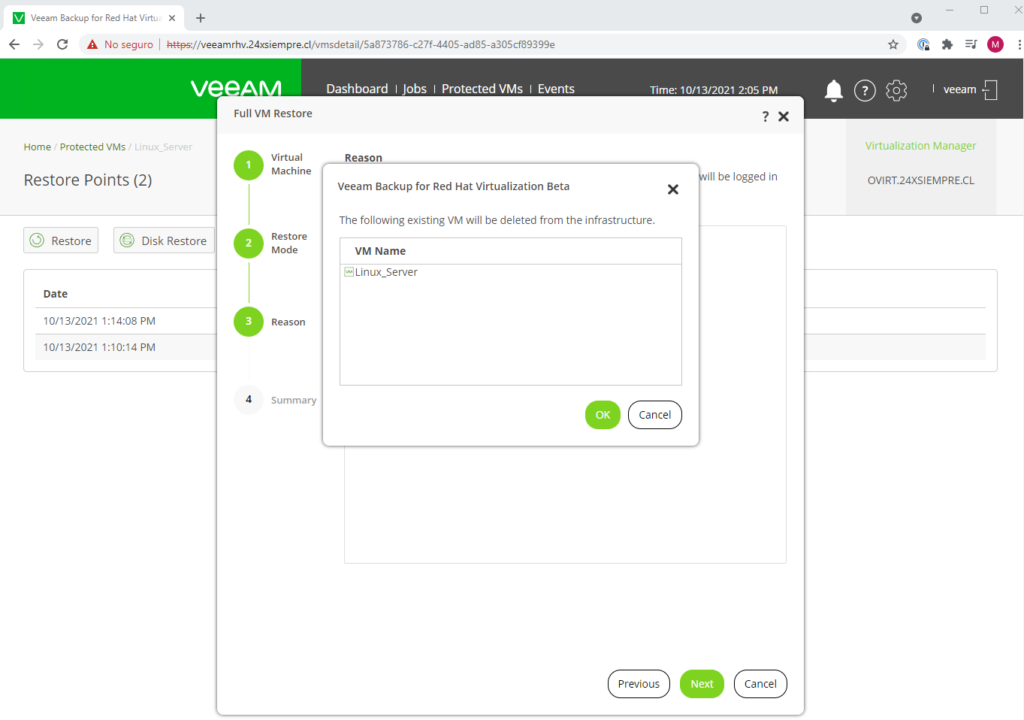
It will indicate that the current virtual machine will be removed from the virtual infrastructure to proceed with the recovery:
And we will select to power on the VM after recovering:
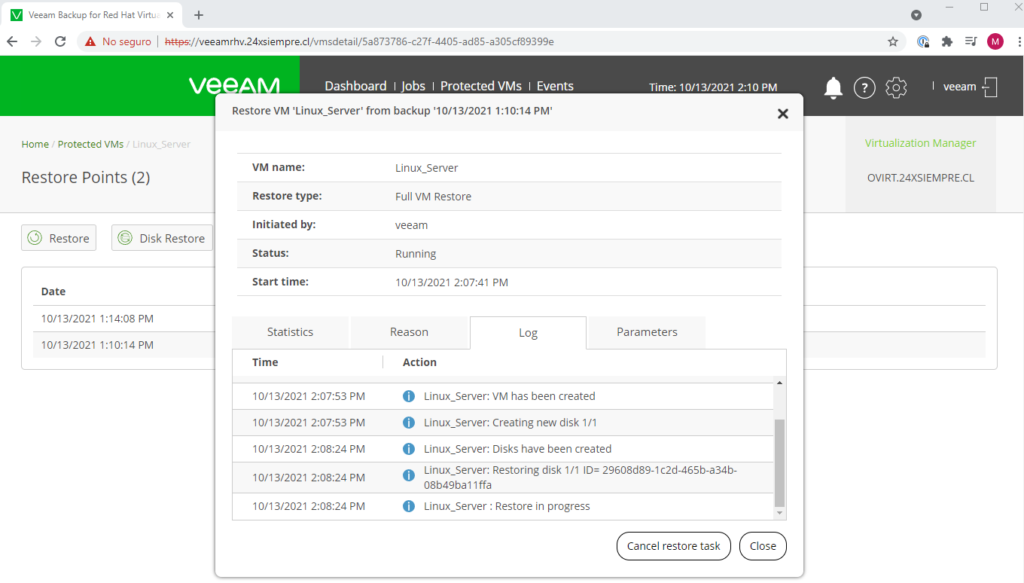
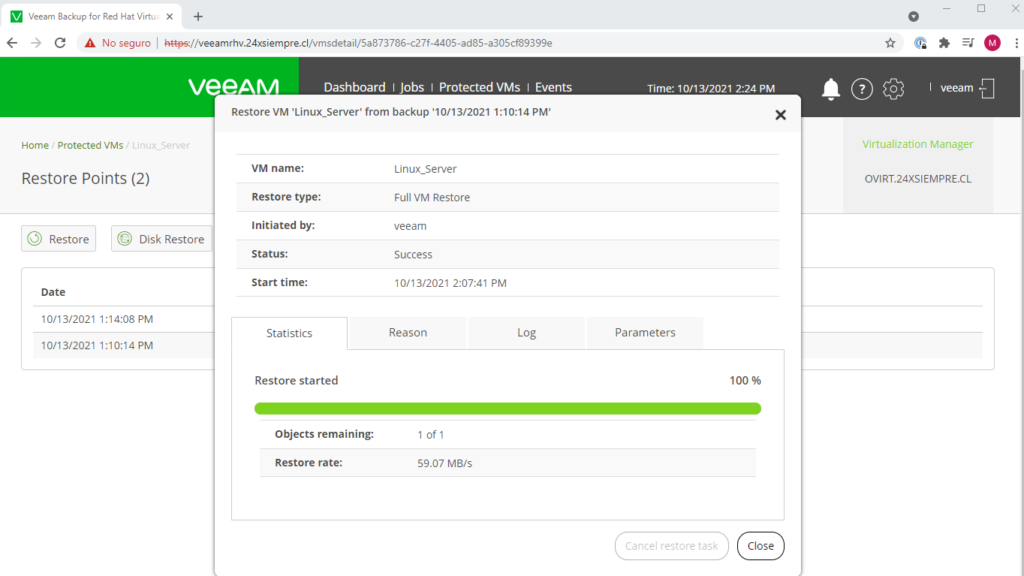
And we will see the recovery statistics:
Recommendations
It is very important to read the limitationsones of the disks, since in order to use native incremental backups from Red Hat Virtualization, they must be in QCOW2 format, which allows the use of the CBT API as indicated
In addition, in case of any communication problem between the solutionsoneyes you can review
And for cases when incremental backup is disabled throughout the system or you have disks without enabling incremental backup, the "Enable Incremental Backup" option should be visited
Finally, if you do not enable the previous option, you can also protect your virtual machines with Veeam Backup for Red Hat Virtualization.