In this guide we will review the installation and configuration of a cluster Kubernetes on Ubuntu 20.04 using containerd, calico, performing the integration via vSphere CSI (Container Storage Interface) to provide the persistent volumes for the containers that will work in the cluster. We will also use MetalLB as a load balancer to access our services.
Introduction
If you are already here, it is possible that you are starting or you already know what it is Kubernetes (k8's), what is it for or what is its main function. Even so, it is always good to check the official documentation to know the new versions.ones, features and support kubernetes, containerd, calico, MetalLB and the CSI drivers, where in this case, we are going to use vSphere CSI to take advantage of the benefits of this integration.
- https://kubernetes.io
- https://containerd.io
- hhttps://www.projectcalico.org
- https://metallb.universe.tf/
- https://vsphere-csi-driver.sigs.k8s.io/
So for the installation of the cluster we are going to use 4 virtual machines, with the default installation of the Ubuntu server 20.04.2 image. It is important to point out that this is for a laboratory environment, even so if you want to go to production you must always have at least 3 master nodes to achieve the high availability necessary for the management of kubernetes.
Servers
For this guide, we will use the following requirements and machines:
| Name | CPU | RAM | Disc | HWVersion | You advanced | IP |
| master prd | 4vcpu | 8G | 30gb | Version 15 or higher | disk.EnableUUID = TRUE | 40.40.40.206 |
| workerprd01 | 2vcpu | 4G | 30gb | Version 15 or higher | disk.EnableUUID = TRUE | 40.40.40.204 |
| workerprd02 | 2vcpu | 4G | 30gb | Version 15 or higher | disk.EnableUUID = TRUE | 40.40.40.203 |
| workerprd03 | 2vcpu | 4G | 30gb | Version 15 or higher | disk.EnableUUID = TRUE | 40.40.40.202 |
For the names always use dns or alternatively add them in the host table of each server, for this guide I use my internal dns for name management. Regarding the version of the virtual hw, it is necessary that must be from the version 15 which is equivalent to the version of vSphere 6.7 U2 or a higher version, in this case we will be configuring it with the version of hw 18 since I have vSphere 7U2 installed and lastly, very importantly, each virtual machine must be configured with the advanced parameter disk. EnableUUID since they are the necessary requirements to use vSphere CSI. They must also have internet access.
Cluster Installation Kubernetes
We validate in ALL servers are fully up to date after installation
sudo apt update
sudo apt -y upgrade && sudo reboot
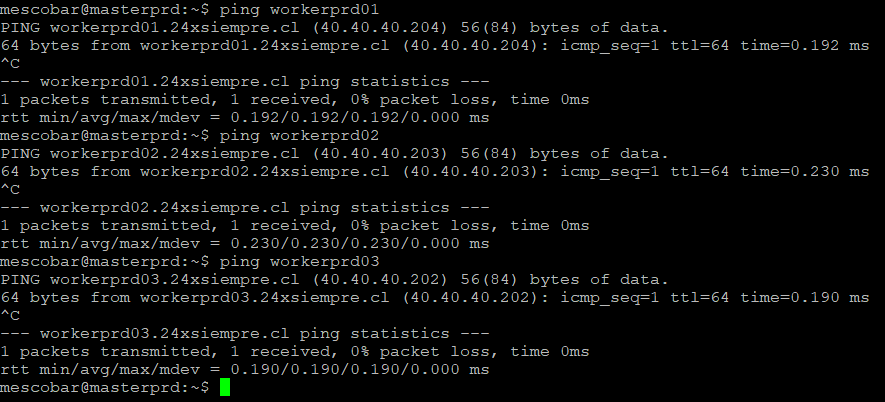
Our coneWe connect again via SSH with our servers and make sure they respond by dns
now we will go to the installation of some necessary packages and the configuration of the repository for apt and later an update of the apt repositories
sudo apt -y install curl apt-transport-https
curl -s https://packages.cloud.google.com/apt/doc/apt-key.gpg | sudo apt-key add -
echo "deb https://apt.kubernetes.io/ kubernetes-xenial main" | sudo tee /etc/apt/sources.list.d/kubernetes.list
sudo apt update
Now we will move on to installing the important packages for the configuration and administration of kubernetes,
sudo apt -y install vim git curl wget kubelet kubeadm kubectl containerd
sudo apt-mark hold kubelet kubeadm kubectl containerd
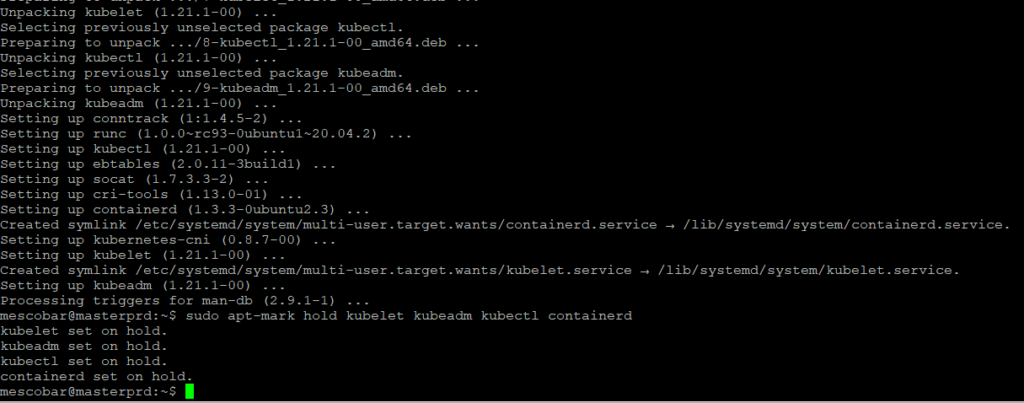
sudo apt-mark hold is so that packages are not automatically removed or upgraded.
Disable swapping
As a requirement for the cluster of kubernetes it is necessary to disable swap, therefore with the following commands we will do it
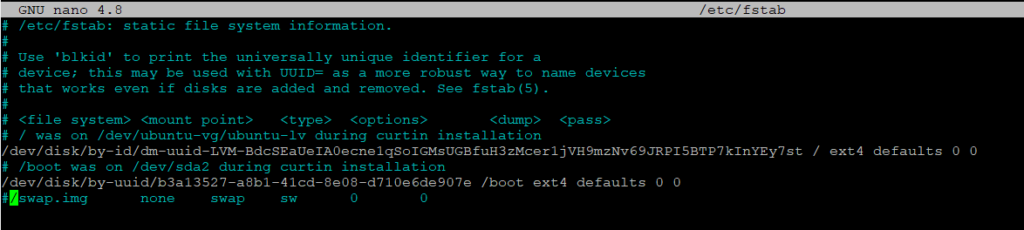
sudo swapoff -a
sudo nano /etc/fstab
With the first command swap is disabled and in the second it comments the line in fstab so that when it is restarted it is not activated again, so it would look like this
ContainerD Configuration
Now it is necessary to configure some modules necessary for the operation of ContainerD
cat <<EOF | sudo tee /etc/modules-load.d/containerd.conf
overlay
br_netfilter
EOF
With the previous command we are generating the containerd.conf file in the path so that it loads the overlay and br_netfilter modules, after that we will activate the changes with the following commands:
sudo modprobe overlay
sudo modprobe br_netfilter
And we can validate the configuration with the command
lsmod | grep br_netfilter

Now according to the needs of ContainerD we will make some configurationonenecessary s that involve kernel parameters for proper operation
cat <<EOF | sudo tee /etc/sysctl.d/99-kubernetes-cri.conf
net.bridge.bridge-nf-call-iptables = 1
net.bridge.bridge-nf-call-ip6tables = 1
net.ipv4.ip_forward = 1
EOF
And with the following command we apply the changes
sudo sysctl --system
Finally we carry out the configuration and end of containerd
sudo mkdir -p /etc/containerd
containerd config default | sudo tee /etc/containerd/config.toml
sudo systemctl restart containerd
With the first command the folder is generated and then with the second command leave the configuration file in the path and finally we restart the services and make sure that they start at boot.
Master Node Configuration
In this stage soil we will perform the commands in the node MASTER (MPS) to start with the necessary configuration. Therefore with the following command in the master node we are going to initialize kubernetes
sudo kubeadm init
This command can take some time, so you just have to go make a coffee. When the execution finishes, it will show us the following:
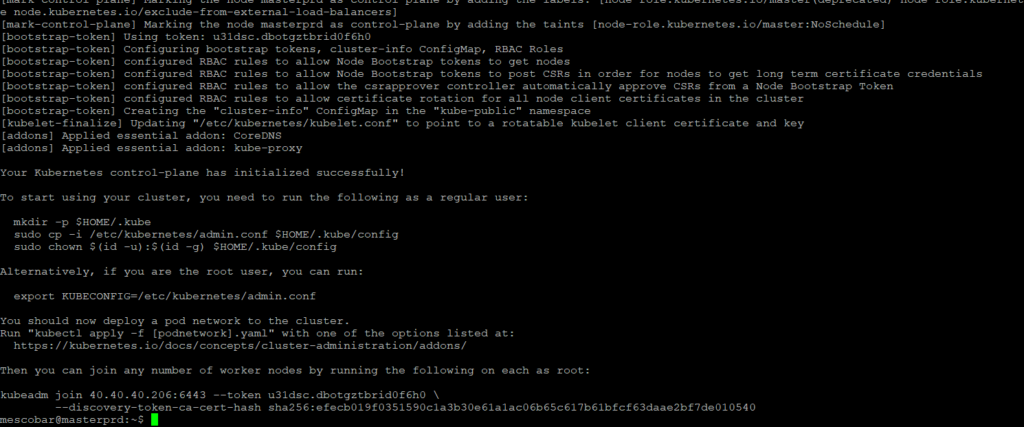
It is important to note that now the application is asking us to perform the following steps:
To start using your cluster, you need to run the following as a regular user:

  mkdir -p $HOME/.kube
  sudo cp -i /etc/kubernetes/admin.conf $HOME/.kube/config
  sudo chown $(id -u):$(id -g) $HOME/.kube/config

Alternatively, if you are the root user, you can run:

  export KUBECONFIG=/etc/kubernetes/admin.conf

You should now deploy a pod network to the cluster.
Run "kubectl apply -f [podnetwork].yaml" with one of the options listed at:
  https://kubernetes.io/docs/concepts/cluster-administration/addons/

Then you can join any number of worker nodes by running the following on each as root:

kubeadm join 40.40.40.206:6443 --token u31dsc.dbotgztbrid0f6h0 \
        --discovery-token-ca-cert-hash sha256:efecb019f0351590c1a3b30e61a1ac06b65c617b61bfcf63daae2bf7de010540
The first part generates a hidden folder in the user's home to store the configuration file of kubernetes and with which we can conectar and the export is to leave the configuration file as an environment variable and it is possible to coneus easily. And last and very important is the kubeadm join command which is used to add the worker nodes to the master.
To leave this configuration persistent we must do the following:
nano .bashrc
And we add at the end of the file
export KUBECONFIG=$HOME/.kube/config
So every time we enter the server by ssh we will have the environment variable configured for conetell us
Worker Node Configuration
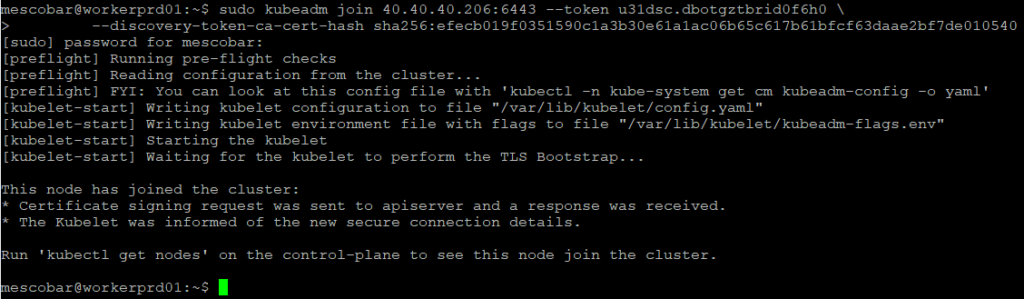
At this stage the commands should be executed only on the worker nodes Therefore, as we saw previously, we must execute the command that shows us on the screen, which is unique for each cluster in my case:
sudo kubeadm join 40.40.40.206:6443 --token u31dsc.dbotgztbrid0f6h0 \
        --discovery-token-ca-cert-hash

And when you run it on each of the worker nodes you will see the following result:
Cluster Configuration Review
Now we return to the ssh session of the master node or we reconeWe connect to the master node and execute the following command
kubectl get nodes -o wide
With which we will see if the worker nodes were added to the cluster and their status:

As we see in the previous image, we have all the information of the cluster, the only difference is that in the status of the nodes “NotReady” appears, this status appears since we have not configured the cluster network kubernetes where we will use in this case Project Calico.
Calico Cluster Network Configuration
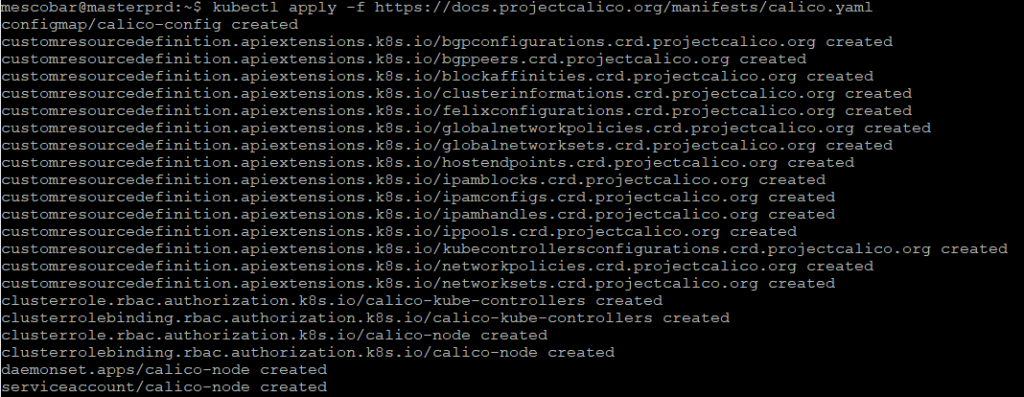
To install calico on our cluster kubernetes, we just have to execute the following command in our MASTER node
kubectl apply -f https://docs.projectcalico.org/manifests/calico.yaml
Then, we check our cluster again with the command to validate the status
kubectl get nodes -o wide

And we already have the status in “Ready”.
MetalLB Balancer Configuration
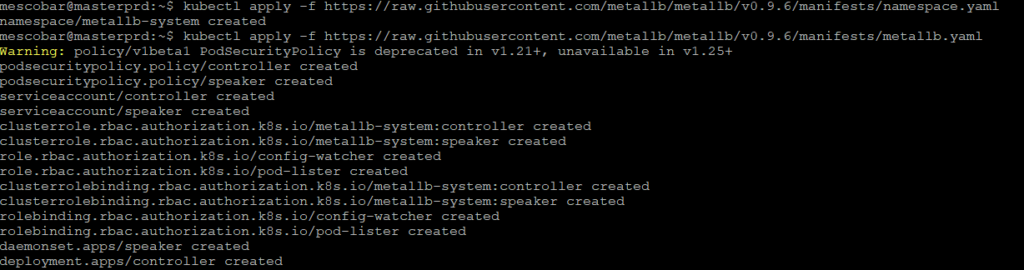
To install MetalLB in our cluster of kubernetes, we just have to execute the following commands in our MASTER node
kubectl apply -f https://raw.githubusercontent.com/metallb/metallb/v0.9.6/manifests/namespace.yaml
kubectl apply -f https://raw.githubusercontent.com/metallb/metallb/v0.9.6/manifests/metallb.yaml
The first command will generate the namespace of MetalLB and the second all the requirements for the operation
Then we will generate a random password for communication encryption.ones
kubectl create secret generic -n metallb-system memberlist --from-literal=secretkey="$(openssl rand -base64 128)"

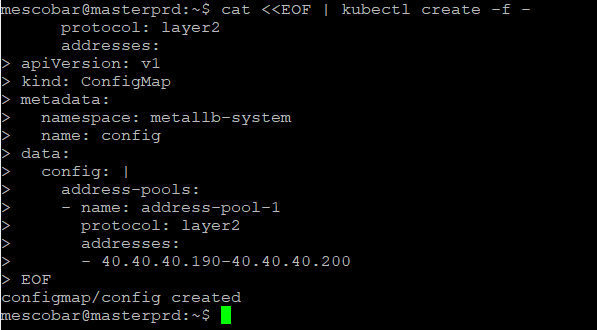
And finally we must configure the address rangeones IP that MetalLB will use to assign and be able to access the services from the network. For this we must use the following configuration
cat <<EOF | kubectl create -f -
apiVersion: v1
kind: ConfigMap
metadata:
  namespace: metallb-system
  name: config
data:
  config: |
    address-pools:
    - name: address-pool-1
      protocol: layer2
      addresses:
      - 40.40.40.190-40.40.40.200
EOF
As we see in the previous command, in my case I will be using a range of 10 addresses.ones IP of my network. If you want you can add the entire /24 network, but you must make sure that the addressones IPs are available. Then run it on your server MASTER (MPS)
vSphere CSI Configuration
To start the vSphere CSI configuration, you need to create two files with the necessary configuration for the coneConnection to vCenter:
csi-vsphere.conf
[Global]

cluster-id = "kubernetes"
#[NetPermissions "A"]
#ips = "*"
#permissions = "READ_WRITE"
#rootsquash = false

#[NetPermissions "B"]
#ips = "10.20.20.0/24"
#permissions = "READ_ONLY"
#rootsquash = true

[VirtualCenter "vcenter.24xsiempre.cl"]

insecure-flag = "true"
user = "[email protected]"
password = "PASSWORD"
port = "443"
datacenters = "24xSiempre"

# Opcional cuando configures con VSAN File Services
#targetvSANFileShareDatastoreURLs = "ds:///vmfs/volumes/vsan:52635b9067079319-95a7473222c4c9cd/"
vsphere.conf
[Global]

cluster-id = "kubernetes"

[VirtualCenter "vcenter.24xsiempre.cl"]

insecure-flag = "true"
user = "[email protected]"
password = "PASSWORD"
port = "443"
datacenters = "24xSiempre"
Now you may wonder why we are generating two files with the same content but different names? it is clearly for the first to use it as "secret" or store the Authentikation data as well as if you want to add other configurationones, such as for VSAN and the second file is for the creation of the "configmap" to store these variables and make them available to the cluster. So we create these files on the server MASTER (MPS)
nano csi-vsphere.conf
nano vsphere.conf
You save the files and we will execute them on the MASTER server
kubectl create secret generic vsphere-config-secret --from-file=csi-vsphere.conf --namespace=kube-system

kubectl create configmap cloud-config --from-file=vsphere.conf --namespace=kube-system
Now that we have configured the credentials and variables, we will configure the CSI to initially get the "ProviderID", first we must leave the nodes in "Taint" for this we will execute in the MASTER (MPS)
kubectl taint nodes --all 'node.cloudprovider.kubernetes.io/uninitialized=true:NoSchedule'
And then run the following to configure
kubectl apply -f https://raw.githubusercontent.com/kubernetes/cloud-provider-vsphere/master/manifests/controller-manager/cloud-controller-manager-roles.yaml

kubectl apply -f https://raw.githubusercontent.com/kubernetes/cloud-provider-vsphere/master/manifests/controller-manager/cloud-controller-manager-role-bindings.yaml

kubectl apply -f https://github.com/kubernetes/cloud-provider-vsphere/raw/master/manifests/controller-manager/vsphere-cloud-controller-manager-ds.yaml

And we will validate if the configuration is generated and we obtain the “ProviderID”, with the command
kubectl describe nodes | grep "ProviderID"

Now we will install the CSI driver version 2.1.1 with the following:
kubectl apply -f https://raw.githubusercontent.com/kubernetes-sigs/vsphere-csi-driver/v2.1.1/manifests/v2.1.1/vsphere-7.0u1/vanilla/rbac/vsphere-csi-controller-rbac.yaml
kubectl apply -f https://raw.githubusercontent.com/kubernetes-sigs/vsphere-csi-driver/v2.1.1/manifests/v2.1.1/vsphere-7.0u1/vanilla/deploy/vsphere-csi-node-ds.yaml
kubectl apply -f https://raw.githubusercontent.com/kubernetes-sigs/vsphere-csi-driver/v2.1.1/manifests/v2.1.1/vsphere-7.0u1/vanilla/deploy/vsphere-csi-controller-deployment.yaml
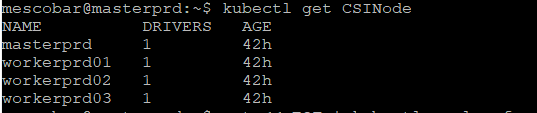
kubectl get CSINode
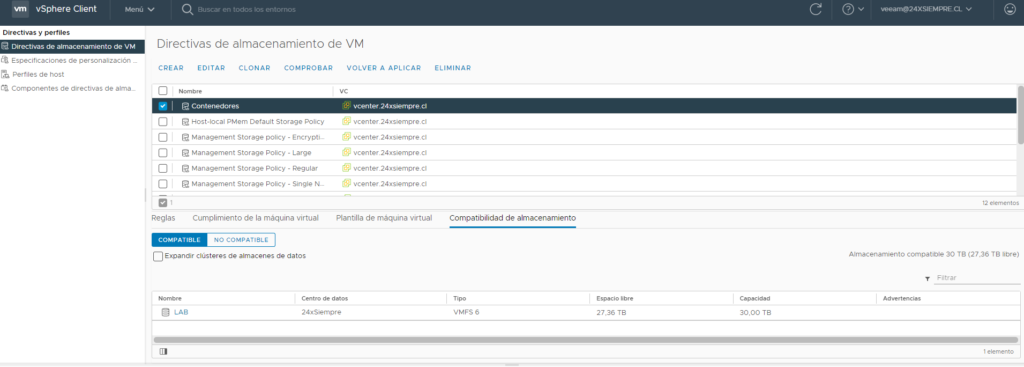
Since we have our driver installed we must create the Storage Class to use our vSphere datastore and generate the volumes or First Class Disk, before this we must generate a Storage Policy Name in vCenter associated with the datastore that we will use to host the persistent volumes
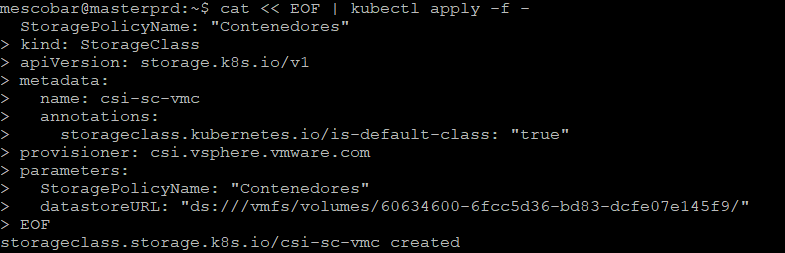
And then we generate the Storage Class
cat << EOF | kubectl apply -f -
kind: StorageClass
apiVersion: storage.k8s.io/v1
metadata:
  name: csi-sc-vmc
  annotations:
    storageclass.kubernetes.io/is-default-class: "true"
provisioner: csi.vsphere.vmware.com
parameters:
  StoragePolicyName: "Contenedores"
  datastoreURL: "ds:///vmfs/volumes/60634600-6fcc5d36-bd83-dcfe07e145f9/"
EOF
In datastoreURL you must enter the address found in the summary of the datastore in vCenter

and you will have the result
Now we will check that the Storage Class is correct and we will create a test disk
kubectl get sc

Now we create a disk of 5 gigabytes
cat << EOF | kubectl apply -f -
apiVersion: v1
kind: PersistentVolumeClaim
metadata:
  name: pruebasc
spec:
  accessModes:
    - ReadWriteOnce
  resources:
    requests:
      storage: 5Gi
  storageClassName: csi-sc-vmc
EOF
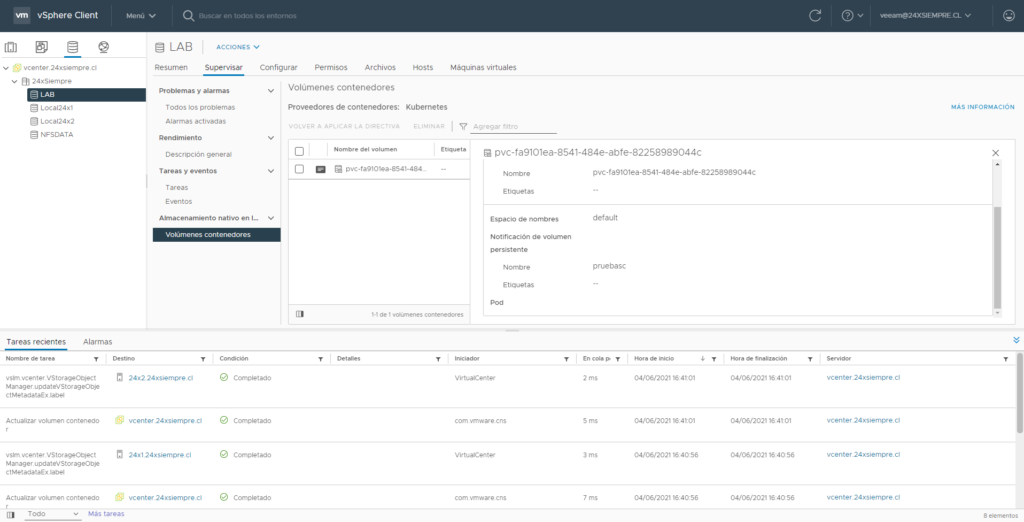
When executing the above, we can see the creation of the disk in vCenter
And with this you have a cluster kubernetes using the vSphere platform as storage for persistent volumes, and then back it up with Kasten, which in a future post we will review how to support multiple clusters using Kasten multi-cluster