One of the most used platforms in companies for the management, operation and maintenance of Containers is Red Hat OpenShift, in the following guide we will review how to protect our containers in Red Hat OpenShift 4.x integrated VMware vSphere through its Container Storage Interface with Kasten K10 Platform, configuring routes to access the administration interface of K10 and using Minio S3 as backup destination.
Initial Steps
As always we must start with the review of the official documentation of the applications.oneYeah, we'll start with Red Hat first. OpenShift 4.7 (Latest version as of the date of this guide):
Where the documentation indicates the requirements and form of installation of Red Hat OpenShift 4.7 via IPI (Installer Provisionaloned Infrastructure) where the installer is executed and we only have to enter the data requested from VMware vCenter. In this post I will not explain how to install OpenShift since with IPI it is very easy to do it. If we must review a very important part of the documentation of OpenShift in relation to the volumes
The default Storage Class that is configured in OpenShift via IPI is named "thin" using kubernetes.io/vsphere-volume where by requiring a persistent volume for the containers, this storage class will provide us with independent and persistent disks from vSphere, therefore, as we know, we will not be able to take snapshots of those volumes, that is why it is important to review the documentation that precedes us.

And of course review the documentation of Kasten K10 Platform, currently at version 3.0.9 (as of the date of this post) for the requirements and installation steps in Red Hat OpenShift
https://docs.kasten.io/latest/index.html
Installation Kasten OpenShift 4.x
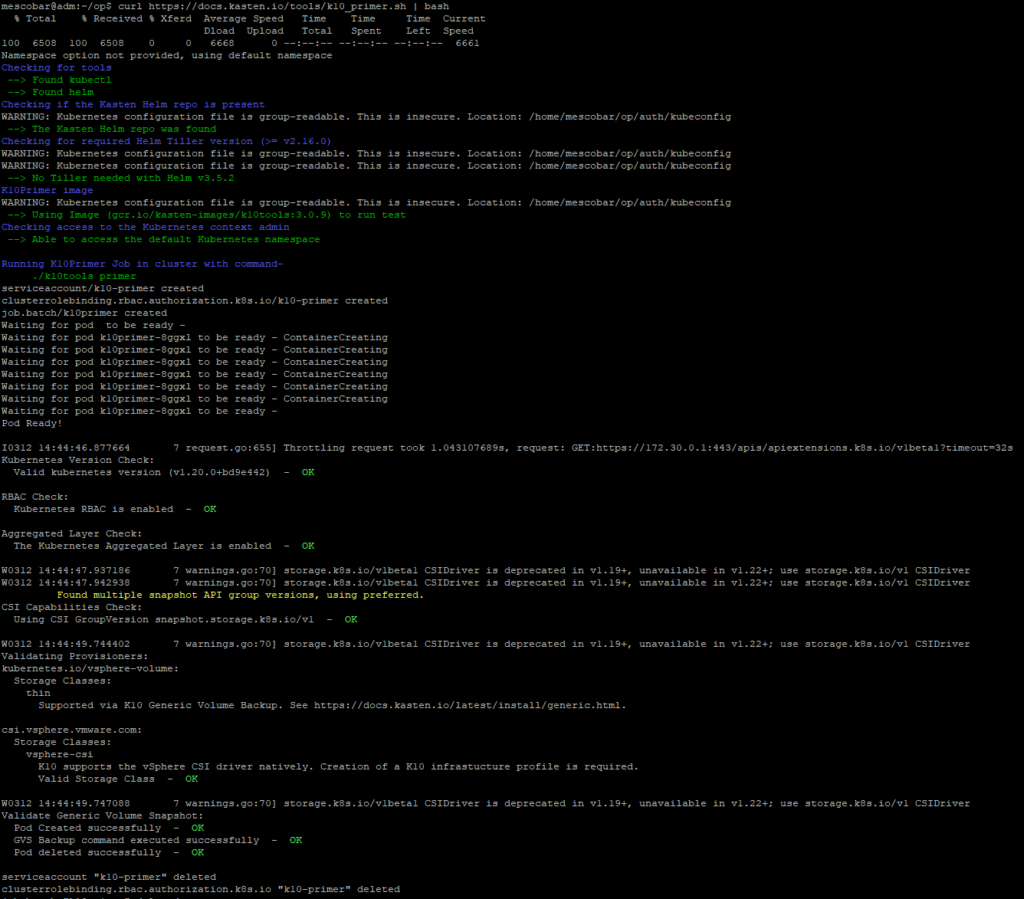
Before installing Kasten in any distribution Kubernetes, we must always execute a script to perform checks prior to installation and validate if we have support for the features of Kasten K10, with the following command:
curl https://docs.kasten.io/tools/k10_primer.sh | bash
If you do not find the helm executable, you can see the installation of the prerequisites in the link in the installation part of Kasten:
https://24xsiempre.com/veeam-kasten/
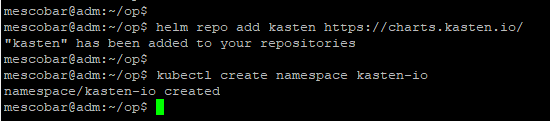
Now since we have the prerequisites, helm, kubectl, vSphere CSI (in this case version 2.1.1) we will start with the installation of Kasten K10, as the documentation indicates, we must perform two commands:
helm repo add kasten https://charts.kasten.io/
kubectl create namespace kasten-io
We already have everything pre-configured, we only need the installation, as indicated in the documentation of Kasten, we will perform the following command
helm install k10 kasten/k10 --namespace=kasten-io \
        --set scc.create=true
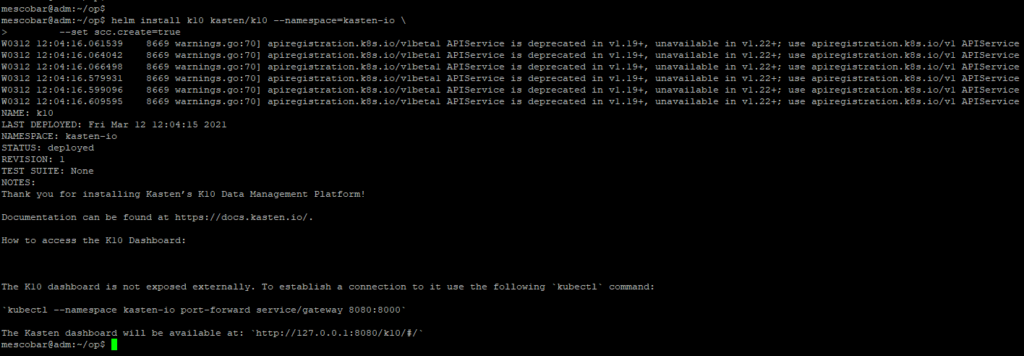
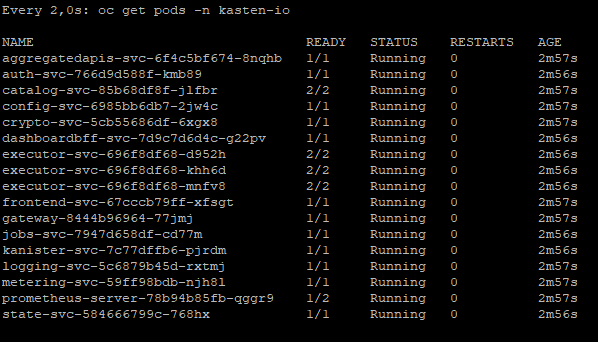
As seen in the previous image, we already have our Kasten K10 about OpenShift, now we will check the status of the pods with the command:
watch oc get pods -n kasten-io
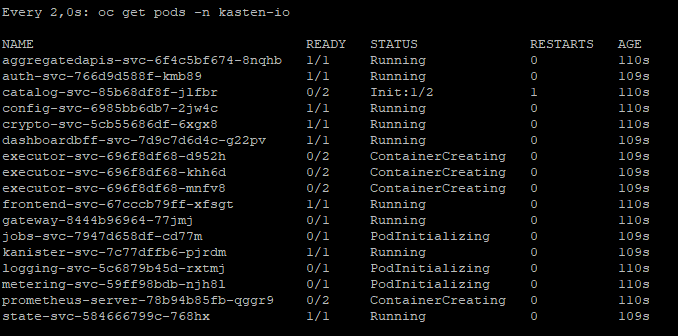
We should expect that all pods of Kasten are in “running” state
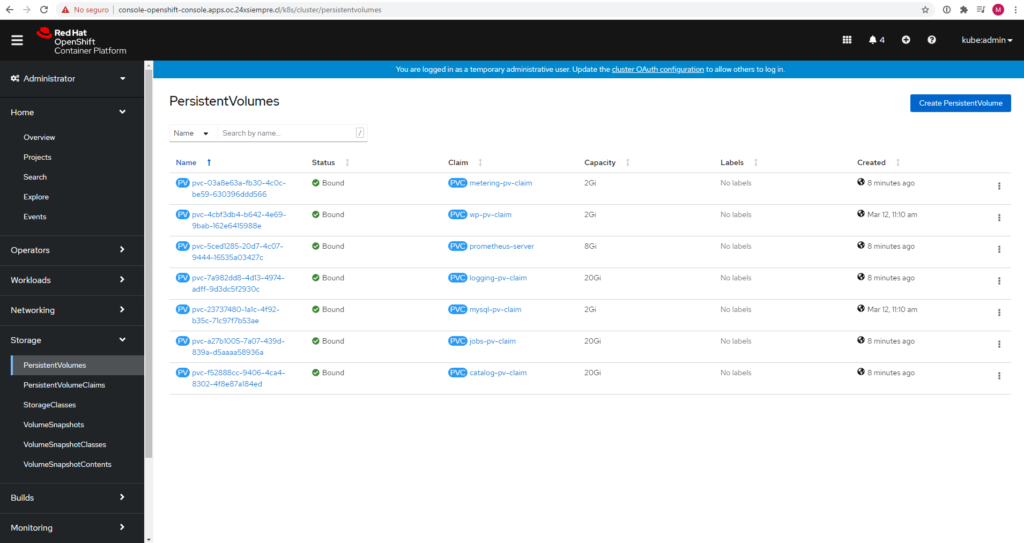
And if we check the persistent volumes you use Kasten from the command line:
oc get pv,pvc

We observe that it is using the Storage Class, vsphere-csi, and associated with the volumes that we can also observe in the datastore that we use in vCenter:

As well as in the Red Hat console OpenShift
Log in K10 Dashboard via Route In OpenShift
To access the management console Kasten K10, we only have to make a route in OpenShift for exponer our service, in this case we will do it through the Red Hat Web console OpenShift, we go Networking -> Routes and in the upper left corner we select the project “kasten-io”
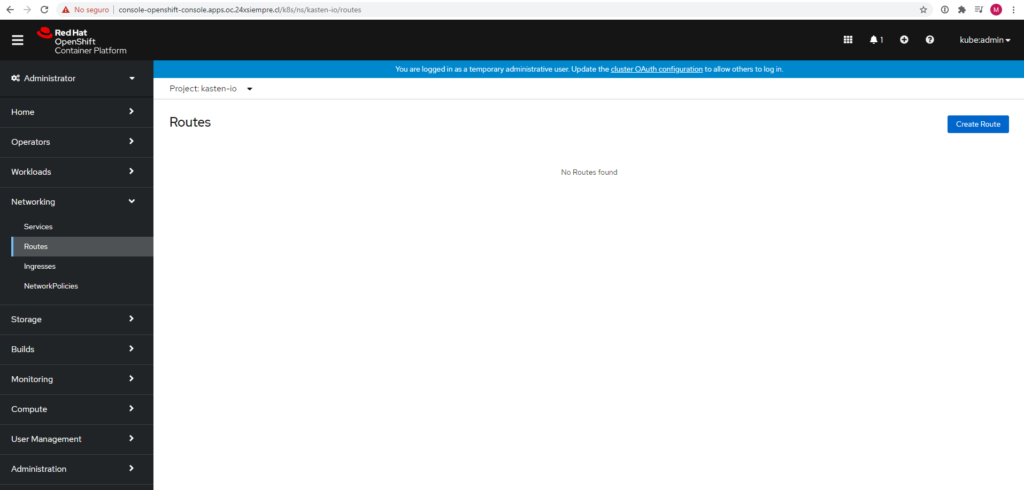
Here we will create the Route by clicking on “Create Route” and enter the following information:
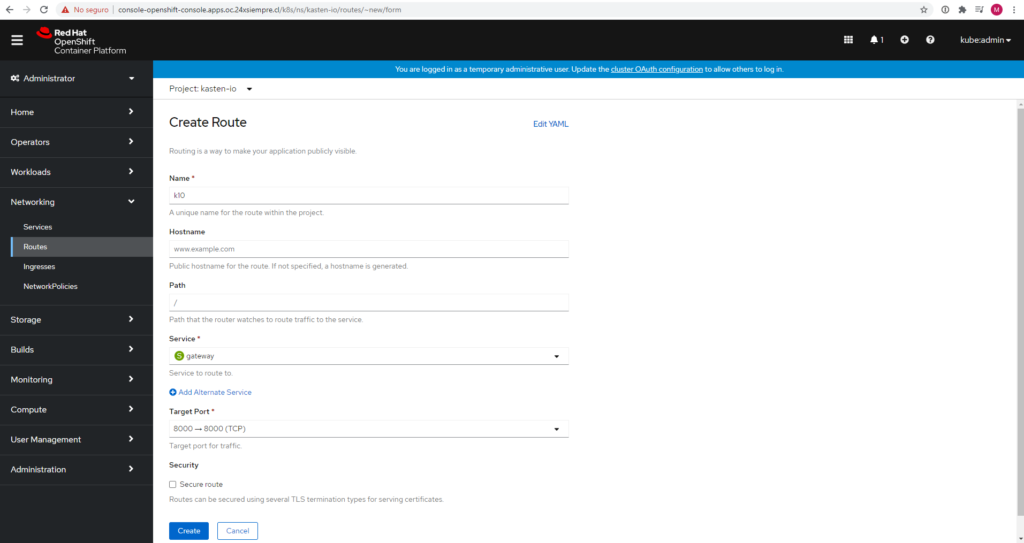
- Name: The name you want in this case “k10"
- Hostname: we leave it blank to assign us a hostname or enter one you want
- path: default
- Service: Select the “gateway” service
- Target Port: Select the only one that displays, if not, only 8000 -> 8000 TCP
And then when clicking on “Create” it will show us the details and the access link that is seen in “Lease"
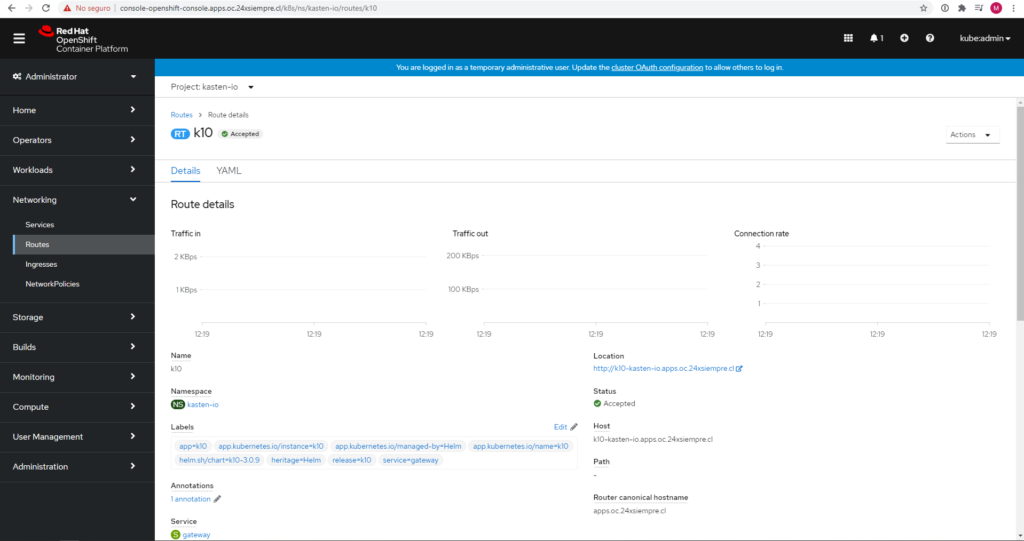
Then they click or copy the URL address found in “Lease” and add “/k10/#/” to access the administration console, the url in my case would be:
http://k10-kasten-io.apps.oc.24xsiempre.cl/k10/#/
And when accessing the URL we will see the console and welcome message of Kasten:
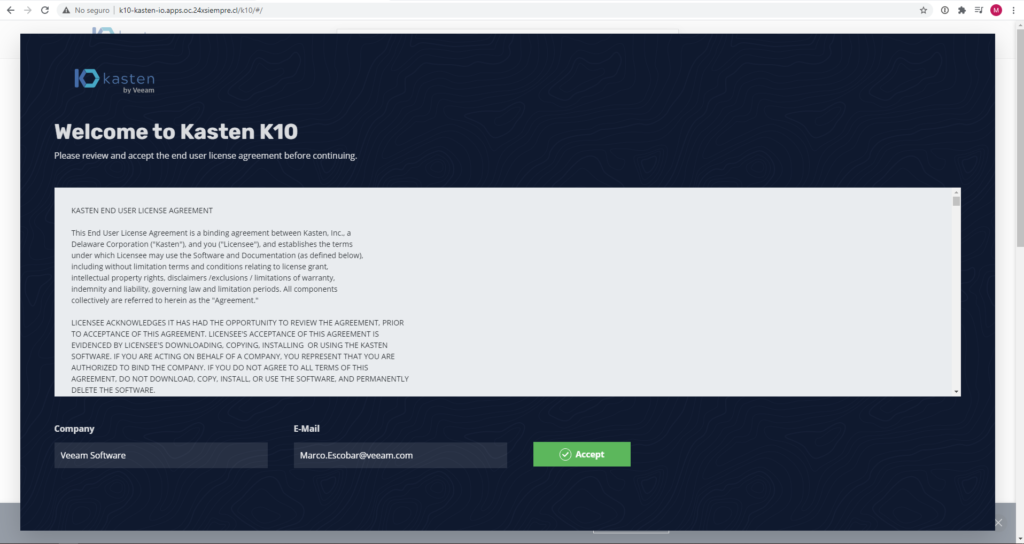
We enter our data and proceed to configure our solution Kasten K10 Platform.
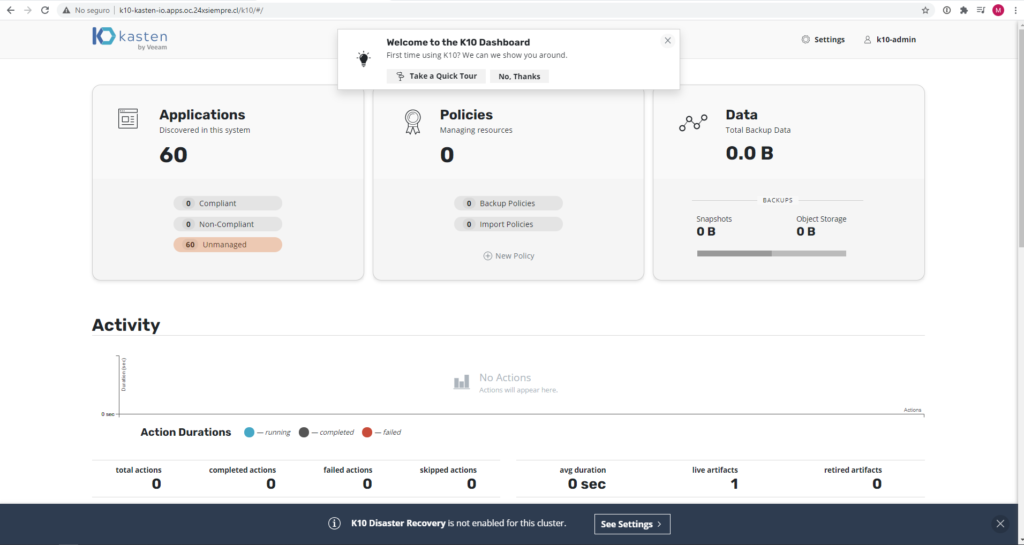
Configuration Kasten K10 with Mini S3
First we will install Minio on Ubuntu, where you can follow one of the many very simple guides to configure, for example:
After having operating Minio S3, we will make the configuration of Kasten k10 entering “Settings” to add a new “Profile”
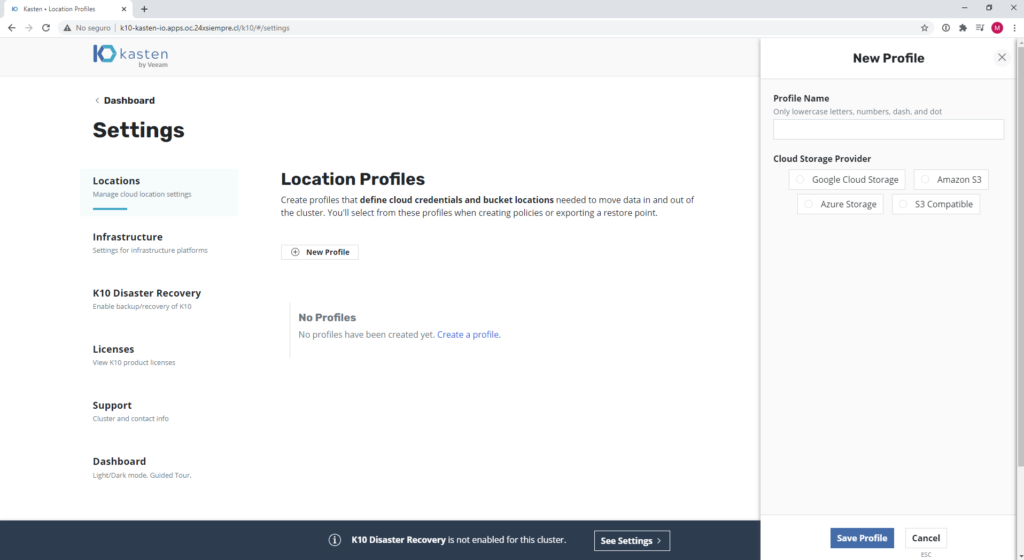
Where we will enter the name of the profile and select "S3 Compatible" to use with Minio
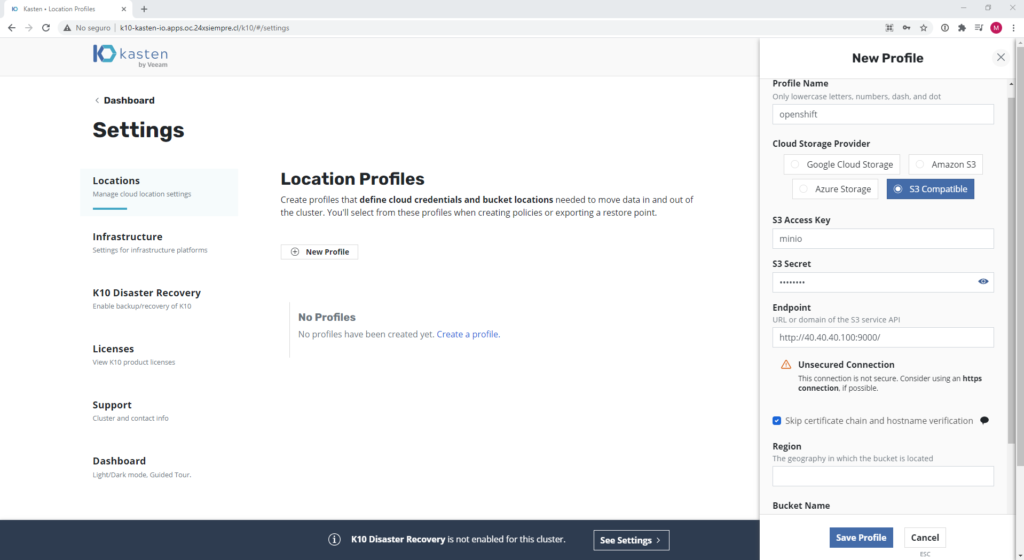
- Profile Name: openshift, or it can be whatever name you want
- Cloud Storage Provider: S3 Compatible, to use with Minio it must be this option, otherwise you can use the one you need
- S3 Access Key: Access key, from Minio or your object storage provider
- S3 Secret: Secret or Password, from Minio or your object storage provider
- Endpoint: http://40.40.40.100:9000/ , or the address of your mini server
- Skip Certificate chain and hostname verification: Enabled, since we are not using SSL in this case.
- Region: Leave Blank
- Bucket Name: openshift, name of the bucket to use
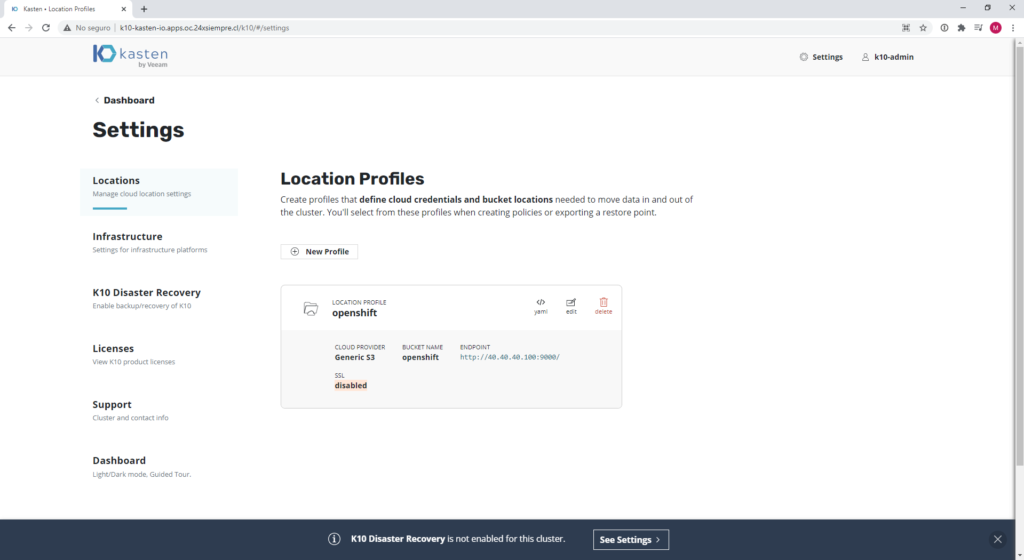
And the configuration will be displayed like this:
Configuration Kasten K10 with vSphere vCenter
Going into “Settings” and selecting “Infrastructure” we will generate a new “Profile”
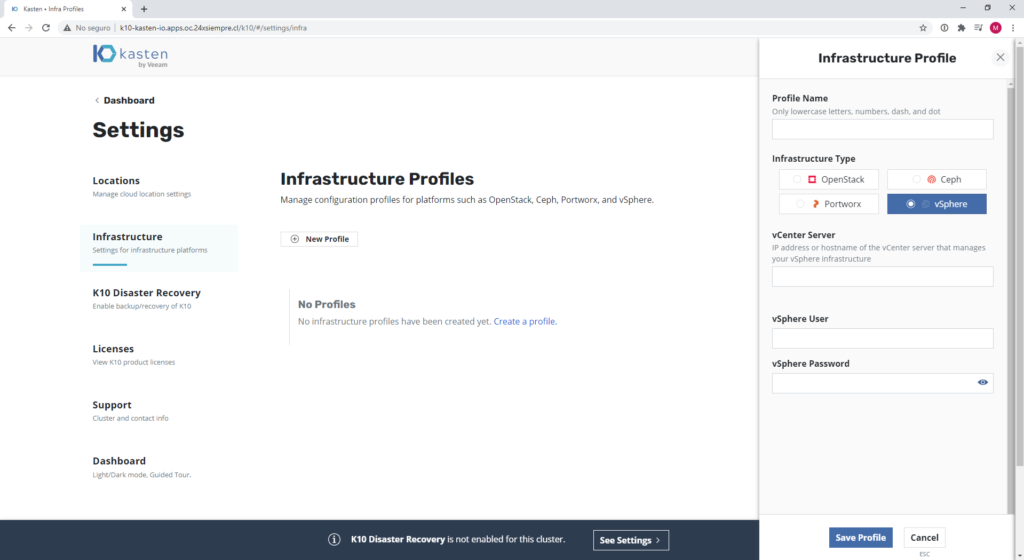
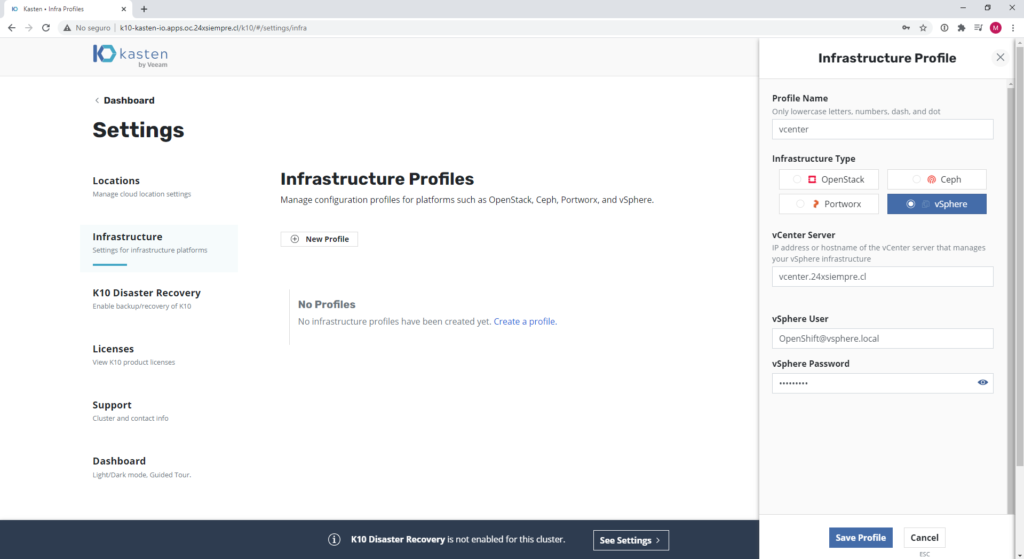
Where
- Profile Name: vcenter, or whatever name you want
- Infrastructure Type: vSphere
- vCenter Server: vcenter ip or dns address, preferably fqdn
- vSphere User - privileged vcenter user
- vSphere Password: password
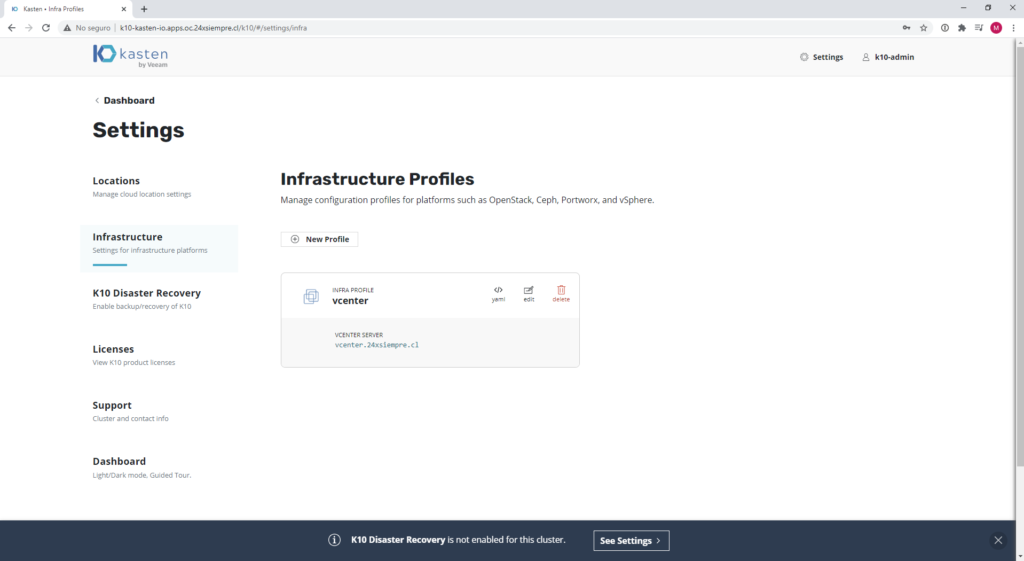
And once you have all this configured, you will be able to make backups using the CSI interface for vSphere, creating snapshots of the persistent volumes that exist in the configured datastores.

And of course the generation of backup policies with Kasten k10 you can check it in https://24xsiempre.com/veeam-kasten/
Excellent, Marco! Parabens.