
In this post, we will review installing an Immutable repository from Veeam With Red Hat Enterprise Linux, we previously reviewed an application for Ubuntu called VeeamHubRepo, which allows us to easily set up an immutable repository on Ubuntu Linux. Now we will review how to do the configuration in Red Hat Enterprise Linux, with a small script for the configuration of the repository automatically and in an easy to use way.
Introduction
As we saw earlier in another post, we have the step-by-step guide to configuring the immutable repository of Veeam for Ubuntu with a utility, you can check it at:
https://24xsiempre.com/veeam-hardened-immutable-repository/
Now if you are looking for an easy way to configure but in Red Hat Enterprise Linux To provide backup immutability in your local environment, this post is for you.
Good practices Veeam Immutable Repository
Below we will review some good practices for this type of repository that allows us to store our backups immutably on Linux:
- Do not add more roles Veeam or other services, i.e. this repository should be for immutable backups only
- Preferably it is a Physical server with local drivess (JBOD)
- Block or disable any remote administration applications or services, i.e. SSH (after setting up the repository), ILO, IDRAC, etc.
Why is it not recommended to add more roles veeam or other Linux services?, such as nginx, the answer is simple, the idea is to keep it as isolated as possible, trying to reduce the risk in case of any vulnerability or unauthorized access to the server. Since as we know, lately, we have multiple 0day vulnerabilities that affect Linux operating systems and services.
Why do you prefer a Physical Server with local drives? If it is a virtual machine and in the event of an attack, unfortunately, the security of the virtual environment was compromised, of course the attacker or attackers will even have the possibility of eliminating the virtual machine with all its content or encrypting the entire virtual environment. Regarding the recommendation of local disks, it is exclusively aimed at avoiding that in the event that the security of the storage or Storage has been compromised, it is not possible to delete the data that is stored in the repository.
And finally, block or disable any type of remote administration access, so that in the event of the compromise of centralized administration credentials or vulnerabilities in remote administration systems, it is not possible to coneconnect to the operating system.
The only thing you should have conexion is Veeam Backup & Replication to send Immutable Backups to the server.
Configure Red Hat Enterprise Linux as Veeam Immutable Repository
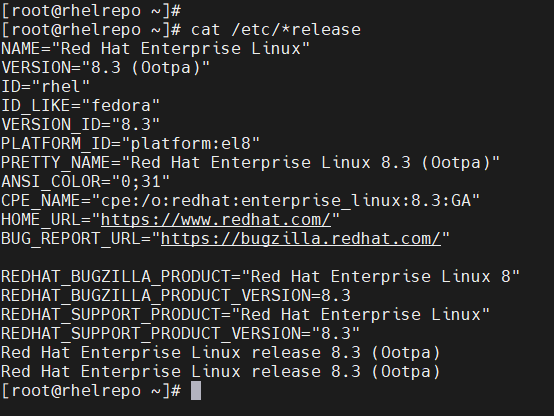
In this case, perform the installation of RHEL 8.3 as a server with the minimum option or by default without a graphical interface. and we coneWe connect via SSH with root:
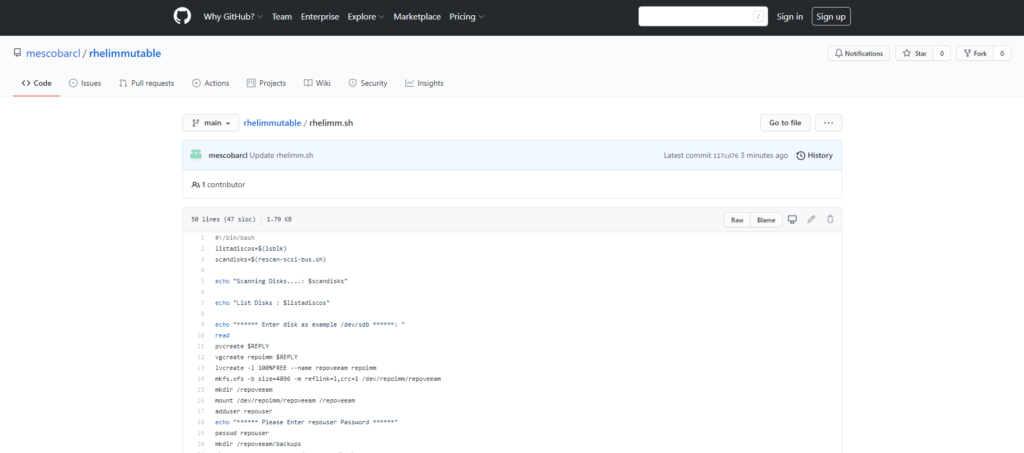
If it is a physical server that already has the disks installed, we will proceed to execute a script that you can download from:
https://github.com/mescobarcl/rhelimmutable
We select the file "rhelimm.sh" to see the content and copy it:
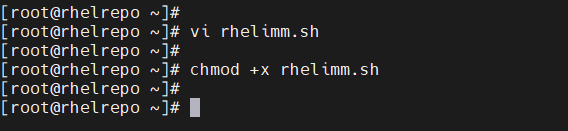
After copying the content of the file, we will return to the SSH session that we have open. We will create a new file with the "vi" editor, therefore in the ssh session we will execute:
vi rhelimm.sh

We press “i” to allow entering text or pasting text in the file:
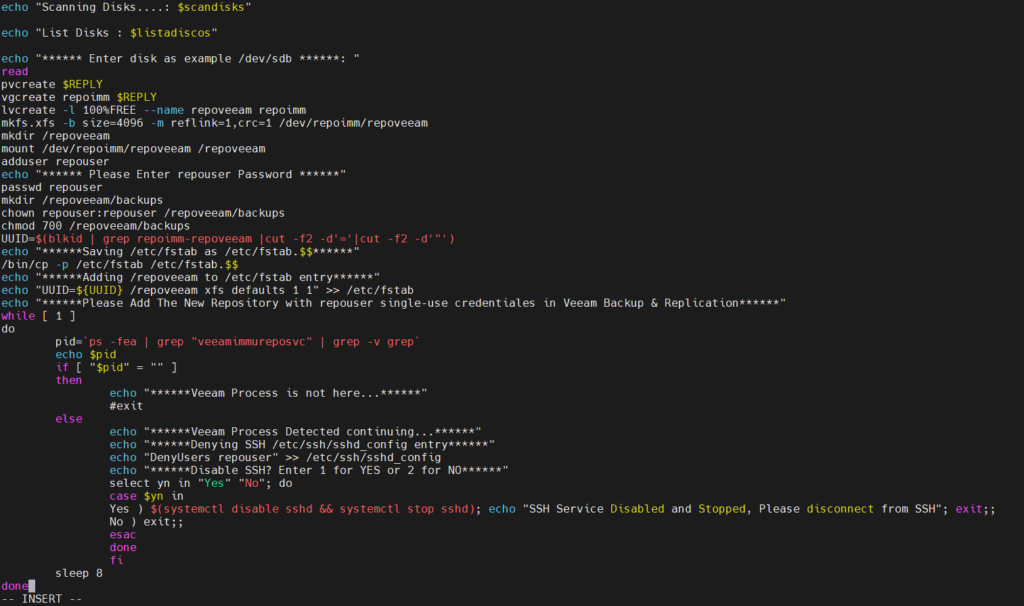
And we exit the file by pressing “ESC :” we enter “wq!” press enter and return to the command line
Now we will assign execute permissions to the file with the following command:
chmod +x rhelimm.sh
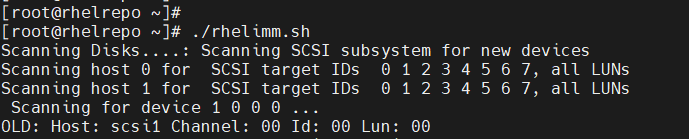
And now we will execute the script with the command:
./rhelimm.sh
And we press “Enter” to execute the script that will request information.
Script Execution
Now we have already executed the script with the previous step, the first thing it does is a scan of existing new disks on the server. Then it lists the disks it found for us to ask if we want to use only one disk or several that exist on the server.
In this case for the demonstration add 4 disks of 50 TB, it should be noted, that it is possible to use multiple disks or just one, depending on your hardware configuration. therefore the script will ask us to enter the disks in “/dev/sdb” format and if you use multiple disks just add a space after each disk when entering it:
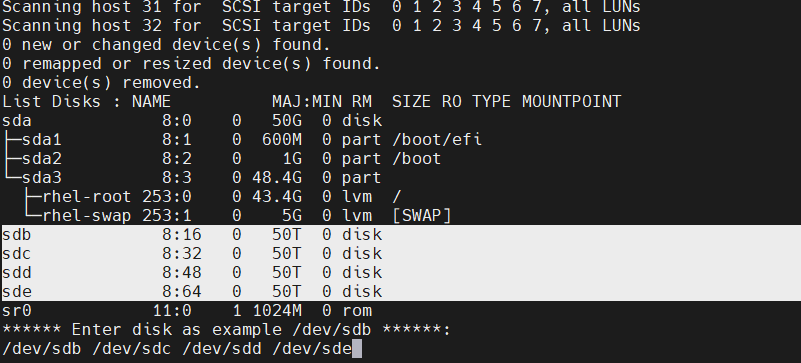
As shown in the previous image, the discs appear “/ Dev / sdb /dev/sdc /dev/sdd /dev/sde“. I enter them in the desired format and press “Enter” for execution:
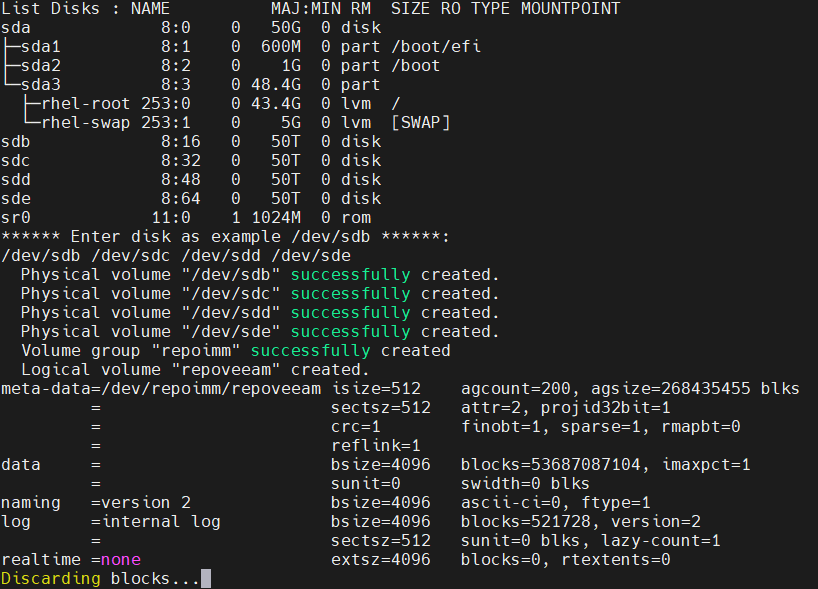
When entering the disks, are created the physical volumes, the volume Group and the logical group to manage via LVM finally the logical volume "repoveeam" is formatted with XFS, in the formatting is included "Reflink" for the support of “Fast Clone” in this type of repository.
After formatting the script asks us for the password or password for the c useronexion, the script creates a user named “repouser“, we enter the password:

Immutable Repository Configuration Veeam Backup & Replication
And now the script tells us that we must add the new repository in Veeam Backup & Replication with the credentials ofrepouser” c usoneWe connect to VBR and add the RHEL server within “Managed Servers”, we will select “Linux Server” to enter the IP address or dns of the server:

After clicking on “Next” it will ask us how the Authentikation with the new RHEL server will be:
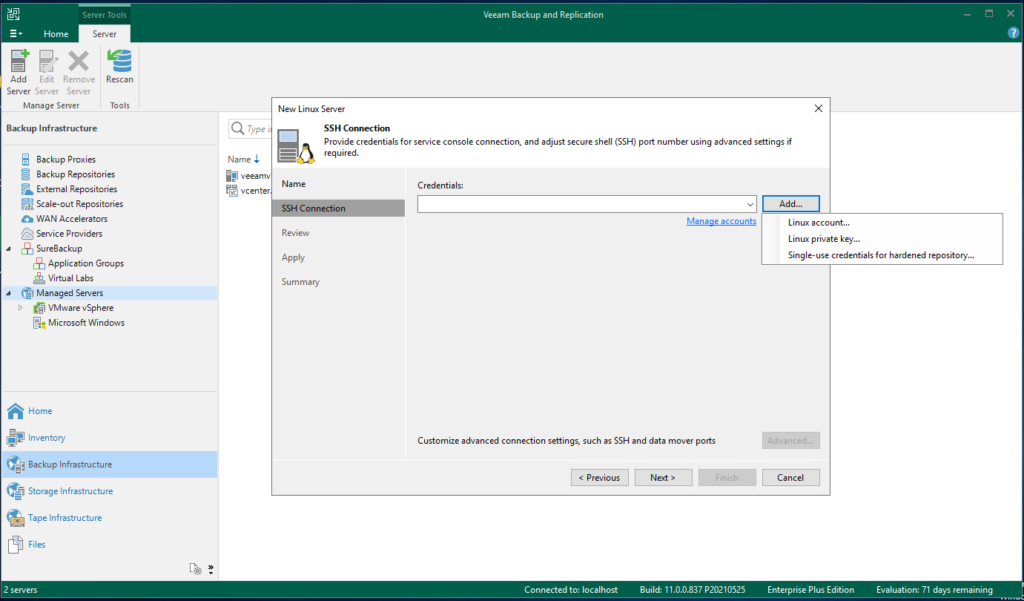
And we will select “Single-use credentials for hardened repository….” to enter the credentials, we will use the user created by the script “repouser” with your respective password that was entered in the script steps and also very important, we will select “Elevate account privileges automatically"And"Use your if sudo fails” and enter the “root” password, press “OK” and then “Next”:
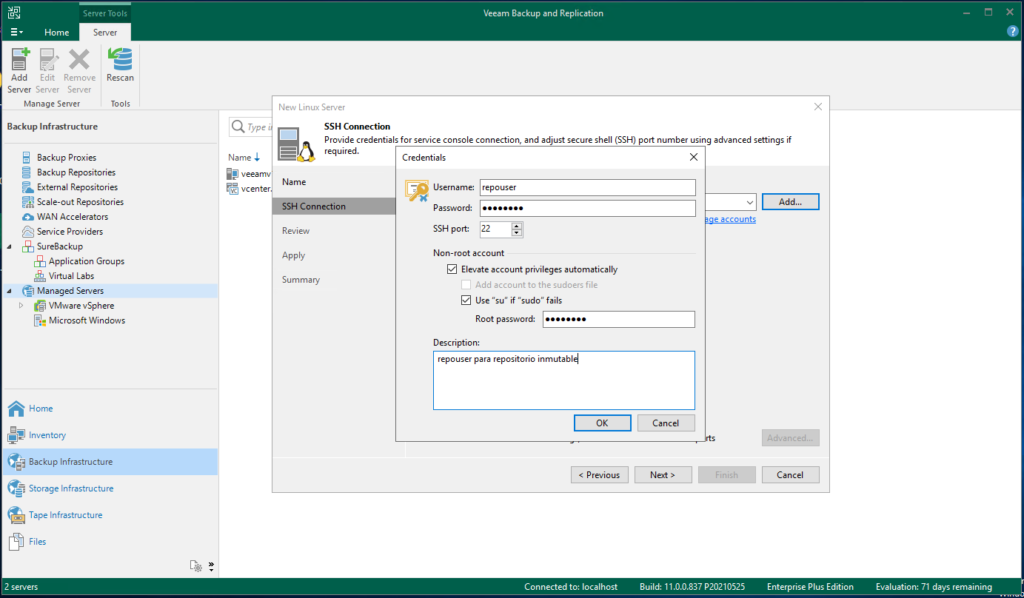
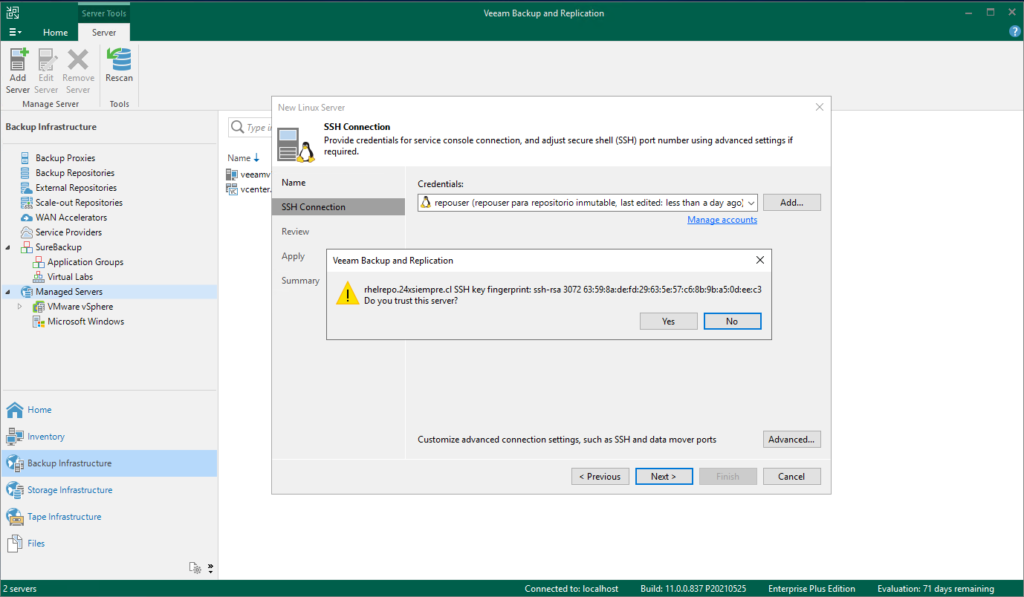
The usernames and passwords that we are entering will only be used in this coneconnection, then the credentials are not stored in the database of Veeam Backup & Replication. Now we select “YES”
And we can see the installation of the componenot necessary for Veeam Backup & Replication:
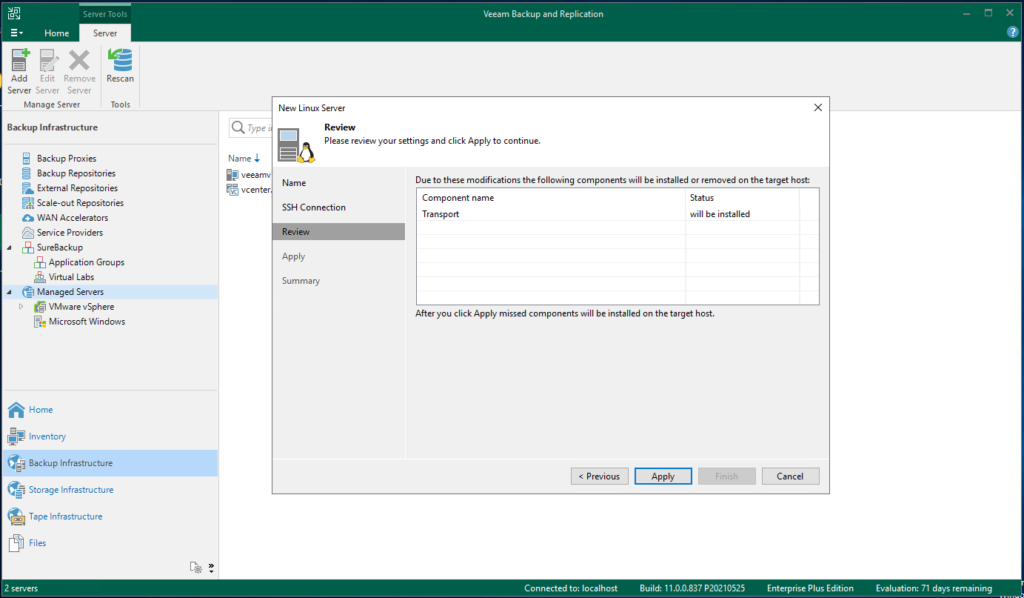
We select “Apply” and we will see the finished installation:
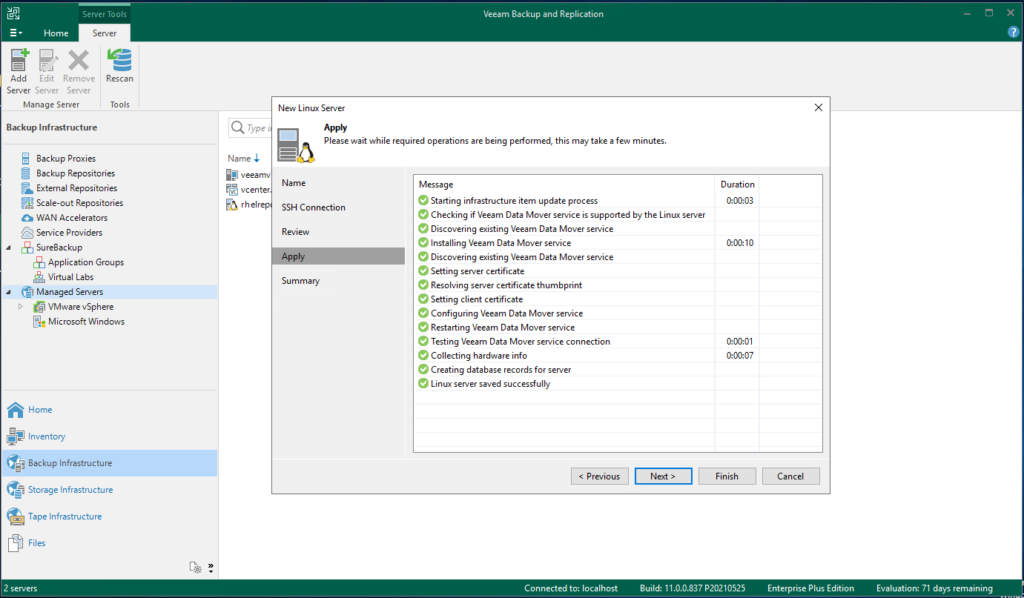
Click on “Finish” and we will return to the SSH session. The script was waiting for the comp installationonent of Veeam necessary checking if the process appears and then asking us if we want to disable SSH completely:
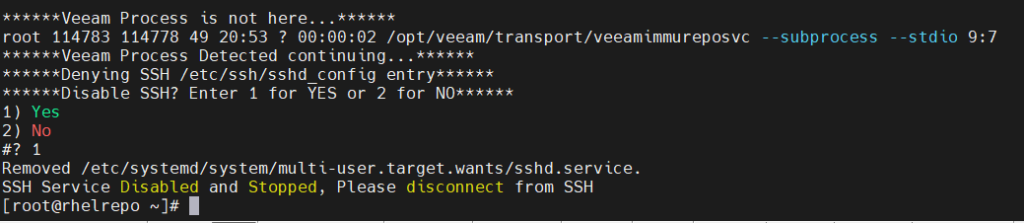
We enter 1 to disable and stop the SSH service and then we unconeWe connect with the “exit” command. Then we can verify that it will not be possible conect us again via SSH even after a reboot. It should be noted that the script add the volume in "/ etc / fstab” so that in case of restart the disks are automatically mounted.
Now we go back to Veeam Backup & Replication to finish the configuration of the Immutable Repository.
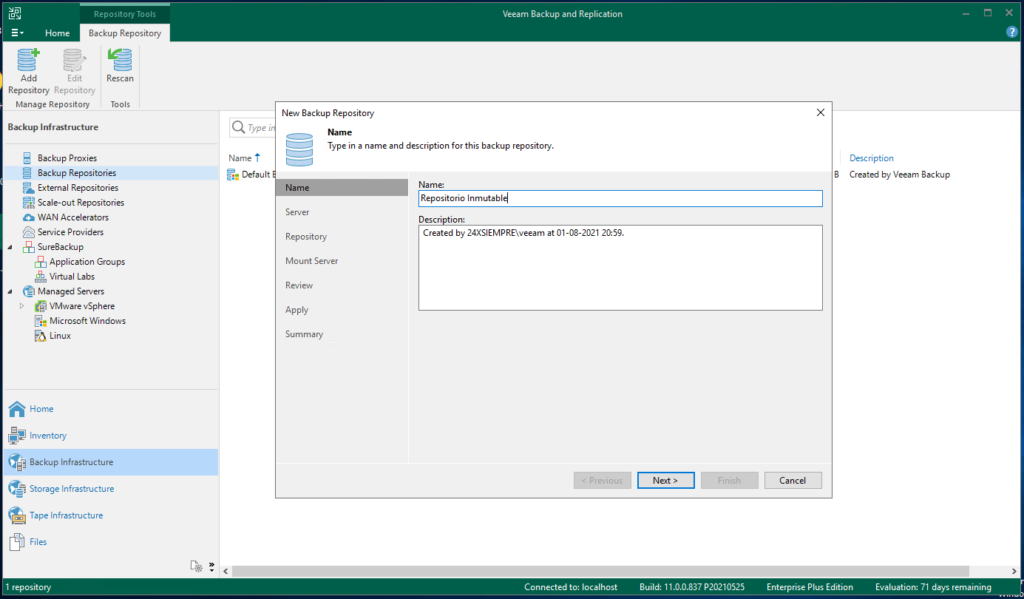
The Creation Veeam Immutable Repository
In the VBR console, we will enter “Backup Repositories”, then right click and select “Add Backup Repository”, then “Direct Attached Storage”, then “Linux” to enter the data requested Veeam:
Click on “Next” and we will select our new Linux RHEL server. where we will also click on “Populate” to see the disk or mount point to store the backups:
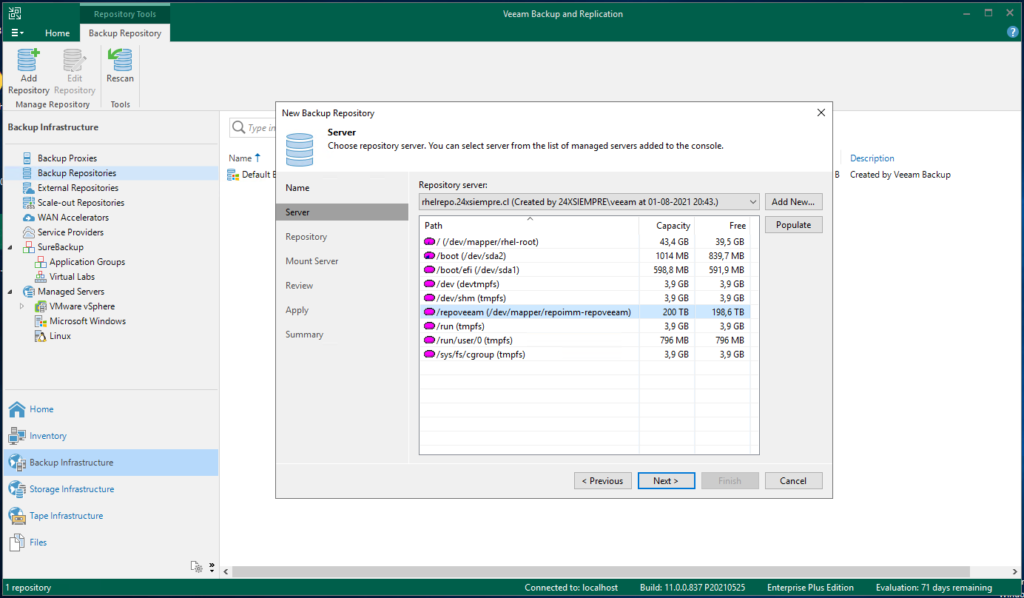
We select “/repoveeam” and click on “Next”
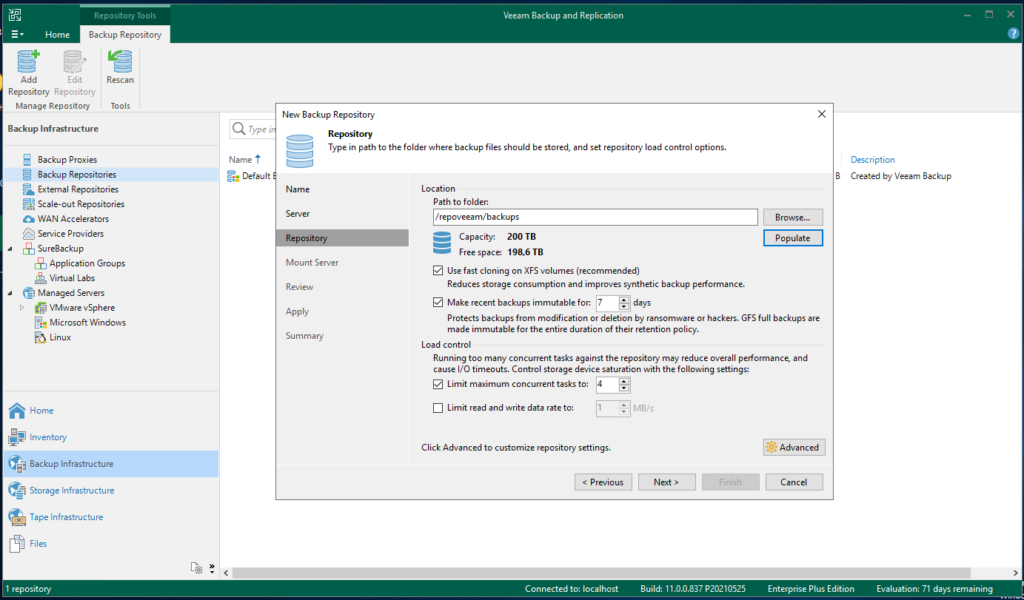
Where we will enable “Use fast cloning on XFS volumes…” and “Make recent backup immutable for”, here you can leave the immutability of backups by default for 7 days or enter the necessary configuration in days. Then “Next”
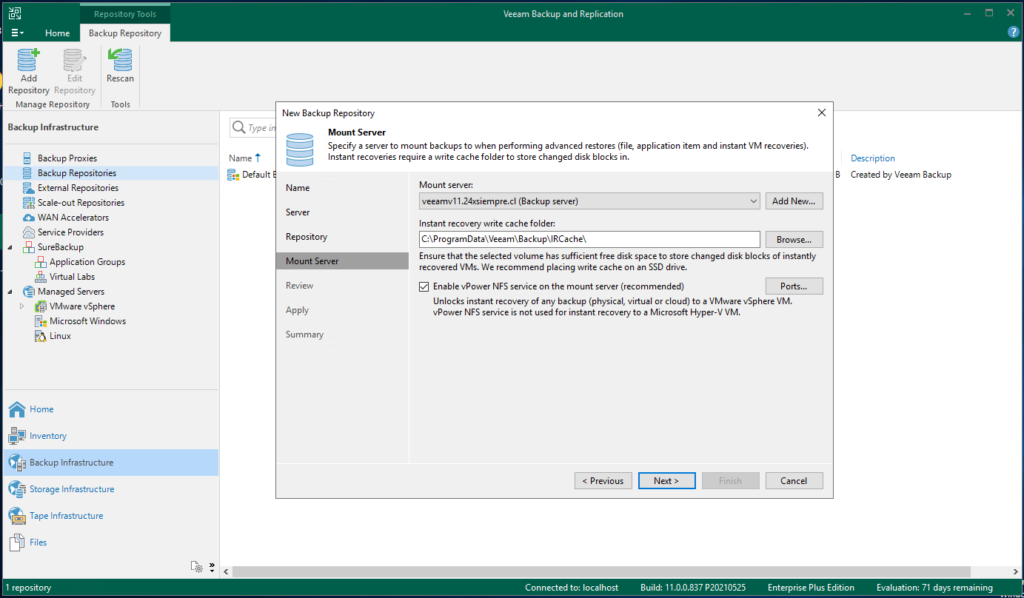
We will select the “Mount Server” then “Next”, then “Apply” to see the configuration status:
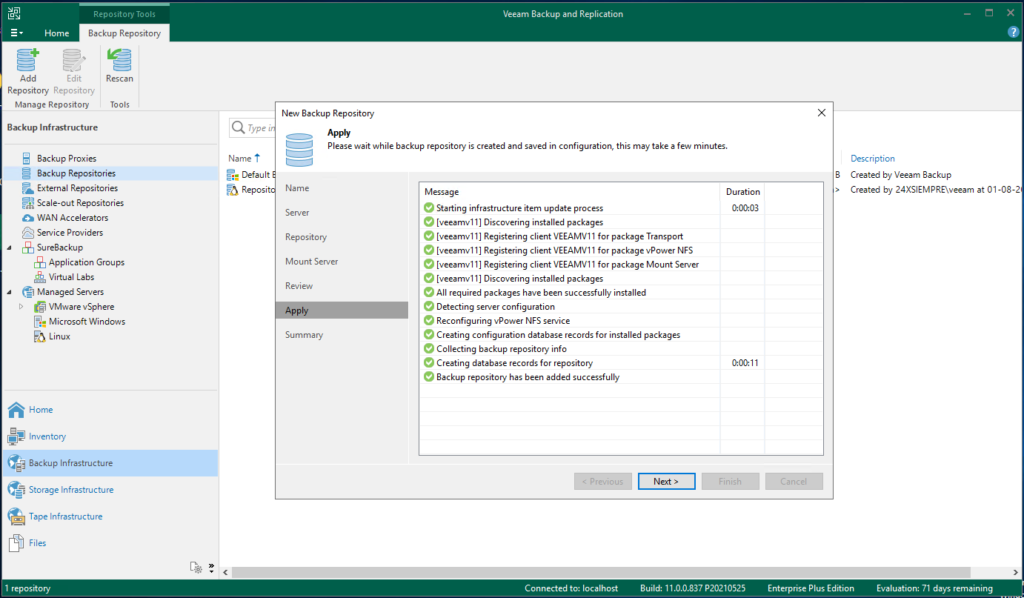
Then it will ask us if we want to change the backup location of the configuration and we select “No”.
Configuration Validation
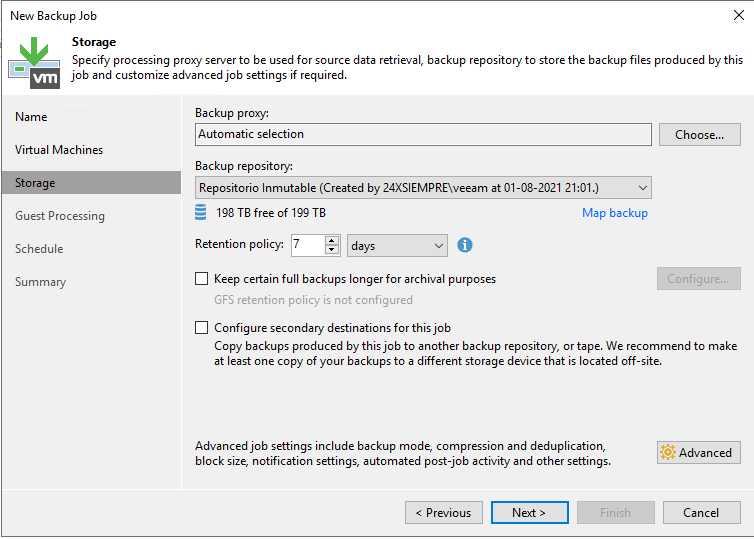
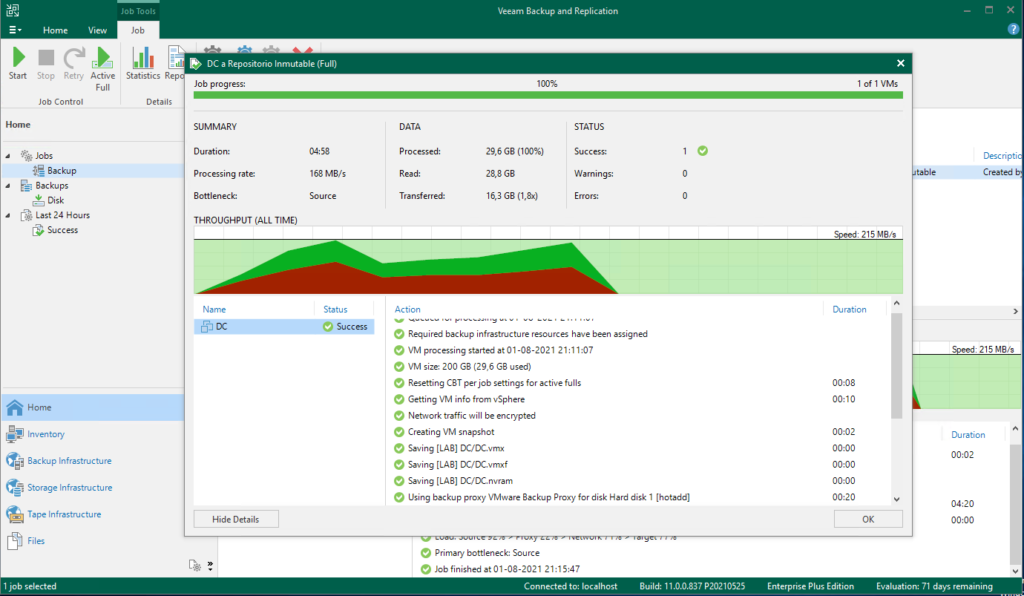
Now we will create a backup Job of some virtual machine and select our new immutable repository:
And we execute it, we wait for the completion:
And finally we will try to delete the backup from the console Veeam Backup & Replication, where it will tell us:
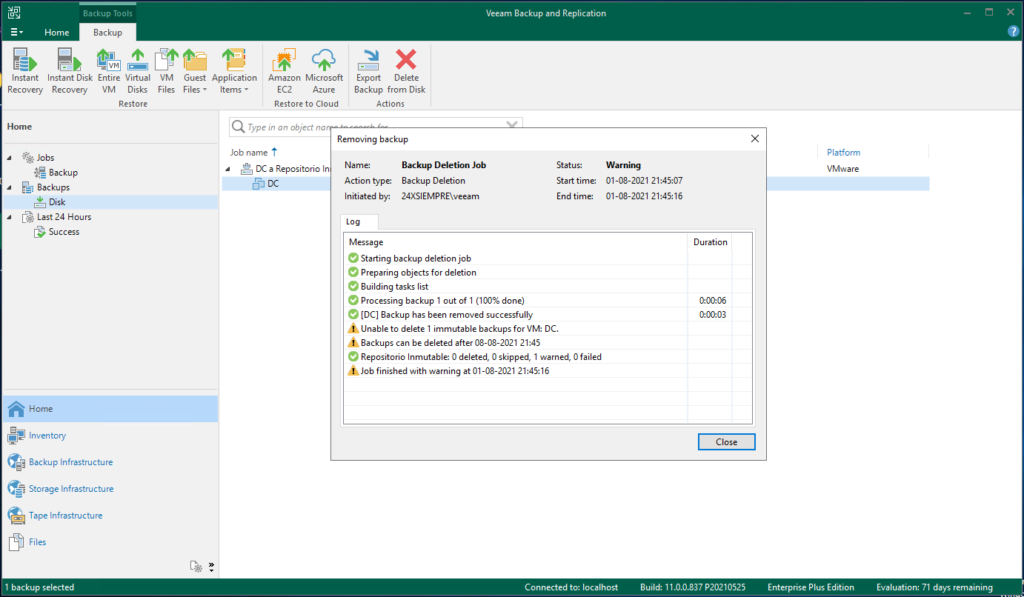
The backup cannot be deleted until 08-08-2021.